
Azure Custom Vision Models
This guide walks you through how to train a model using Azure CustomVision.ai and use it with Lumeo.
Overview
Azure Custom Vision is an easy to use, no-code tool that allows developers to train a custom vision AI model easily. This guide walks you through the process of training a custom AI model using Azure Custom Vision.
Step 1 : Create a Project
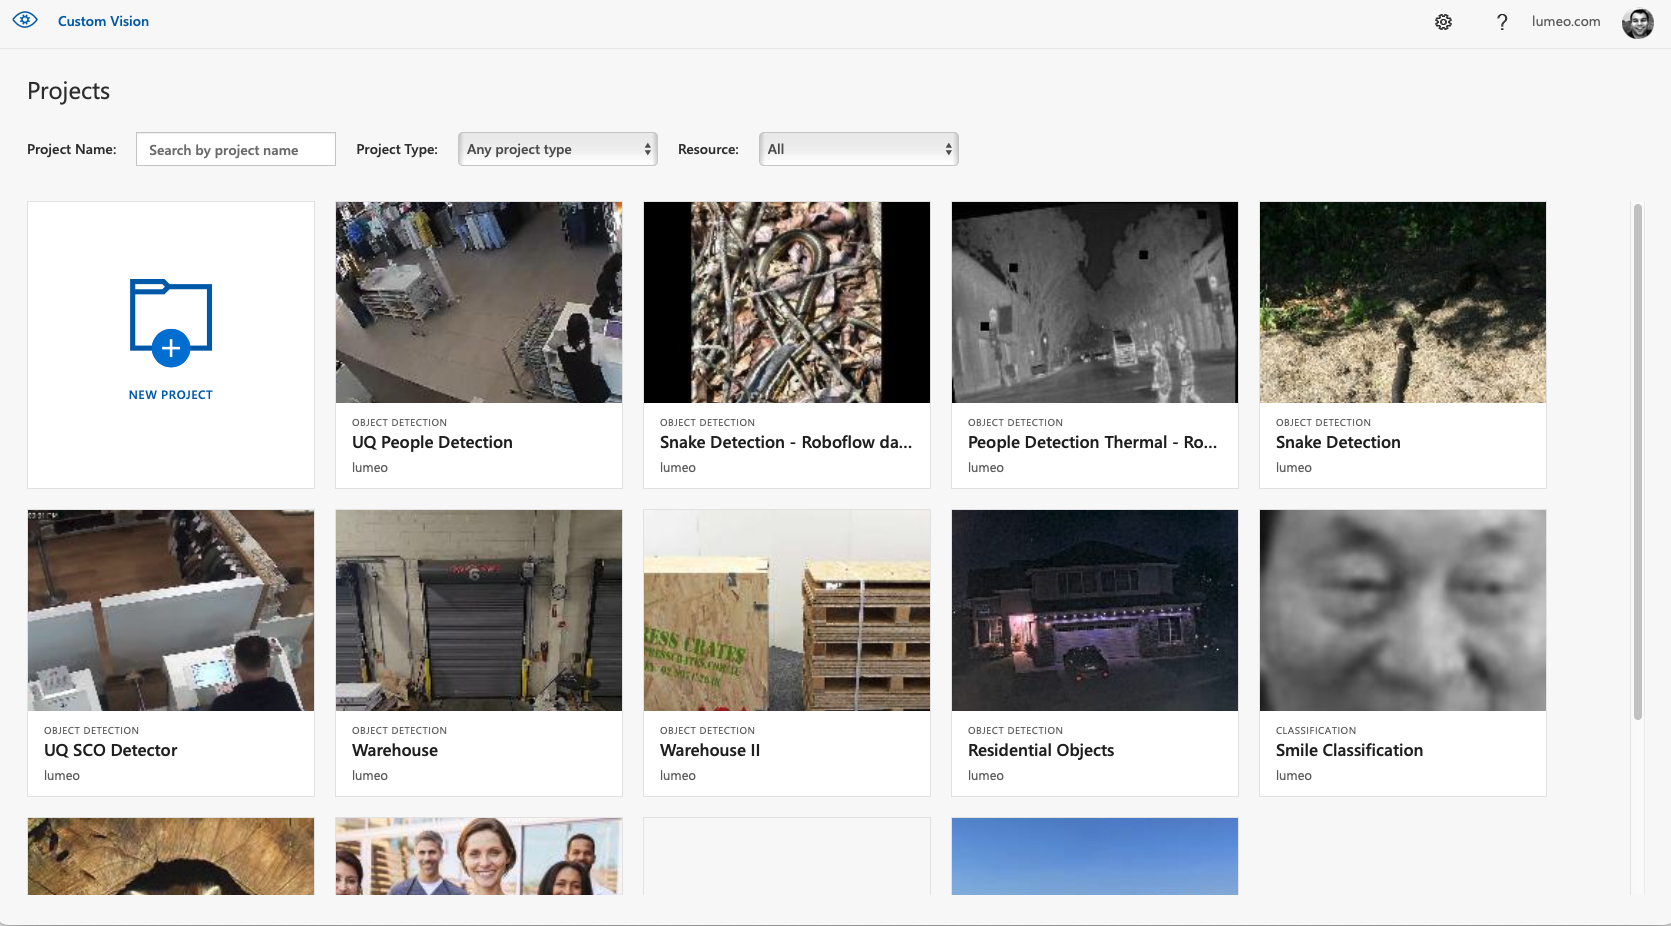
The first step is to create a project in Azure Custom Vision. You can do this by navigating to the Custom Vision portal and signing in with your Microsoft account. Once you are logged in, click on the "New Project" button and provide a name and description for your project.
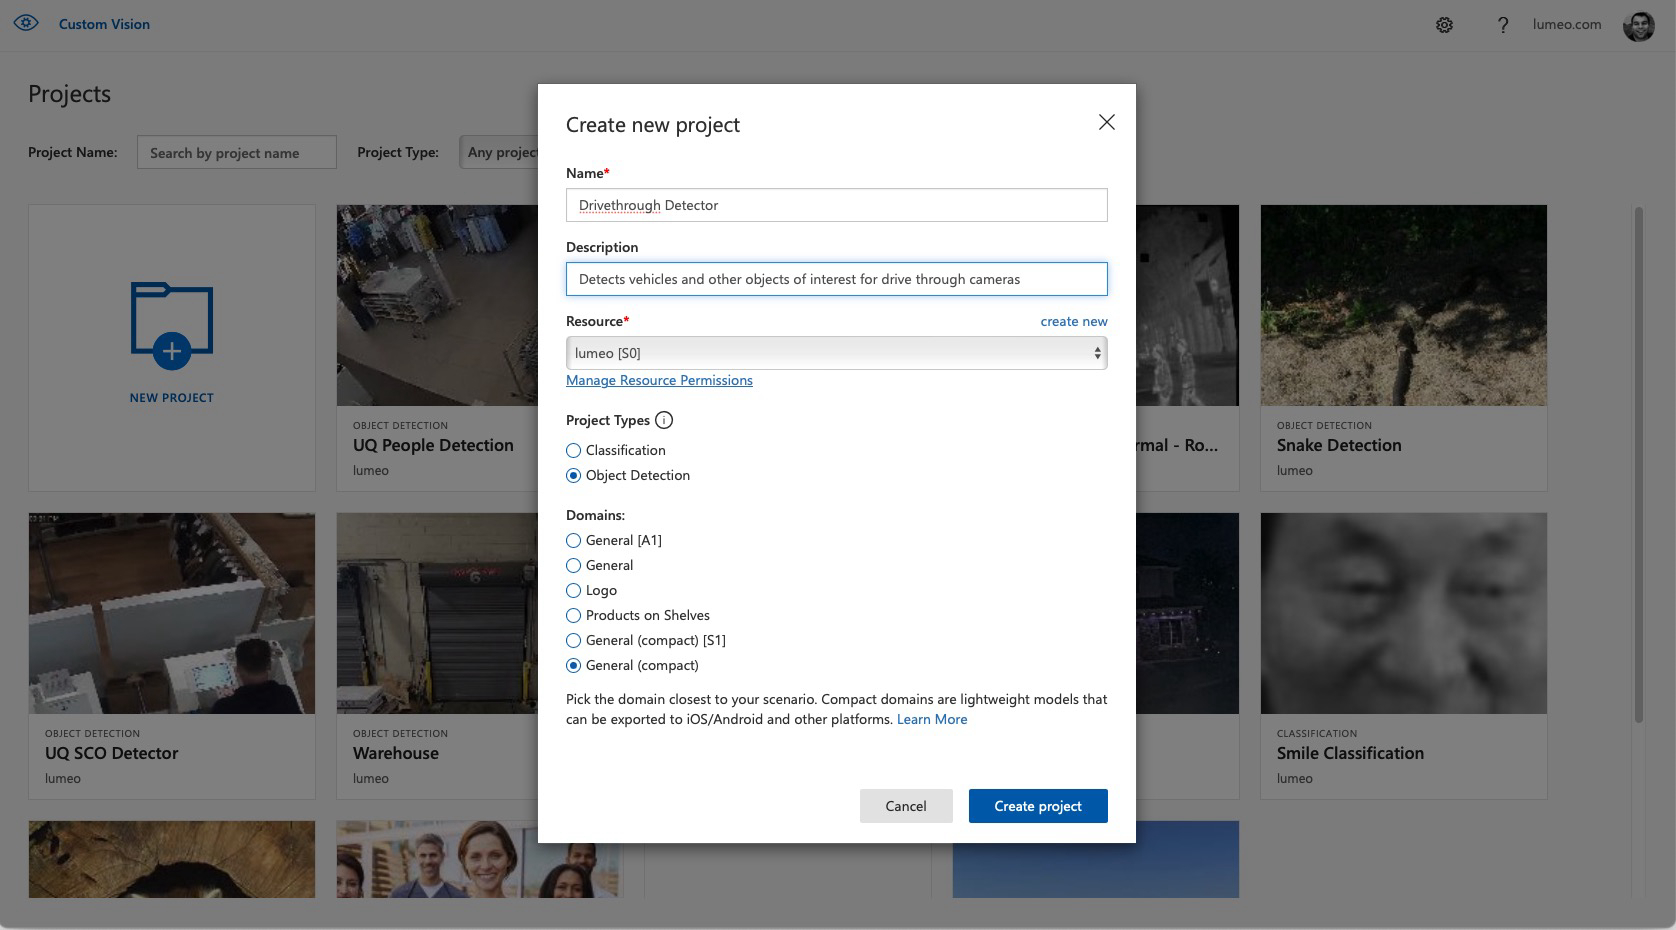
In order to create a CustomVision project that can export a model to Lumeo, use the following settings :
Project Type: Object Detection, Domains : General (compact)
or
Project Type: Classification, Domains : General (compact), Export Capabilities : Basic platforms
Step 2: Add images to your project
Next, you need to add images to your project. Azure Custom Vision uses images to train the AI model. You can upload images from your computer, import them from a URL, or ingest them from live cameras or video clips using a Lumeo pipeline, or use images from the Azure marketplace. You can add as many images as you want, but it's recommended to have at least 50 images per tag.
Capture and Push Images using a Lumeo Pipeline
Lumeo makes it easy to collect your training set of images from live cameras or video clips.
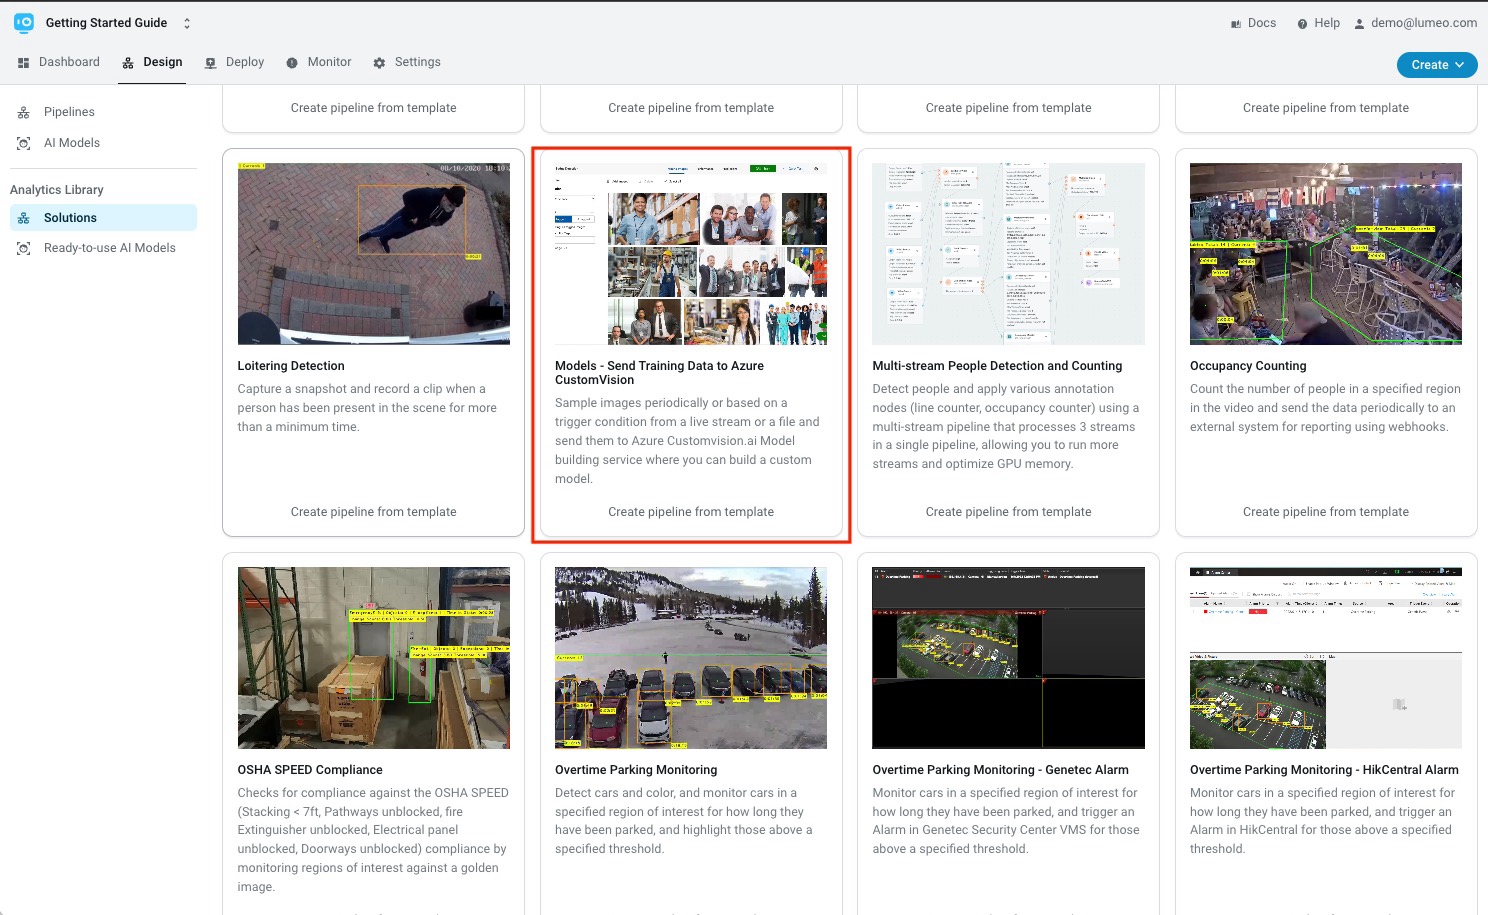
Create Pipeline
To do so, head over to Design -> Solutions, and choose the "Send Training Data to Azure CustomVision" template.
Configure Azure Custom Vision project settings in the Webhook node
The pipeline template has a Filter Stream node that samples a frame every 8 seconds, and then pushes a snapshot of that frame to Azure Custom vision via a webhook.
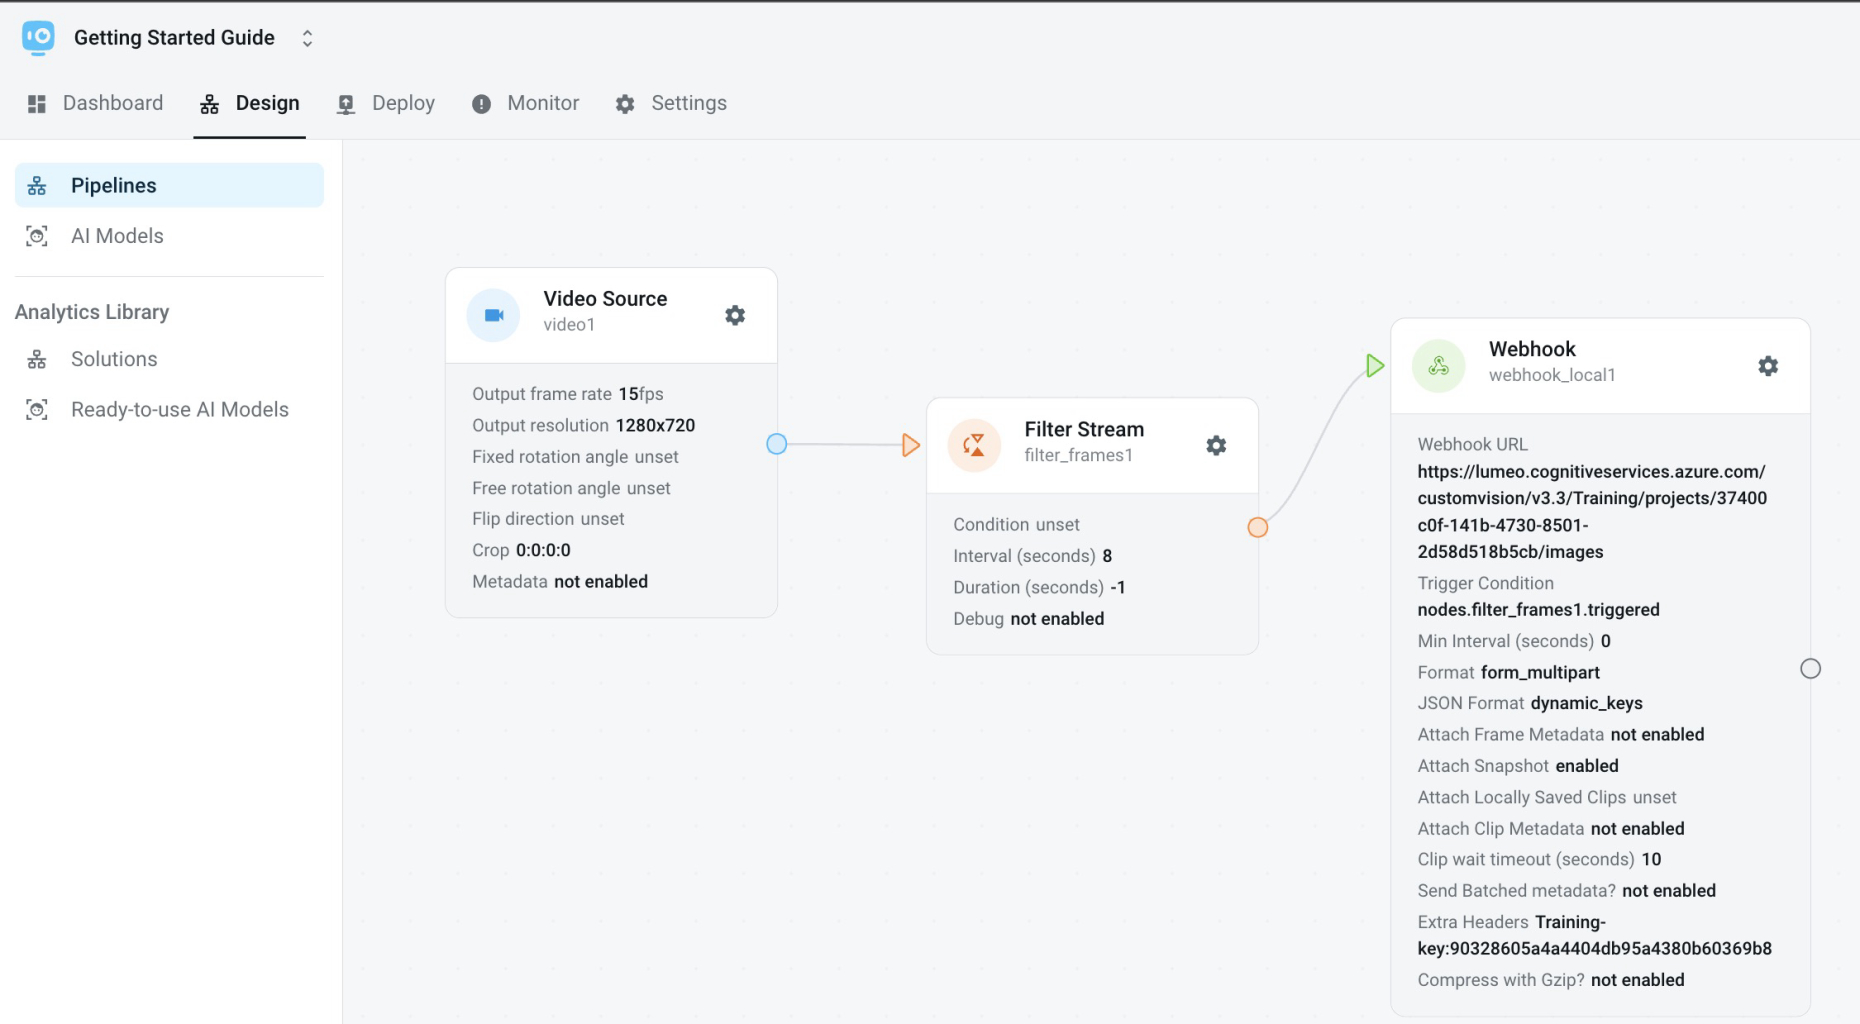
Lumeo CustomVision Training data capture pipeline
Head over to the Webhook node settings and replace the Webhook URL and Extra Headers fields with the following values:
Webhook URL : https://YOUR-CUSTOMVISION-ENDPOINT/customvision/v3.3/Training/projects/YOUR-CUSTOMVISION-PROJECT-ID/images
Extra Headers : Training-key:YOUR-CUSTOMVISION-PROJECT-KEY
The Endpoint, Project Id and Key can be found on your Custom Vision project settings tab.
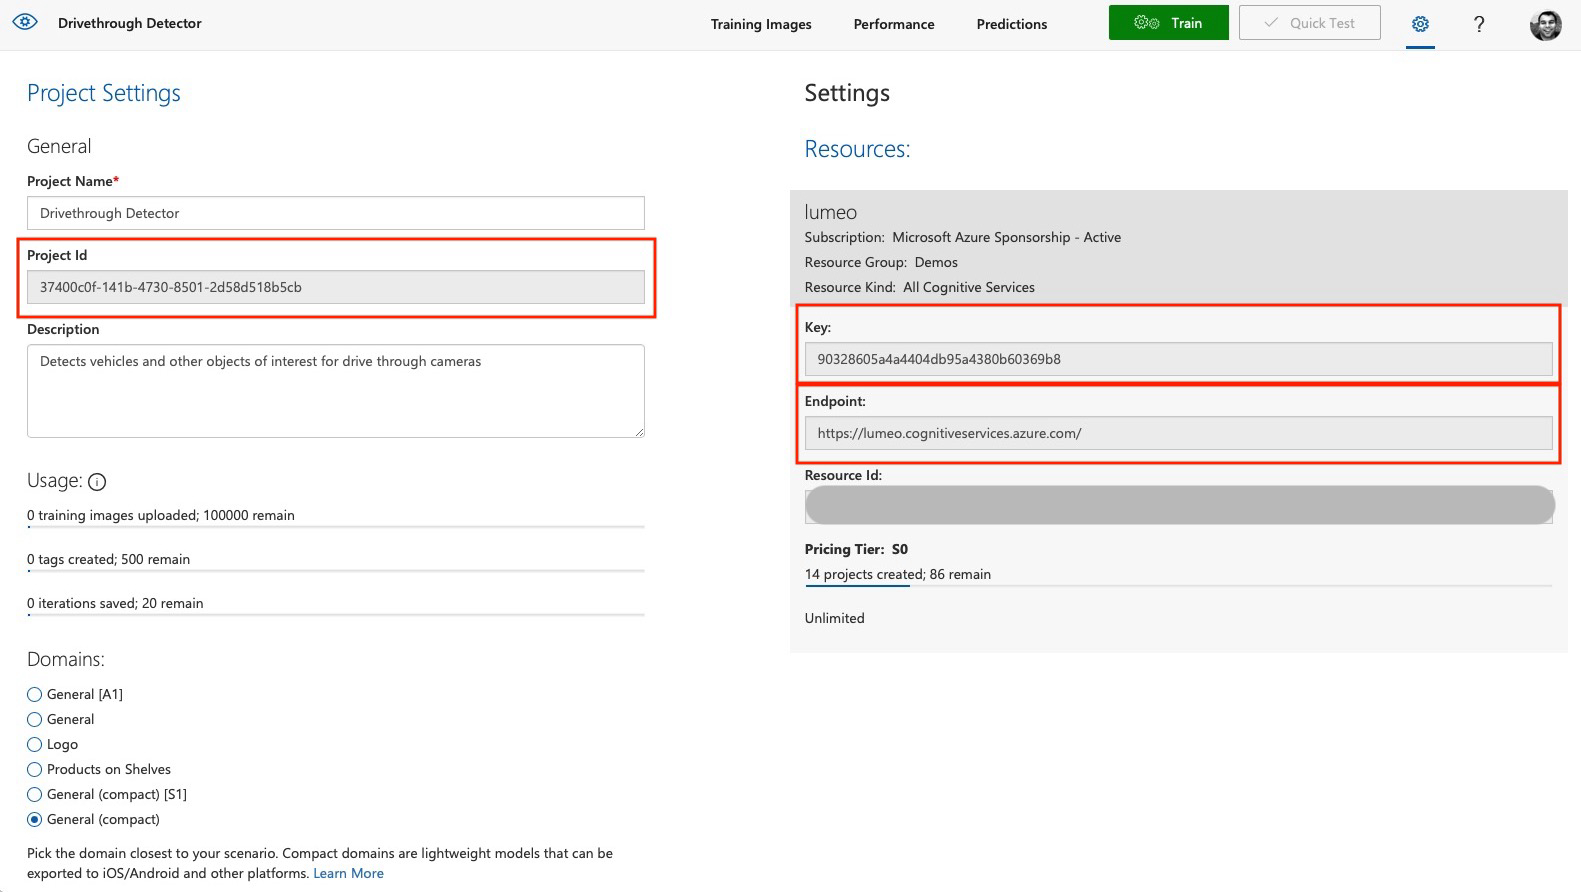
CustomVision.ai Project settings
Deploy the Training Data capture pipeline
As a last step, deploy the training data capture pipeline in Lumeo and wait a few minutes for images to appear in your CustomVision project.
If you don't see any images, check the Logs tab on the Deployment detail view to see if there were any errors publishing the images to CustomVision APIs. Most common sources of errors stem from incorrect values of Project Id, Endpoint and/or Key.
Step 3: Tag your images
After adding images, you need to tag them. Tags are labels that you assign to your images to help the AI model understand what it's looking at. For example, if you're creating an AI model to recognize cats and dogs, you would tag all the cat images with "cat" and all the dog images with "dog". You can add multiple tags to each image.

Step 4: Train your model
Once you have added and tagged your images, you can train your AI model. Click on the "Train" button, and Azure Custom Vision will start training your model. The training process can take a few minutes to a few hours, depending on the number of images you have and the complexity of your model.

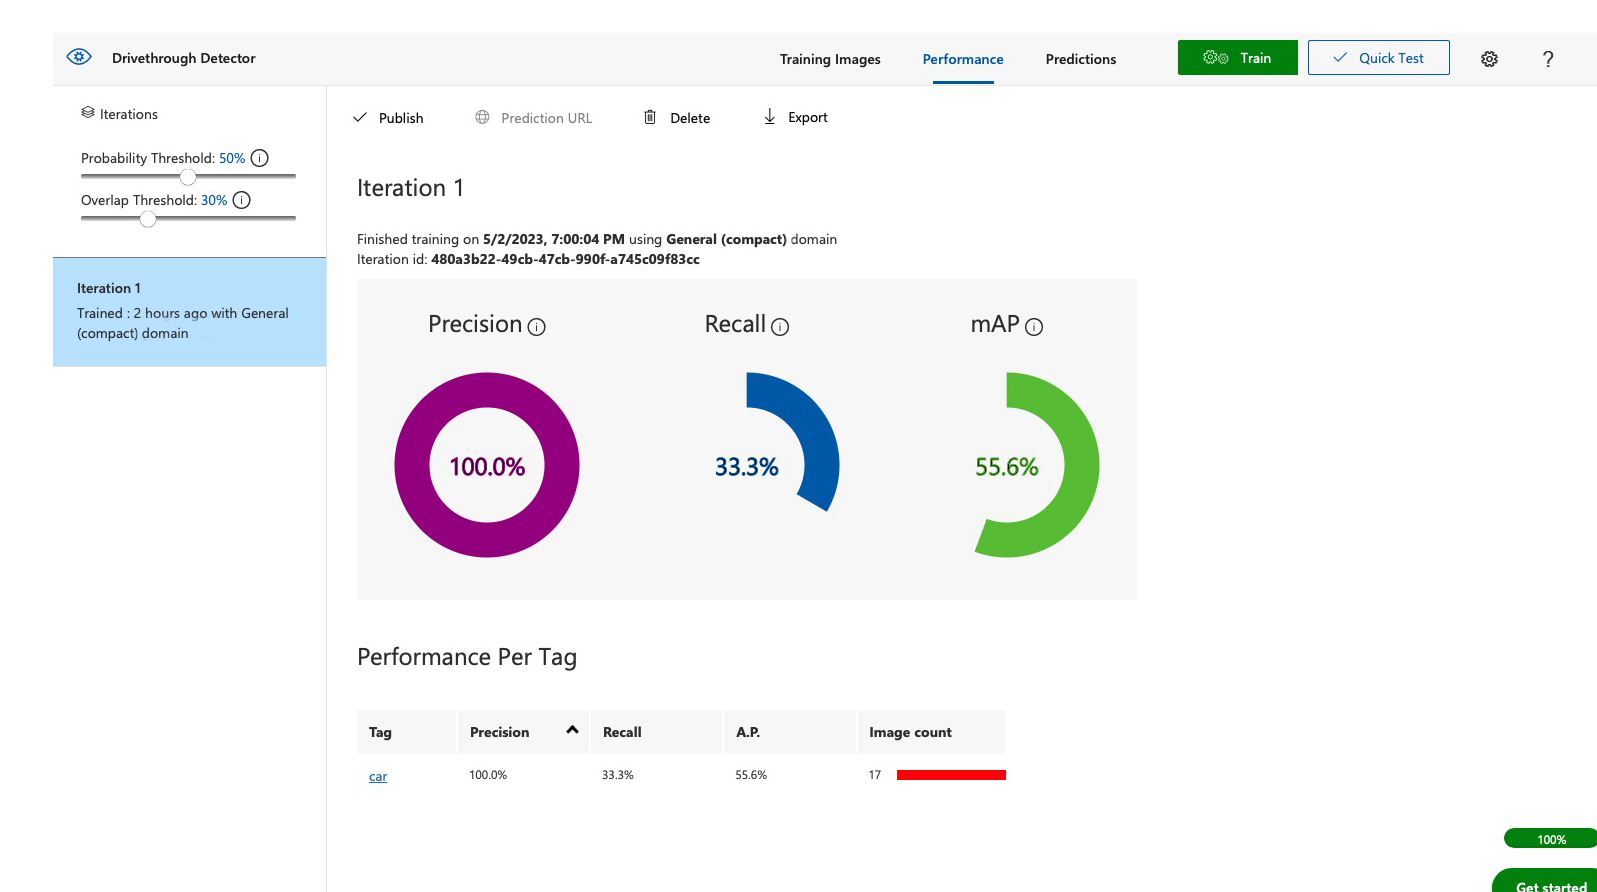
Trained model performance
Step 5: Test your model
After the training process is complete, you can test your AI model. Click on the "Quick Test" button, and Azure Custom Vision will ask you to upload an image. Once you upload the image, the AI model will try to predict what it is. If the prediction is correct, congratulations, you have successfully trained your custom AI model.
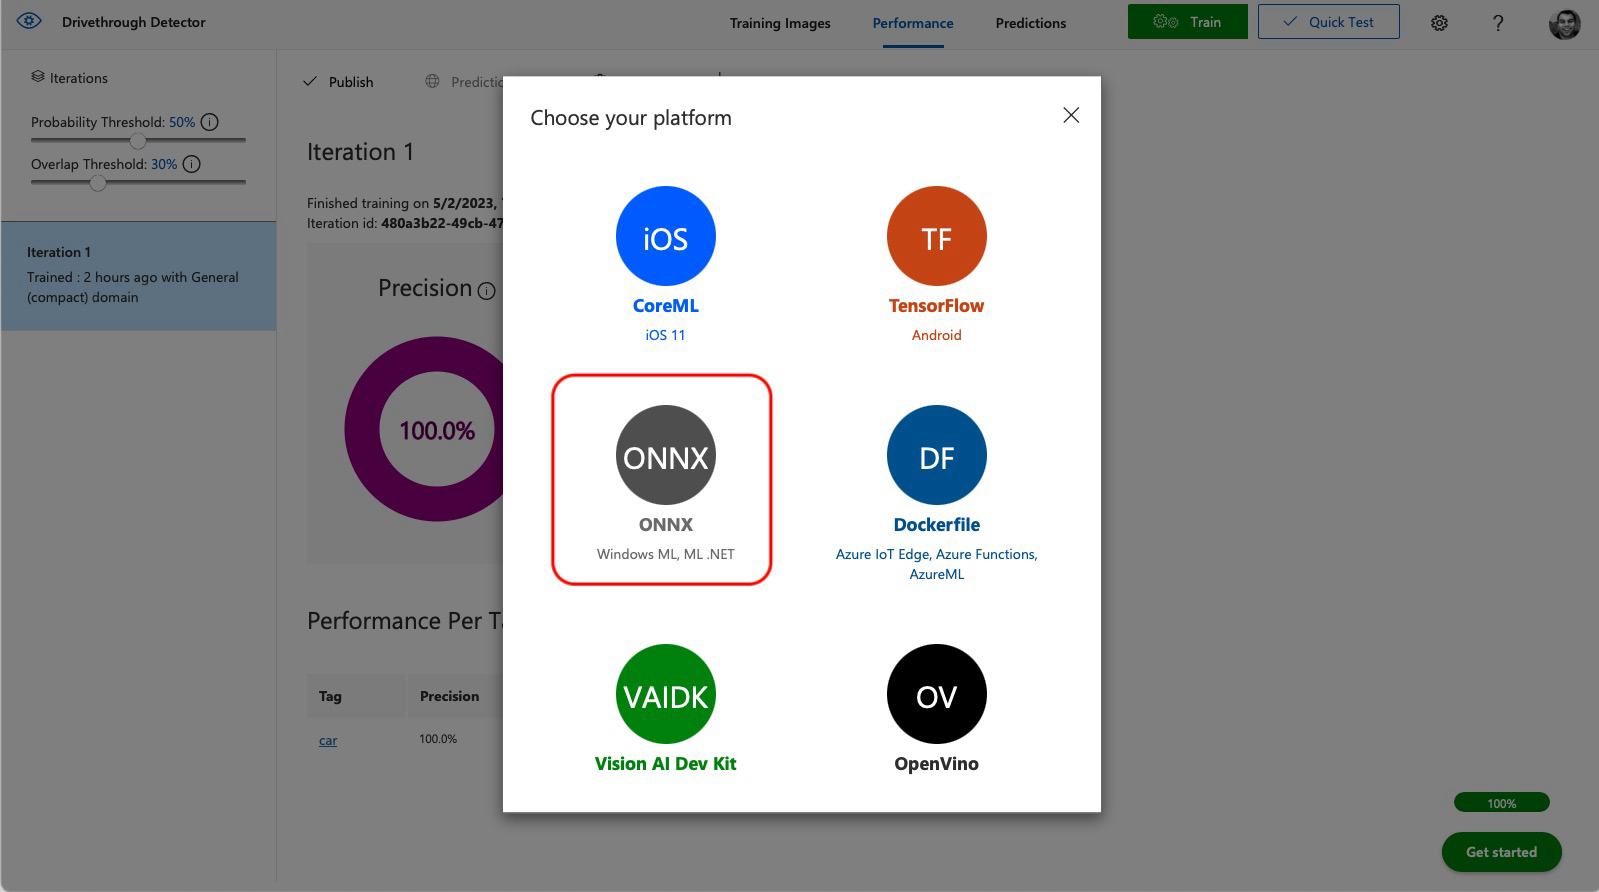
Step 6: Export your model
As a next step, export the model from CustomVision by clicking the Export button on the Performance screen. Choose ONNX, and select either the 32 bit (higher accuracy) or 16 bit version of the model. This will download a zip file containing the trained ONNX model.
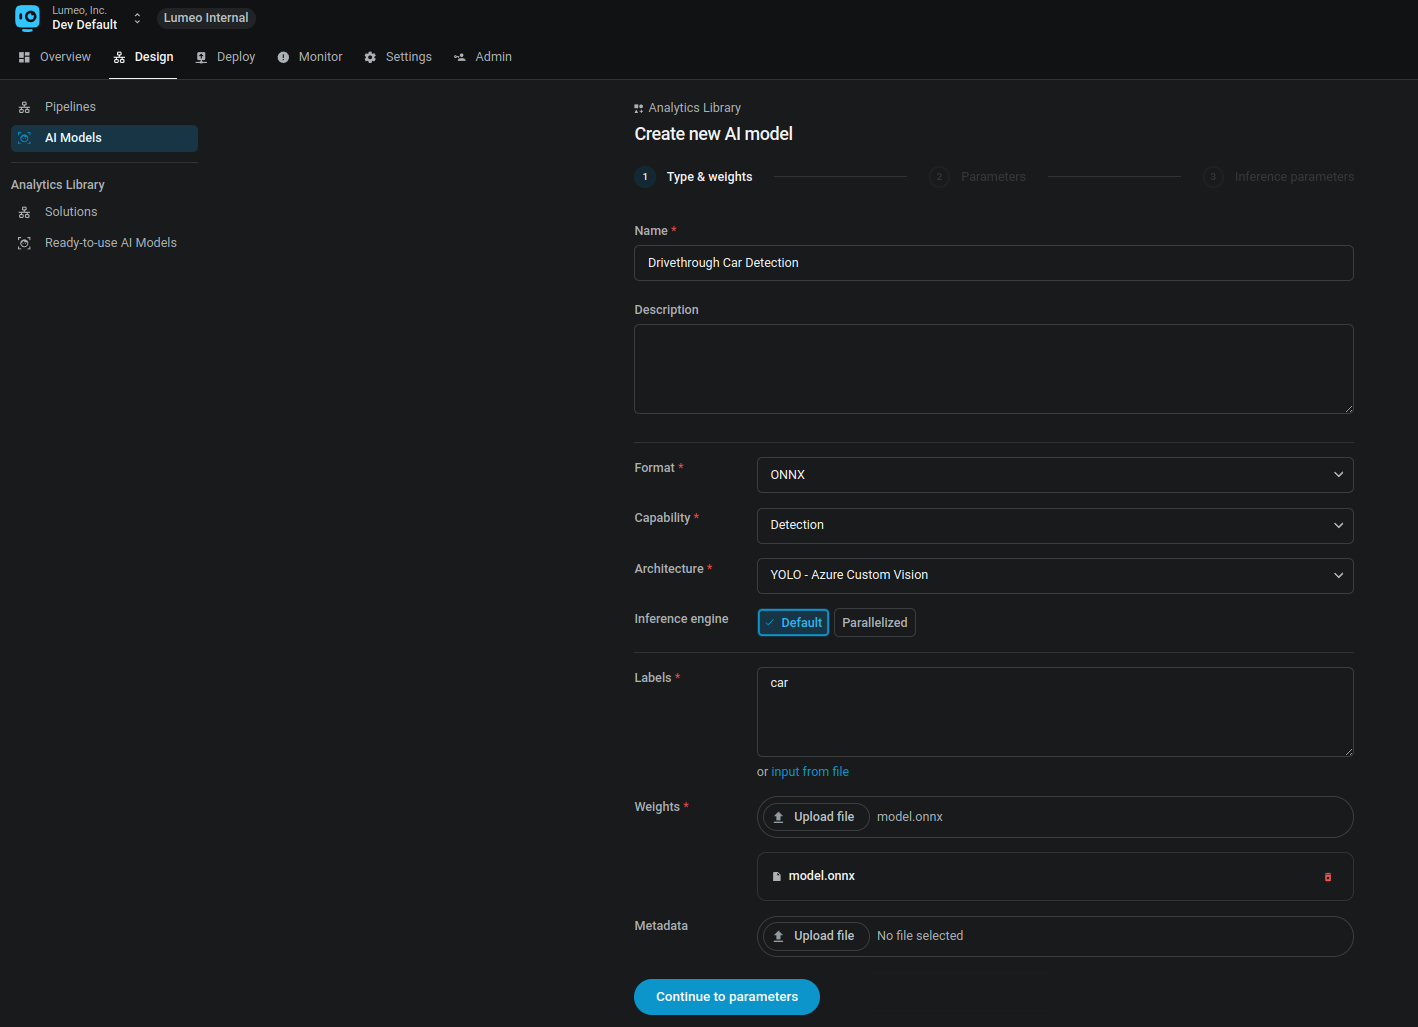
Step 7: Import the CustomVision model into Lumeo
Head over to Design -> Your AI Models page in Lumeo and create a new model, choosing the following settings:
Format : ONNX
Capability : Detection
Architecture : YOLO - Azure Custom Vision
Labels : Copy paste the labels from the labels.txt file in your downloaded model folder.
Weights : Upload the model.onnx file from your downloaded model folder.
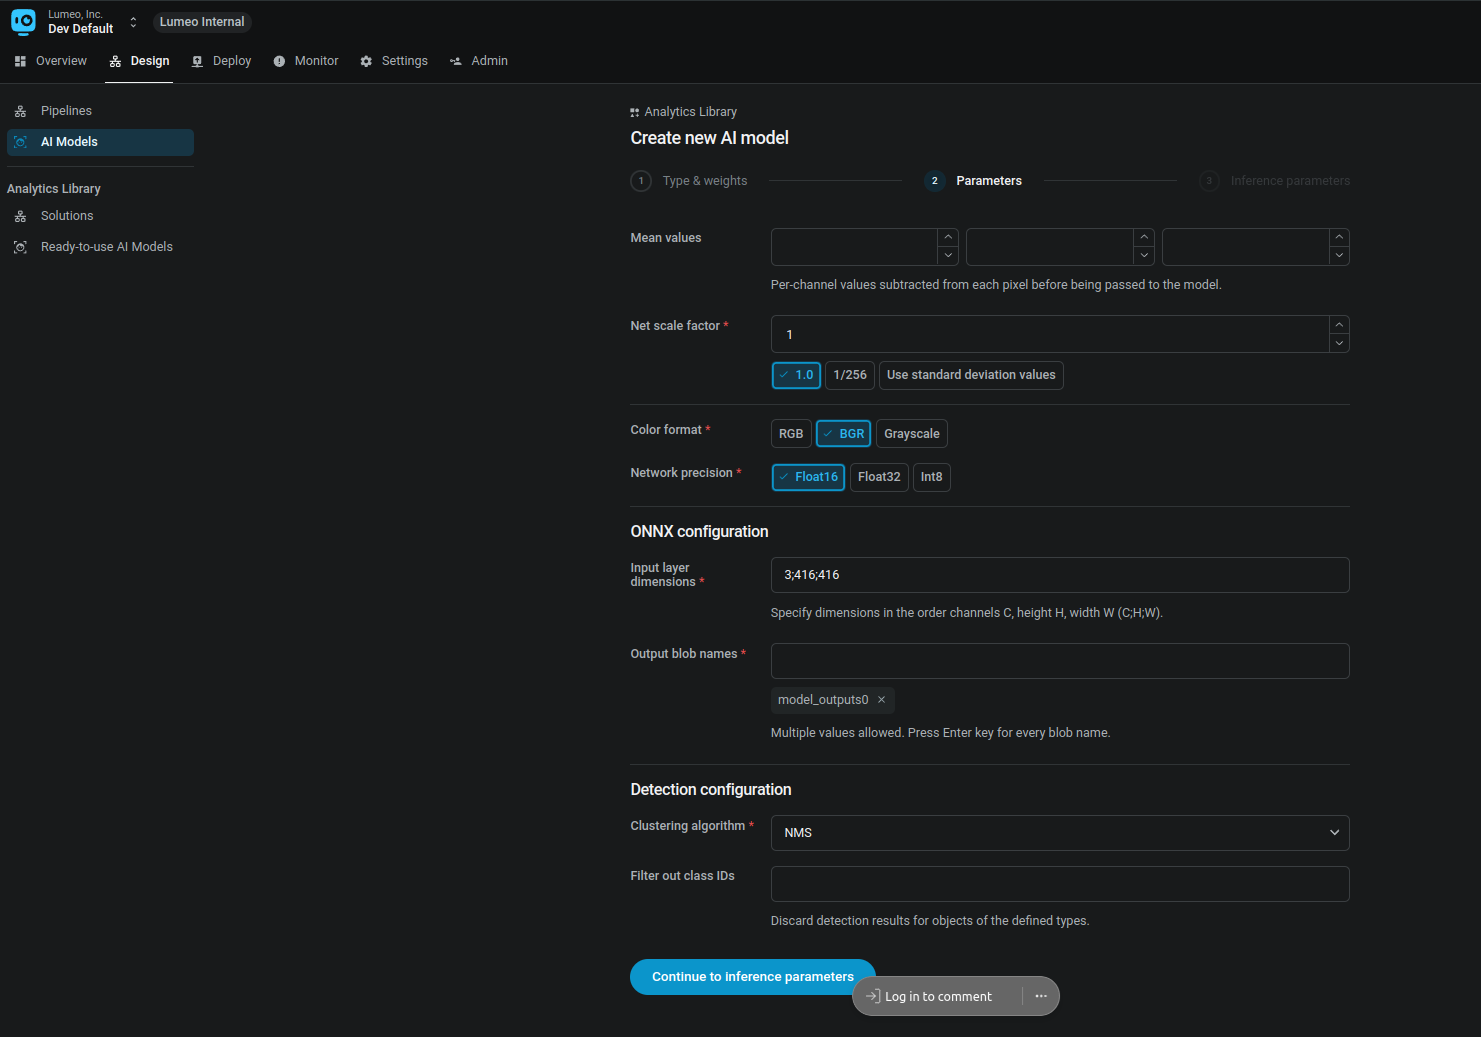
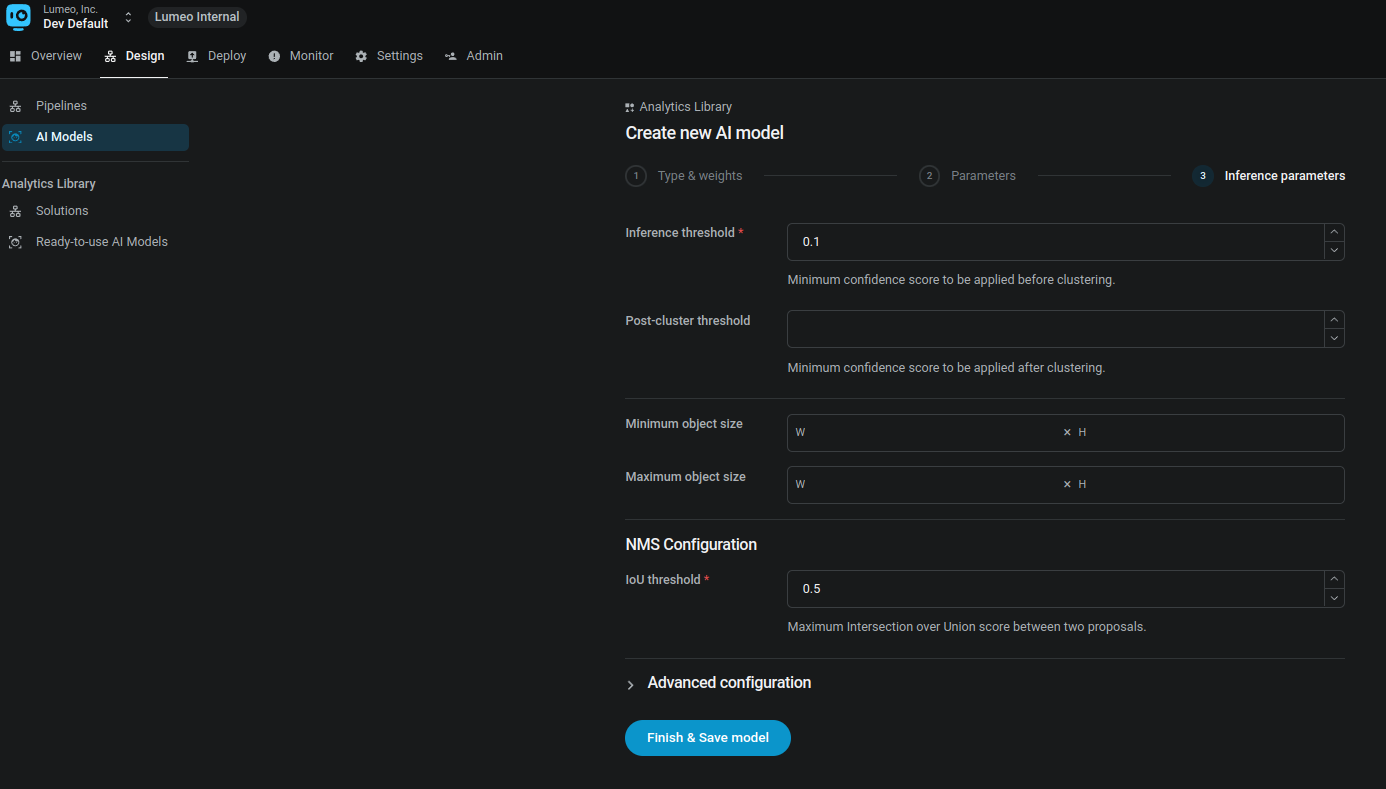
Next, set the model parameters :
Net scale factor : 1
Network precision : Float16 or Float32 depending on the selected precision when you exported the model
Input Layer dimensions : 3;416;416
Output Blob names : model_outputs0
Clustering algorithm : No clustering
Check Model Parameters using NetronFrom time to time, Azure updates their output models so the input layer dimensions may be different for your export.
Please verify the model inputs using https://netron.app and set them appropriately.
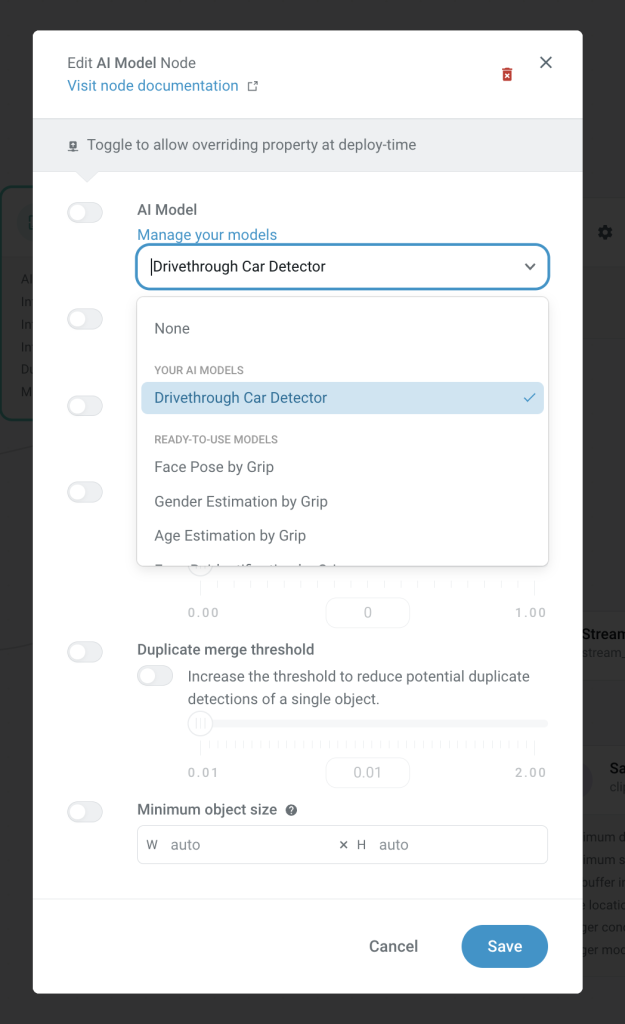
Step 8 : Use the model in a pipeline
Finally, you are now ready to use this model in your own pipelines. The model can be selected from the AI model selector in the AI Model node.
Updated 11 months ago