
Camera & Streams
A Camera is an IP (Security) Camera, or a USB / CSI Camera attached to Gateway.
Overview
Lumeo enables provisioning, configuration and management of ONVIF, IP and USB cameras & RTSP/HLS streams easily from a central location and process video from them.
TLDR:
- In order to use a camera or stream as a source, you start by linking it to a Gateway in your Application.
- Gateways let you discover ONVIF and USB Cameras attached to them or on the same network as the Gateway
- Once a camera or stream is linked to an Application, it can be used in the Video Source node in a Pipeline
| Video source type | Supported Gateways | Instructions |
|---|---|---|
| ONVIF-enabled IP camera | On-prem (local network) Gateway | See ONVIF setup section below |
| IP camera with RTSP or HTTP stream | On-prem (local network) Gateway Lumeo Cloud or Your Cloud Gateway (with Port forwarding) | See Stream setup section below |
| USB Camera | On-prem (directly attached) Gateway | See USB Cameras section below. |
| Milestone VMS | On-prem Gateway | See Milestone Import |
| Hanwha Wave VMS (live streams & recordings) | On-prem Gateway | See Hanwha Wave Import |
| Hanwha Vision PNM-C32084RQZ Camera | Embedded gateway within the camera | See PNM-C32084RQZ Setup |
| Rhombus Camera | On-prem (local network) Gateway, Lumeo Cloud Gateway (with Port forwarding) | See Rhombus Camera Import to generate Rhombus Secure Raw Stream URLs and then follow Stream setup section below. |
| HikCentral Professional VMS | On-prem Gateway | See HikCentral Import |
Camera Recommendations
In general, Lumeo will work well with most IP cameras or encoders in the market. To ensure maximum compatibility, we recommend that your IP camera meets the following specifications. Lower specifications than the recommended spec may work, but will require testing.
| Attribute | Recommended minimum spec | Notes |
|---|---|---|
| Streaming format | RTSP capable | ONVIF, RTSP or HLS capable cameras will work well |
| Resolution | 480p | For better results, use 720p resolution Specific analytics, such as license plate recognition, OCR, Barcode detection will perform better at 1080p |
| Frame rate | 5 fps | For better results use 10fps Specific analytics such as LPR perform better at 15-20 fps for fast moving vehicles |
| Encoding | H264, CBR | Lumeo also supports H265 but H264 is preferred. VBR and CBR are both supported, but VBR is known to cause issues at times with reliable analytics processing so we recommend CBR. Please turn off any vendor-specific encoder features such as Wisestream, Hikvision H264+, Zipstream, etc. |
USB Camera Setup
Lumeo supports USB and Raspberry Pi-like cameras connected to a Gateway via USB interface. Most v4l2 enabled USB cameras should work out of the box with Lumeo.
Connect USB Cameras when installingIn order for USB Cameras to be discoverable within Lumeo Gateway containers, ensure that they are plugged in when running the installer.
If the USB cameras were plugged in after the setup was completed, you can "restart" the Gateway by re-running the Gateway installer and selecting "restart" as the option in the Container manager.
Link a New USB Camera
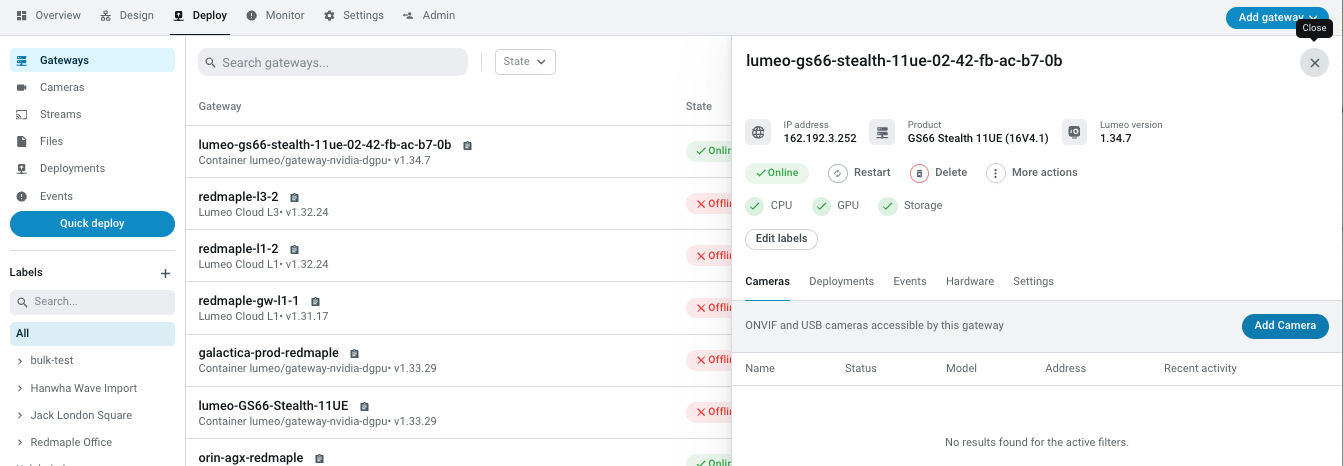
To Link a new USB/CSI Camera with your Application, start by discovering it on the Gateway detail page. Go to Gateway detail -> Cameras and click Add Camera.
Initiate USB camera discovery
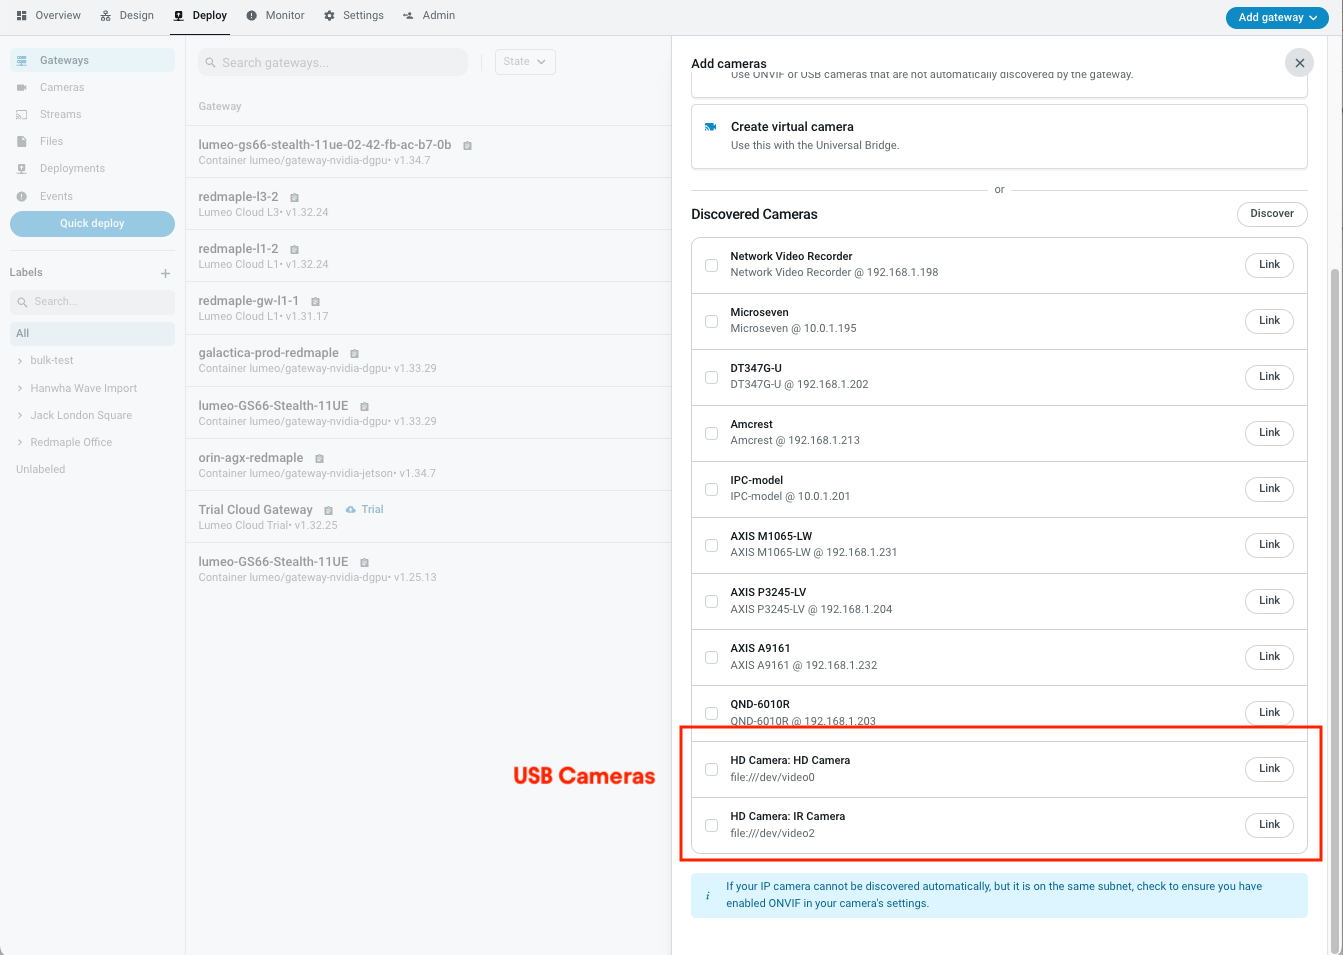
Click Link next to the discovered camera to add it to your application.
If the Camera doesn't show up in Discovery, you can also try to add it manually by specifying it's file URI (file:///dev/video0) when adding a new Camera.
Manually add USB camera
Configure USB Camera
Once linked to an Application, you can set a video format, resolution and frame rate for the camera in the Video Source node.
Process Video from a USB Camera
USB Cameras can be selected in the Video Source node when you deploy a Pipeline that contains that node.
ONVIF Setup
Before you begin, ensure that your camera has ONVIF enabled. See the table below for instructions on enabling ONVIF for popular camera brands.
Discover Cameras
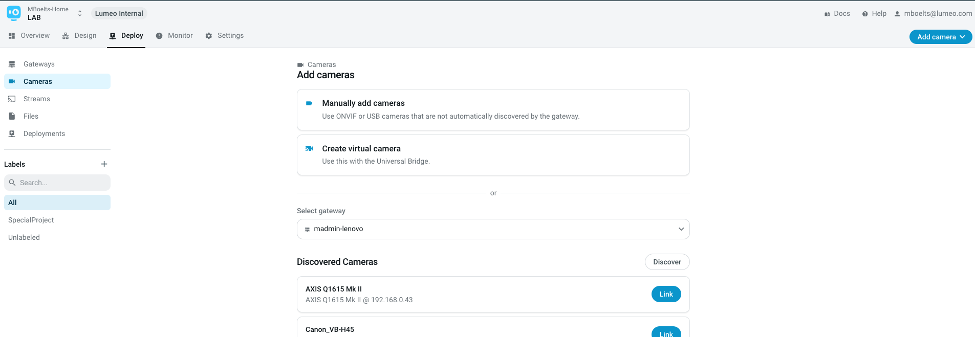
To Link a new IP Camera with your Application, start by discovering it on the Gateway detail page -> Cameras -> Add Camera. Lumeo will automatically discover ONVIF IP cameras on the same subnet as your Gateway.

Gateway Details -> Cameras tab. Click Add Camera button to add a camera.
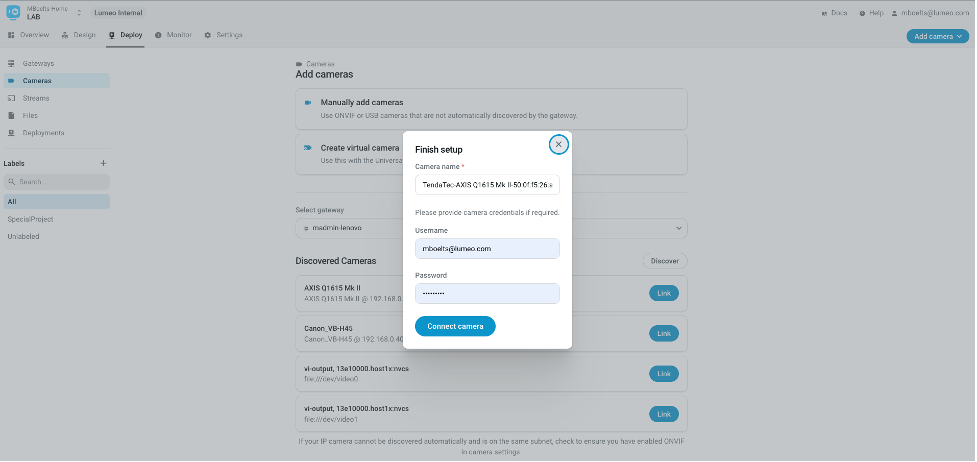
This will start an Onvif discovery for cameras. Once discovered, you can link the camera by providing camera credentials. Click the link button.
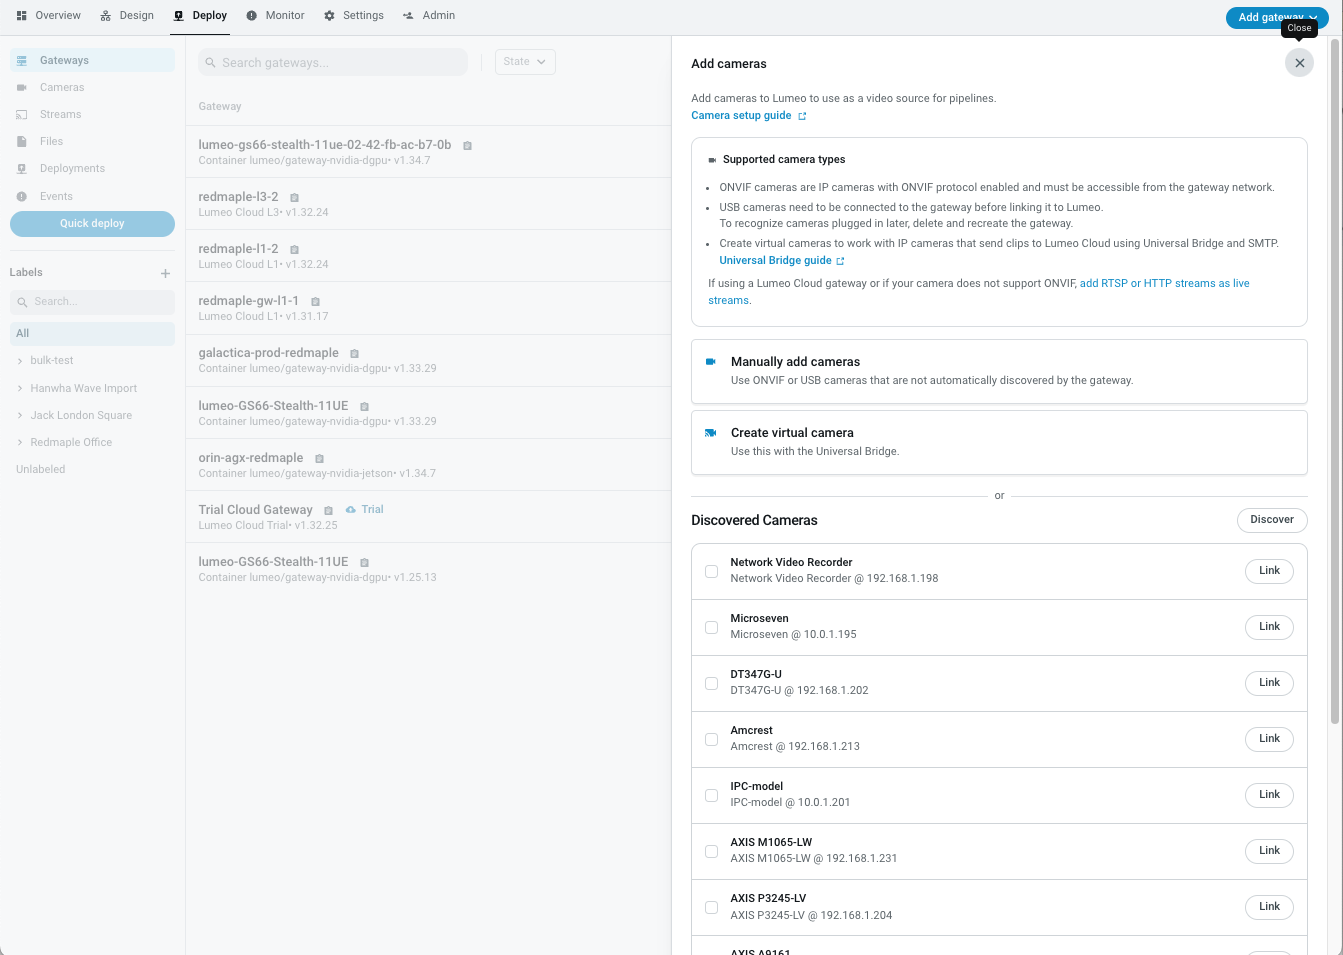
Discovered ONVIF cameras. Click Link to link a camera to Lumeo.
This will open an additional window to complete the connection with the camera. Here you will need to put in the Onvif user and password.
Manually Add Cameras
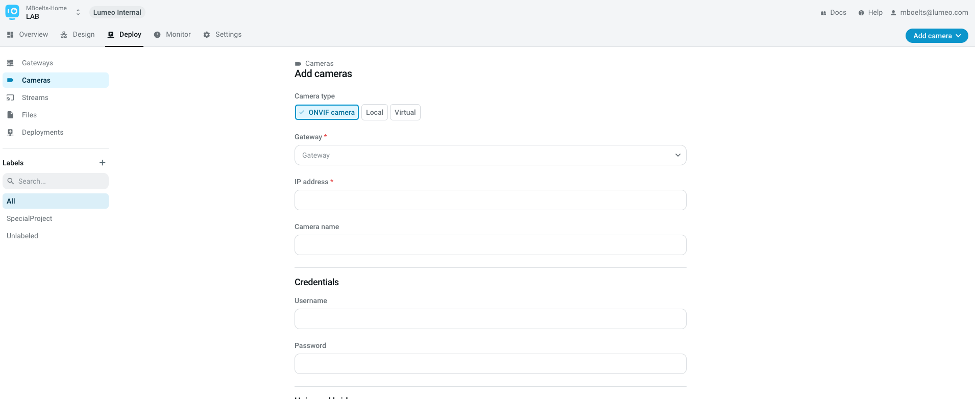
If the Camera doesn't show up in Discovery, you can also try to add it manually by specifying it's IP address as long as it is reachable via the chosen Gateway.
Manually configured IP Cameras must be accessible from the GatewayIt's important to ensure that IP cameras, when configured manually, are accessible from the Gateway. This is one of the most common reasons why a manually configured camera may not work.
For instance, when used with Lumeo Cloud Gateways, an IP camera on your local network must be port-forwarded via a Router. This port forwarding should include the ONVIF port (580) and RTSP port (554), and you must specify the forwarded ONVIF port in the camera IP address in Lumeo.
If your IP Camera doesn't show up in Discovery (because it doesn't support ONVIF, or doesn't conform to the standard correctly), and cannot be added manually, we recommend that you create a RTSP stream instead using the Stream setup section in this guide.
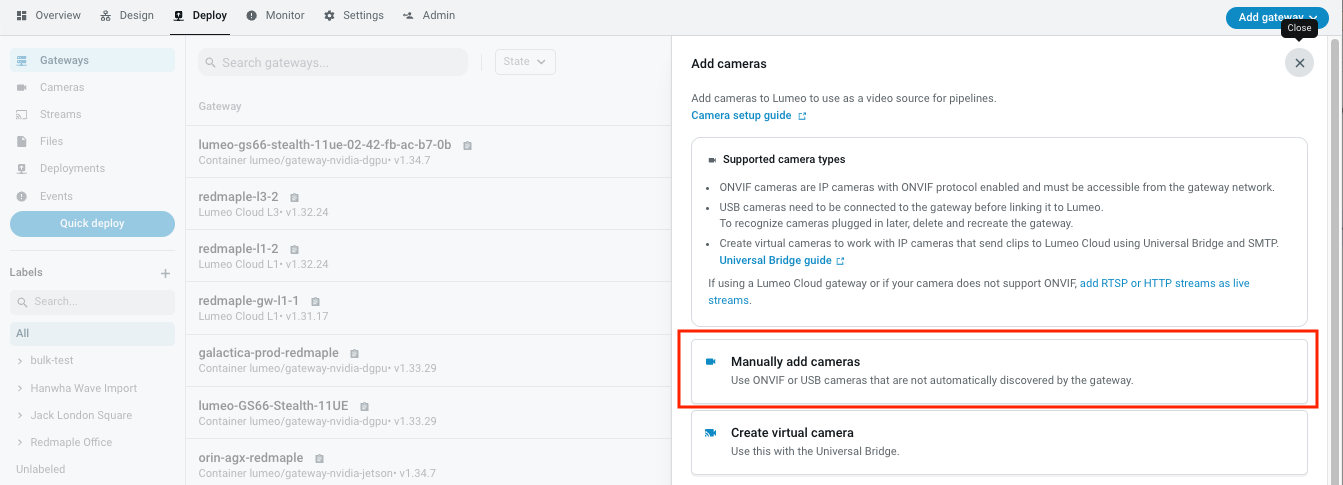
Click on Add Camera and then Manually add cameras
From this window you can select the gateway and then input the ip address, Camera name and Onvif user credentials for the camera.
If this does not work you might not have Onvif setup on your camera. There are some instructions below to setup Onvif on a couple of popular camera models here : Enable ONVIF on Camera
Configure IP Camera
Currently, IP Camera settings & Stream settings must be configured using the Camera's native web interface or manufacturer's tools.
As a part of the linking process, Lumeo automatically creates a Stream for each video stream that the IP Camera provides. Camera details page has details of that camera's Streams.
Process Video from an ONVIF Camera
Camera Streams can be selected in the Video Source node when you deploy a Pipeline that contains that node. These streams are processed in real time, and Lumeo will attempt to restart any Pipeline Deployments that use Camera streams if the stream goes offline or encounters an error.
Stream Setup
If your camera is not ONVIF enabled, or you are trying to access the Camera from a Gateway outside the firewall (such as from a Lumeo Cloud Gateway), you can add it as a Stream. You can also add HLS streams as a Stream to Lumeo.
Start by determining the source URL for the stream or camera. Examples:
rtsp://user:[email protected]/videoMain
https://abc.xyz/video.m3u8
Determine the source URL for a IP Camera
To do this you will need to find the RTSP url for your particular camera model. Look for it in the camera manual or find your camera model below:
Once you find a URL for your camera go to the next step.
Forward RTSP through firewall
If you are using a Lumeo Cloud gateway, you will need to setup port forwarding so that the cloud gateway can access your stream. See RTSP Port Forwarding to setup port forwarding and determine the Stream URL in this setup.
Common Misconfigurations
- Configuring your internal network IP in Lumeo Console when you are using Lumeo Cloud Gateways
- IP Addresses that start with
192.168.x.yor10.0.x.yor172.16.x.yare internal IP addresses, not your public IP address. They can only be used when the Lumeo Gateway is deployed within your network.
- IP Addresses that start with
- Missing credentials
- If your camera is using RTSP credentials (which may be different from an email address used to setup web access for the camera), you will need to ensure they are present in the RTSP URL as
rtsp://username:password@....
- If your camera is using RTSP credentials (which may be different from an email address used to setup web access for the camera), you will need to ensure they are present in the RTSP URL as
- Port Forwarding is not setup or not working correctly
- Often times, using your internal IP address and playing the RTSP stream with VLC from within your network will work just fine. However, if the port forwarding is not setup correctly, Lumeo Cloud gateways cannot access the stream from outside your network.
- To verify, create your RTSP URL with the public IP address and forwarded port, and play that using VLC.
Add a Stream
Use a public IP Address in the Stream URI when using Lumeo Cloud GatewaysIf using the Lumeo Cloud gateway, you will need to ensure that the Stream URL you configure in Lumeo uses the public IP address with port forwarding.
Once you have the source URL for your camera/stream go to Streams in Lumeo Console.

Streams list page. Click the Add Input stream button in the top right to add a stream.
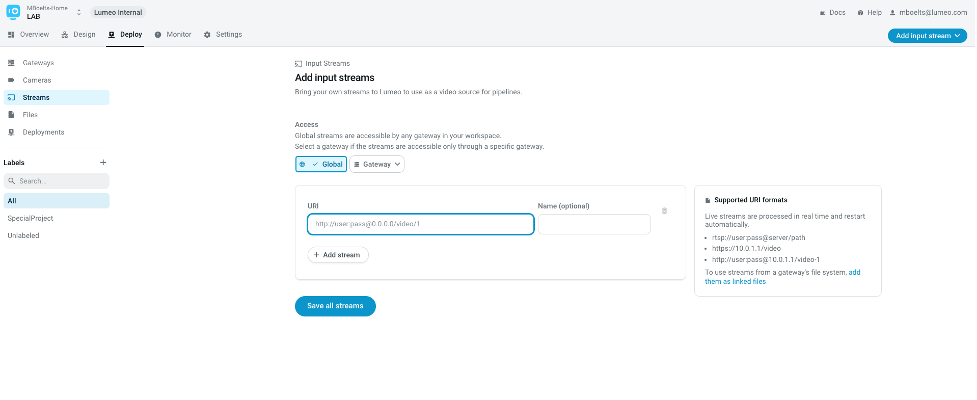
Here you will put in the source URL, an optional name, and then save streams.
You can specify the gateway which will process this stream by setting the Gateway in the Access section. Setting a specific Gateway will cause it to monitor the stream availability and let you playback the stream in the Lumeo console.
Process Video from a Stream
These Streams can be selected in the Video Source node when you deploy a Pipeline that contains that node. They are processed in real time, and Lumeo will attempt to restart any Pipeline Deployments that use them if the stream goes offline or encounters an error.
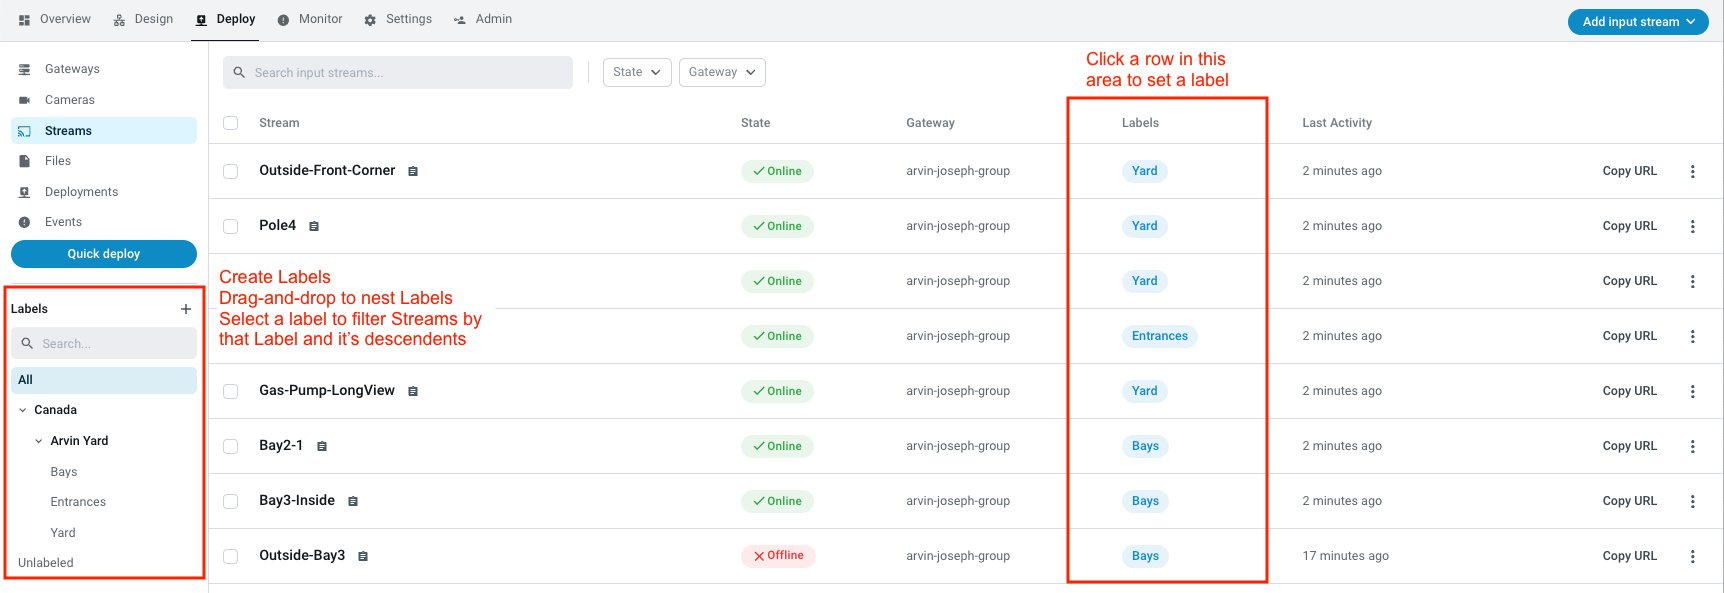
Labels
Cameras & Streams can be tagged with Labels.
Labels are hierarchical and selecting a particular label will filter the list of Cameras & Streams to those tagged with that Label or it's descendants.
Labels can also be used to filter Dashboards by a specific source.
API Reference
Updated 11 months ago