
Quick Deploy Guide
Follow these steps to quickly deploy a pre-built analytic solution with Lumeo
Overview
This is a Step by step guide to deploying a pre-built solution using Lumeo. You will do so with 2 key activities :
- Provision a Gateway and a Camera or Stream to run the Pipeline
- Deploy a pipeline from your library or the Solutions gallery to the Gateway and preview or embed output Streams in the browser.
Looking to build or tweak an analytic ? Head over to the Getting Started Guide instead.
What will you need :
- A Nvidia family device (Jetson NX, Orin, x86 with DGPU etc.) to run the pipeline. If you don't have one handy, every new Lumeo account comes with a free Trial of a Lumeo Cloud gateway that you can use to run the pipeline.
- A USB camera or an IP camera to use as an input source. If you don't have one, you can use a RTSP stream or a clip as an input source, or add sample streams.
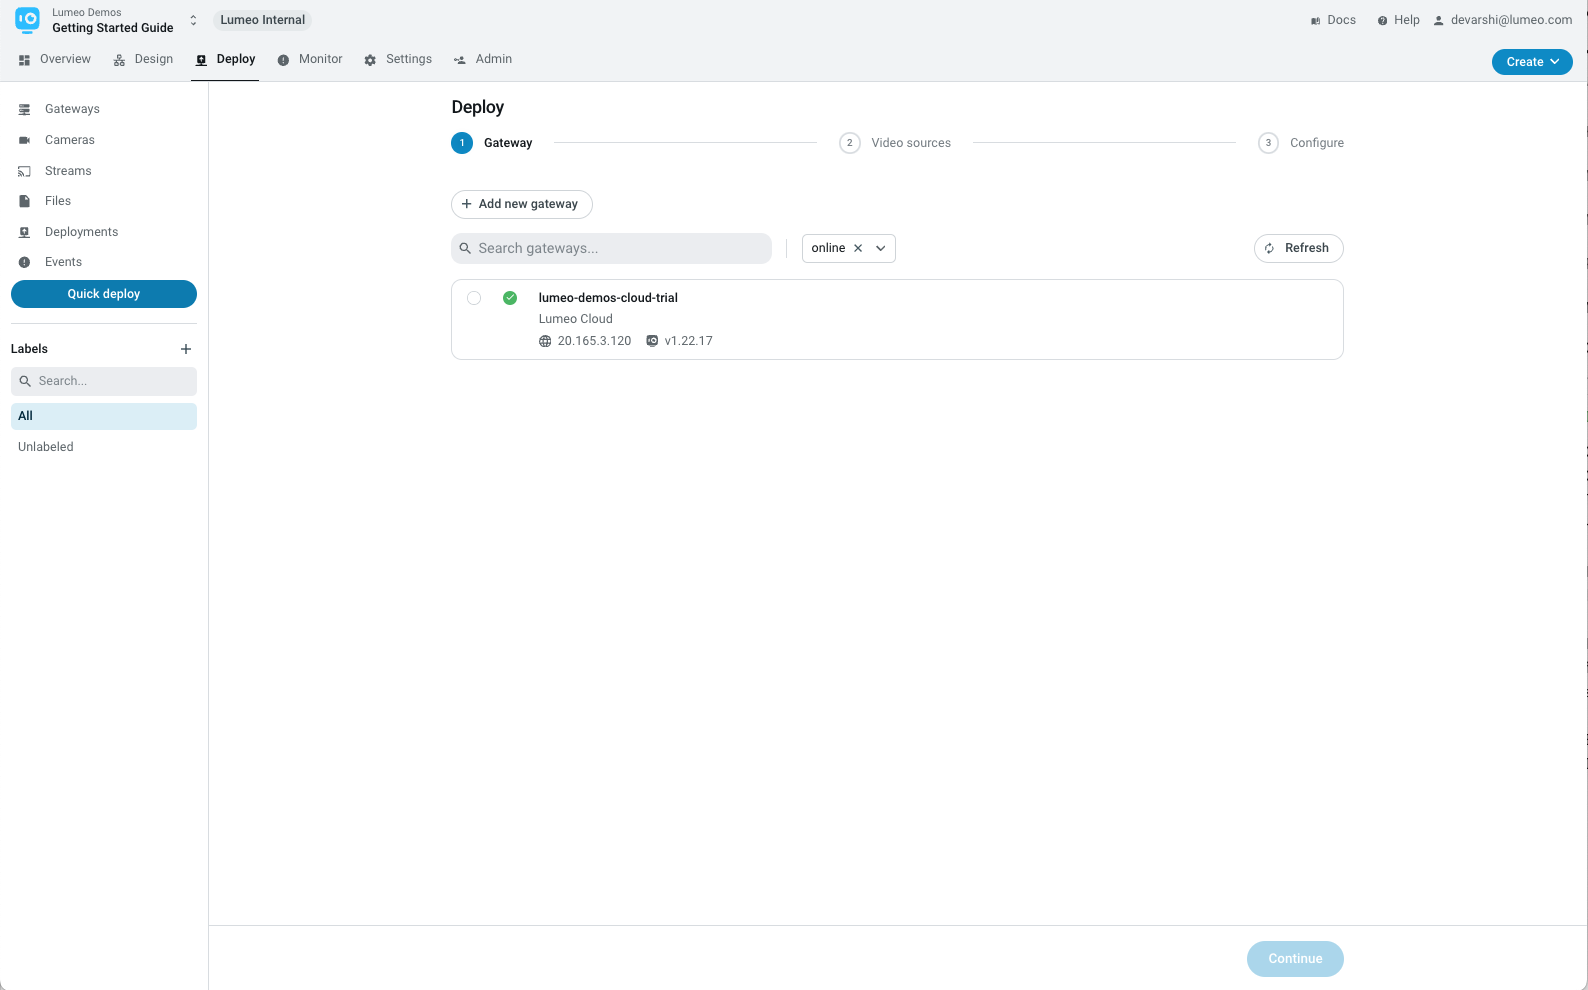
Gateway Selection
To start, head over to Deploy tab in the Console, and click the Quick Deploy button. This will take you to the Gateway selection page.
Gateways are servers or devices that run the Pipeline. In the first step, you will choose the Gateway if you already have one, set one up if you are using your own device, or use a Lumeo Cloud Trial Gateway if you have neither.
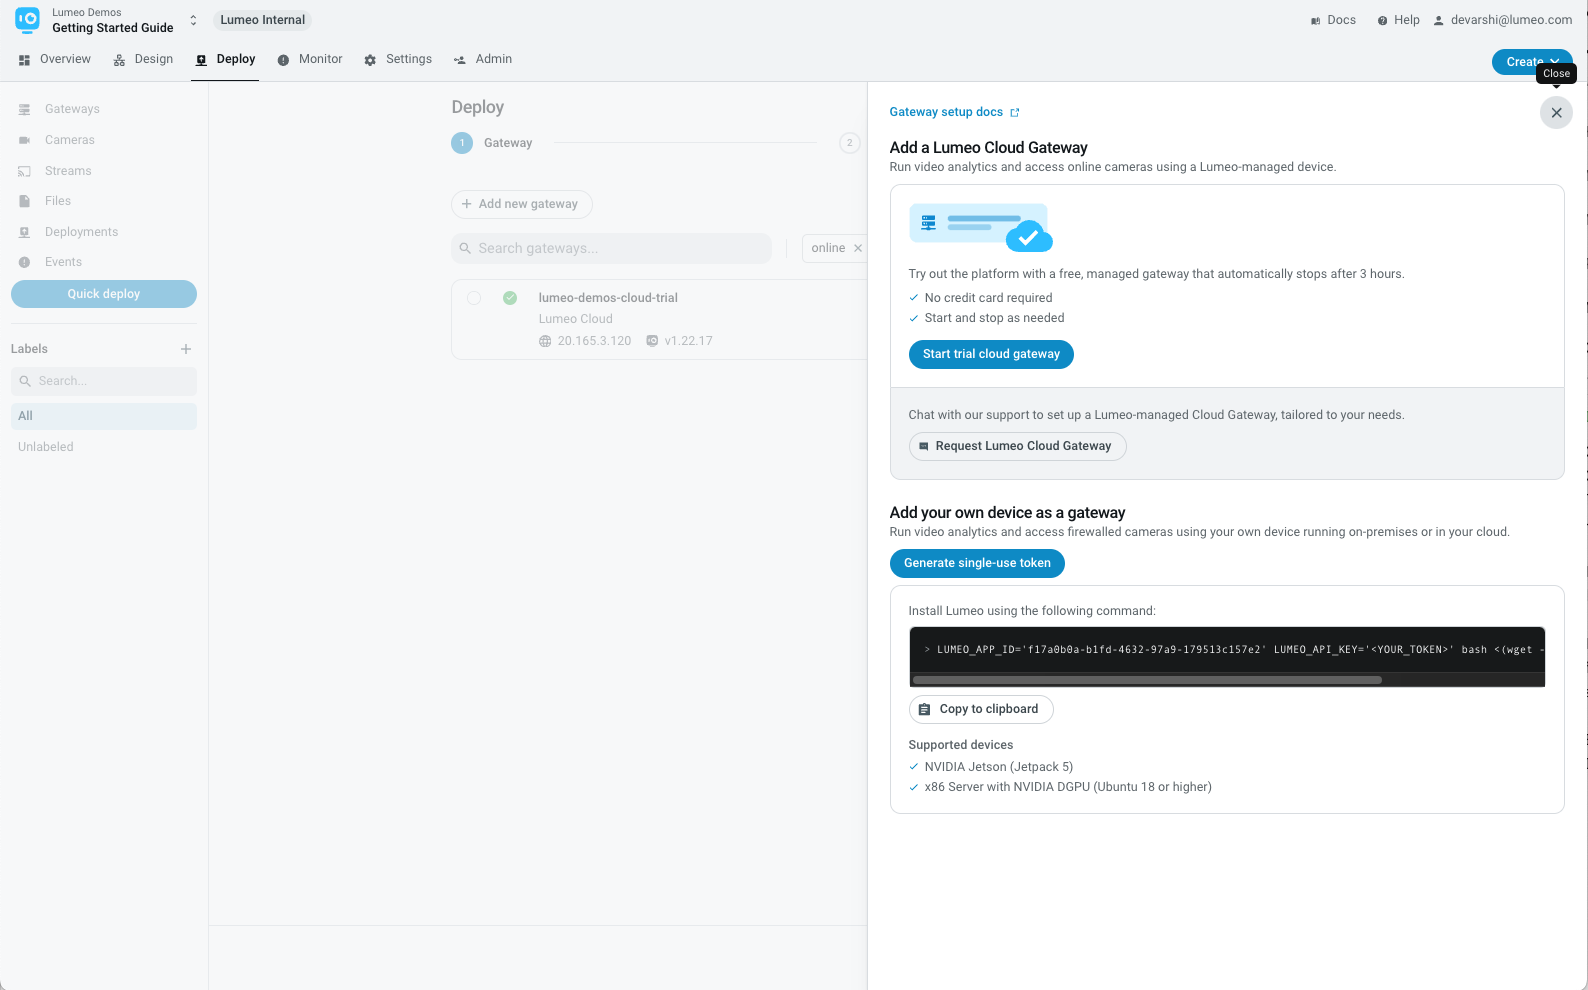
Use Lumeo Cloud Gateway
Every new Lumeo account comes with a Cloud gateway Trial which we will use for this Guide. Skip to the next section if you would like to use your own device as a Gateway.
Lumeo Cloud Trial Gateway LimitsNote that trial gateways are limited to a 3 hour runtime, after which they will automatically stop. You can restart them anytime from the Console.
Create a Lumeo Cloud Gateway by clicking Add new Gateway -> Start trial cloud gateway. This will set you up with a Lumeo Cloud Gateway in your account.
Use your own Gateway
If you have an Nvidia device handy that you'd like to use (ex. Jetson NX, AGX, Orin, or x86 server with Nvidia DGPU) you can do so.
Gateway Limit on Free accountsFree accounts are limited to 1 gateway per Workspace, so if you already created a Trial gateway, you will need to delete that before you can add a new one. To do so, head to Gateways page and click on the Trial Gateway name and then the Delete button. Then come back and resume this Guide.
Lumeo-ready Gateway
If you have a Lumeo-ready Gateway, you can copy the generated token and workspace id to the Gateway's web interface to set it up.
See Lumeo-Ready Gateways for setup guide.
Generic server or Jetson device
Click Add new Gateway -> Generate single use token. This will show you the installer instructions that you must run on your gateway device (Nvidia enabled devices only for now).
Run the installer on the device using the terminal and return back to the Console when done.
Installer Tips
- When the installer asks you if you want to set the device up as a new gateway, answer
y- When the installer asks you to login to Lumeo, use the same credentials you use to login to the Console
- If you plan to use USB cameras with Lumeo, ensure they are plugged in before running the installer.
Select the Gateway
Once you have a gateway in your account, select it in the Gateway step of the Quick deploy flow, and click Continue at the bottom to continue.
Video source selection
After selecting the Gateway, this page lists all the Cameras / Streams linked to the Gateway. To continue, select one or more streams to deploy the pipelines to.
If this is the first time you will deploy a certain analytic, we recommend following the rest of this guide one camera/stream at a time till you all of them working.
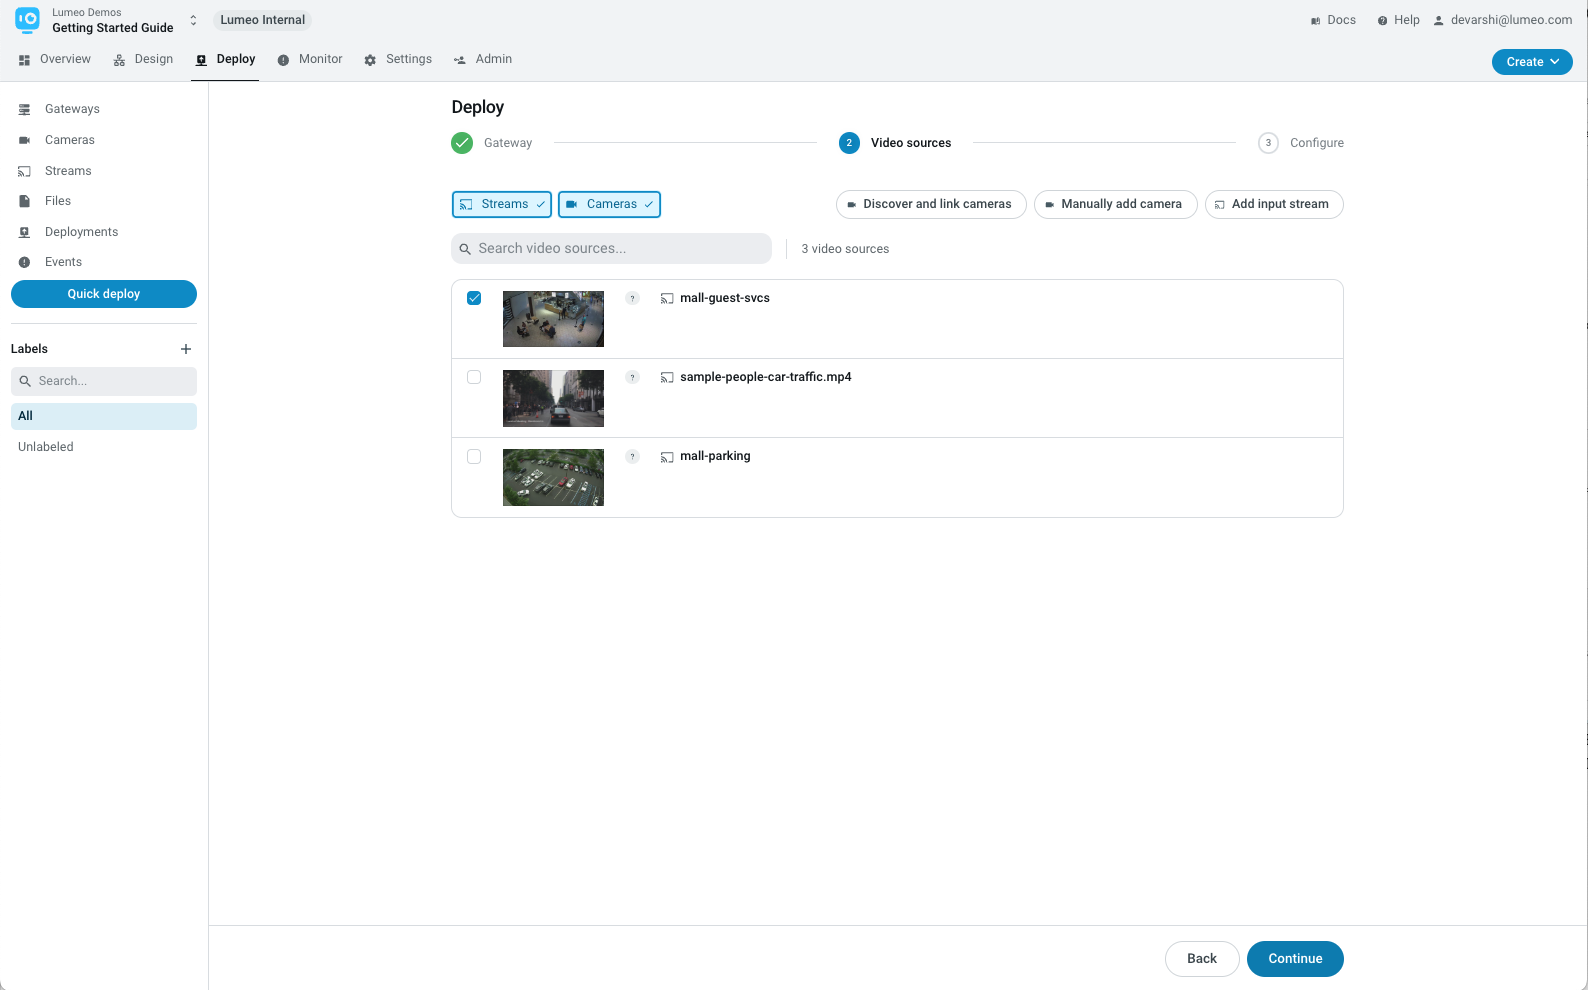
Add new cameras or streams
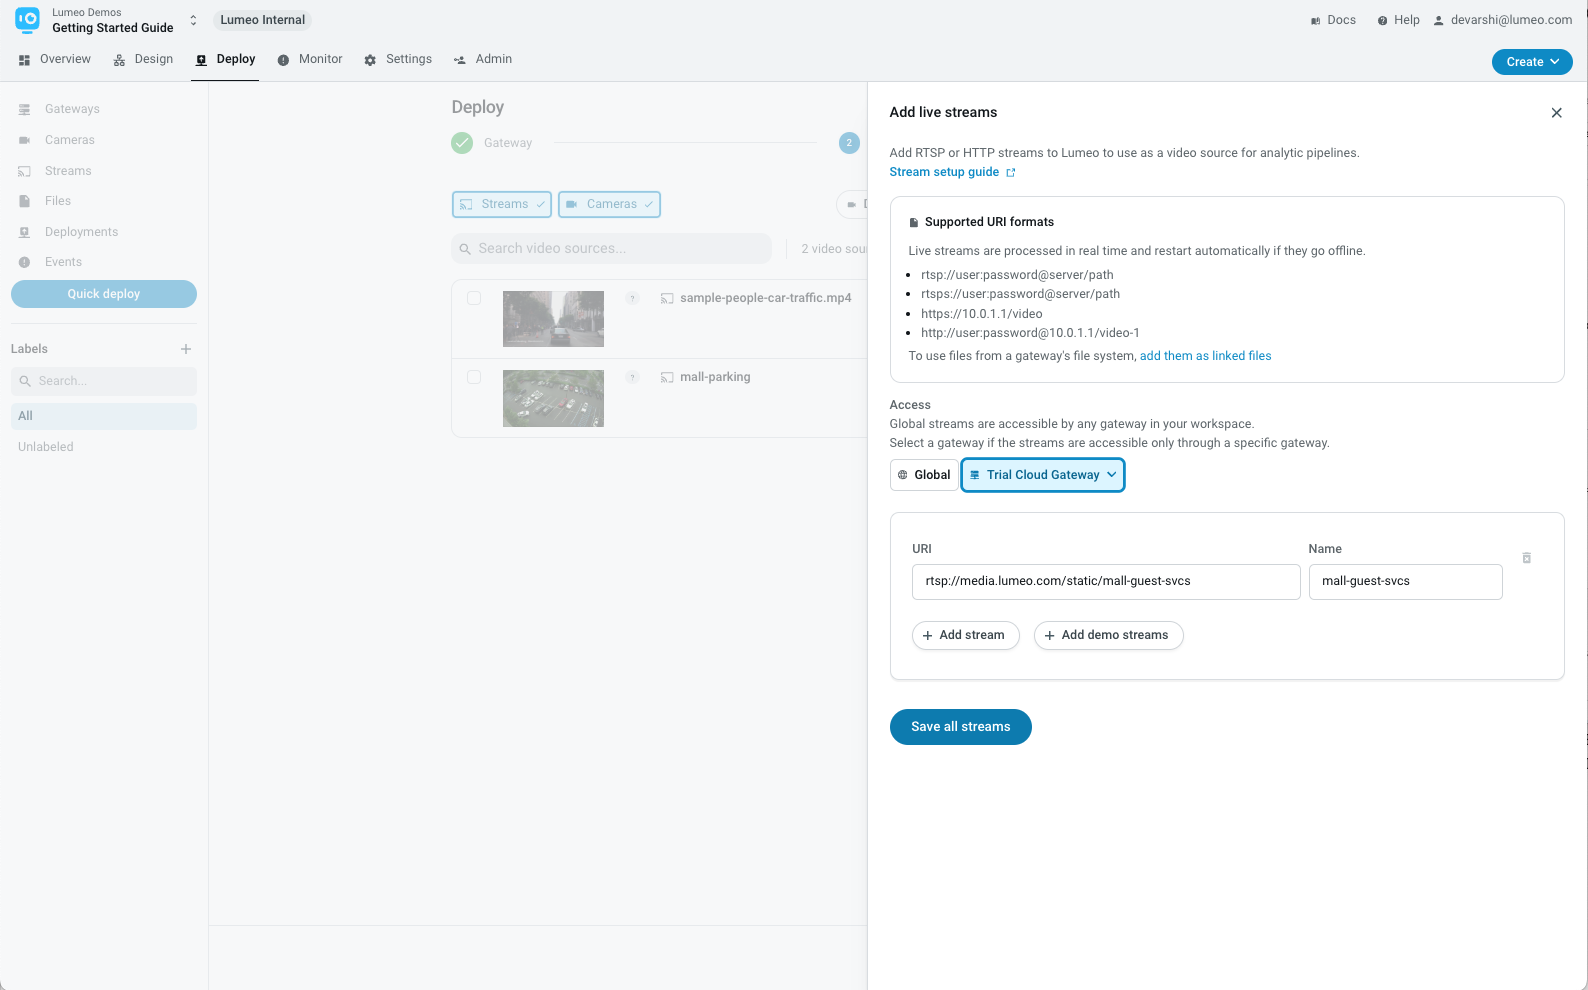
At this step, you can also use the buttons at the top to discover ONVIF cameras on the gateway's network, manually add USB or IP cameras, or Live (RTSP/HTTP) streams.
Note: If you add a Live stream be sure to set the Gateway to the specific gateway you are using as shown in the image below.
Analytic pipeline configuration
With one or more sources selected, click Continue at the bottom to the next step of the Quick deploy flow : Configuring your analytics.
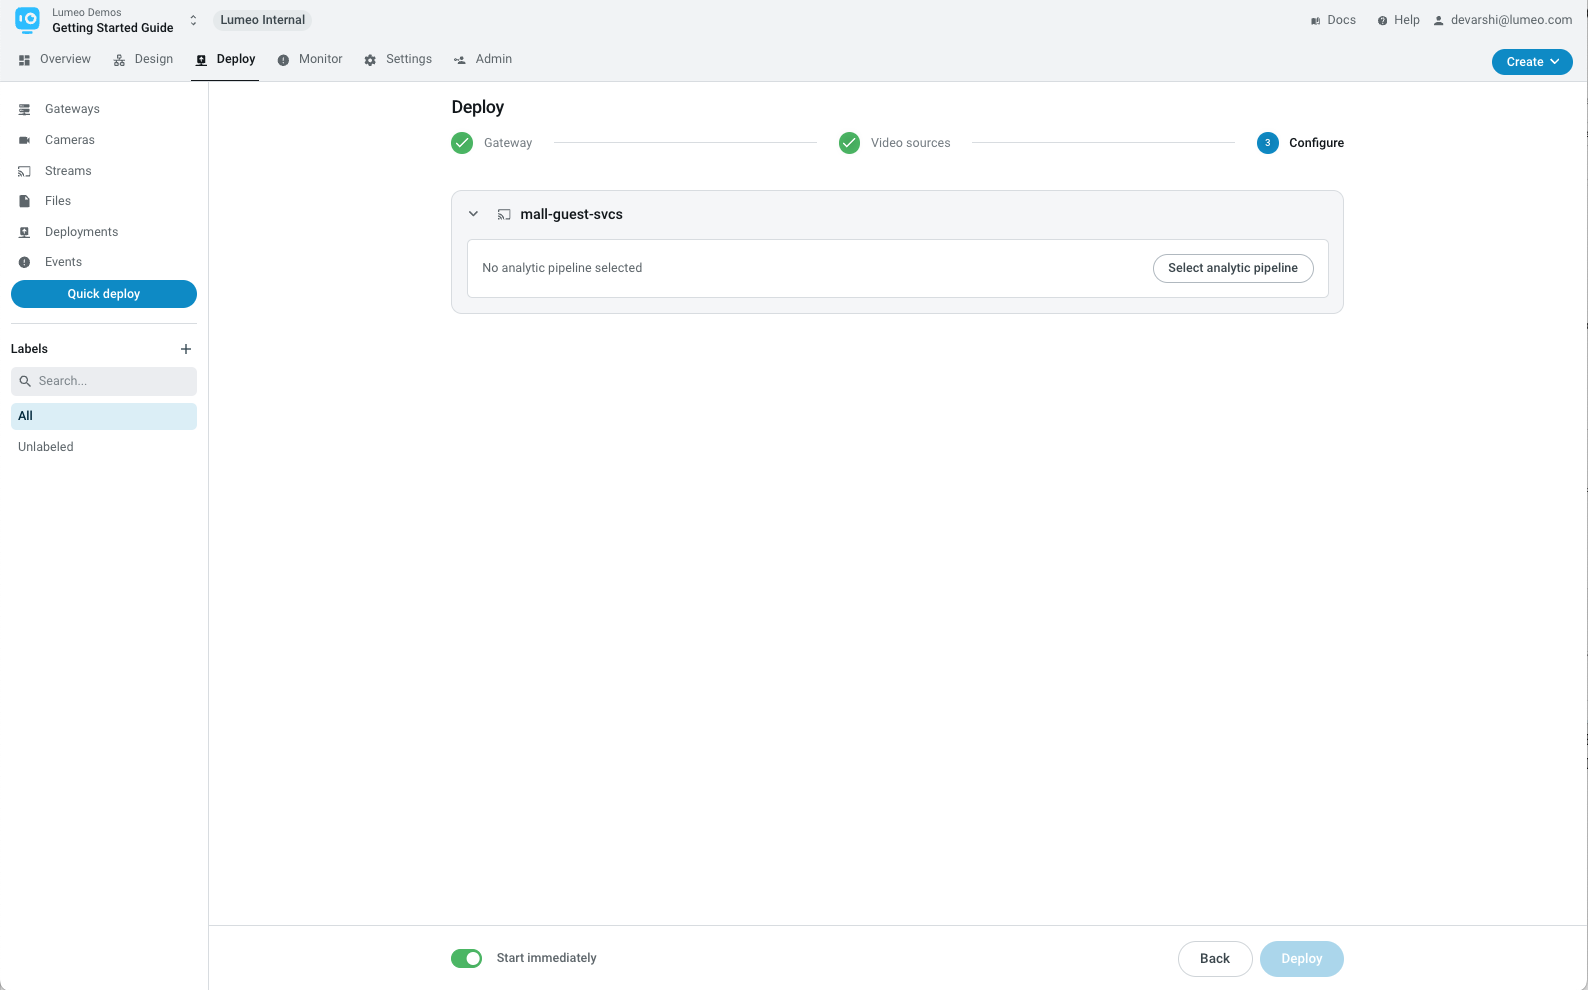
For each source, expand the accordion and click Select analytic pipeline to pick the pipeline to deploy.
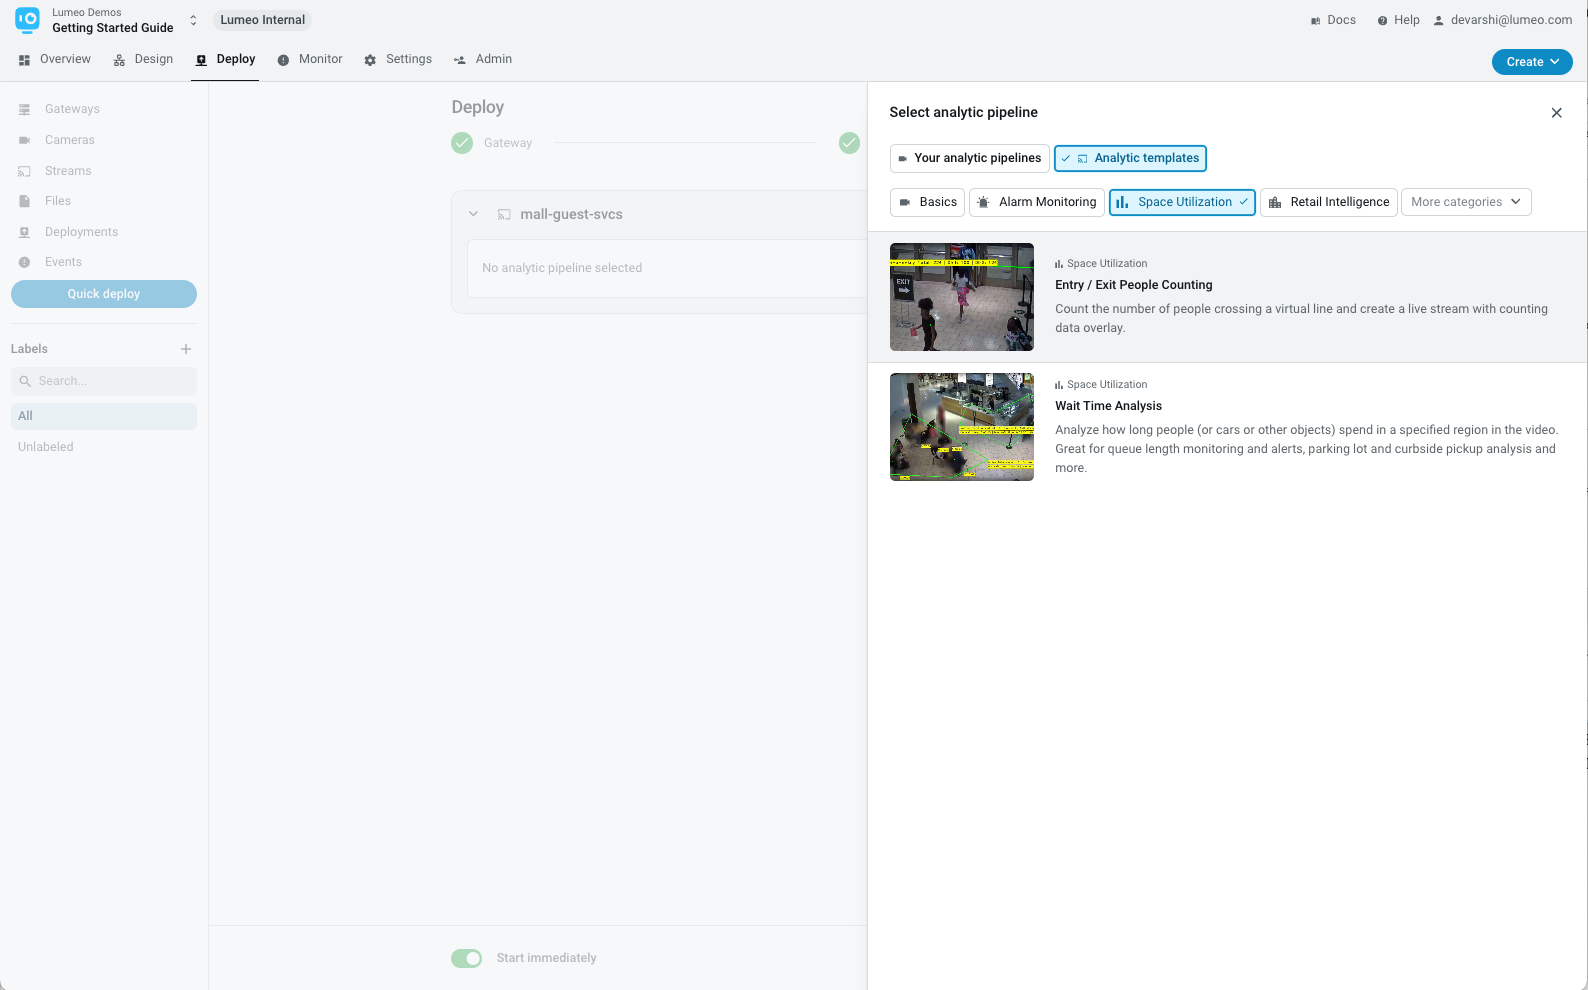
Select pipeline
You can pick one from your analytic pipelines, or choose a template. For this example, lets pick the Entry / Exit People Counting template. This template will be imported to your library as well so you can deploy it to other sources or tweak it in the pipeline editor subsequently (Design -> Pipelines).
Configure pipeline
With the pipeline selected, the next step is to configure it : draw the lines, provide missing settings, etc. Look for instructions under the individual elements in the template.
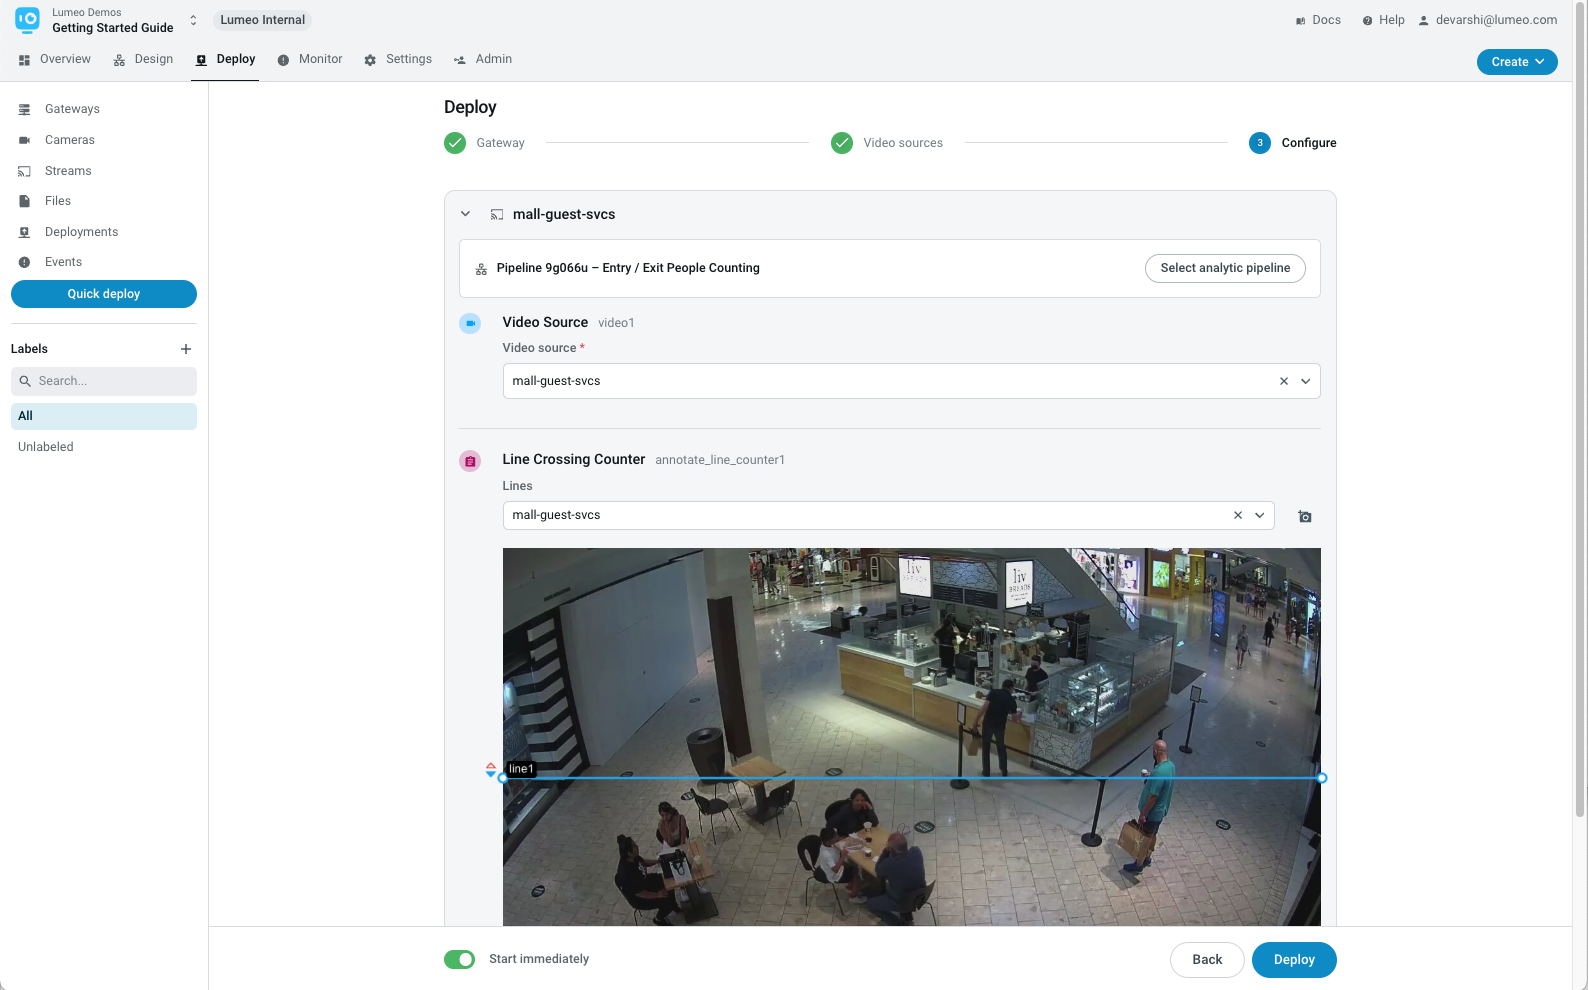
After configuring all the pipelines, click Deploy.
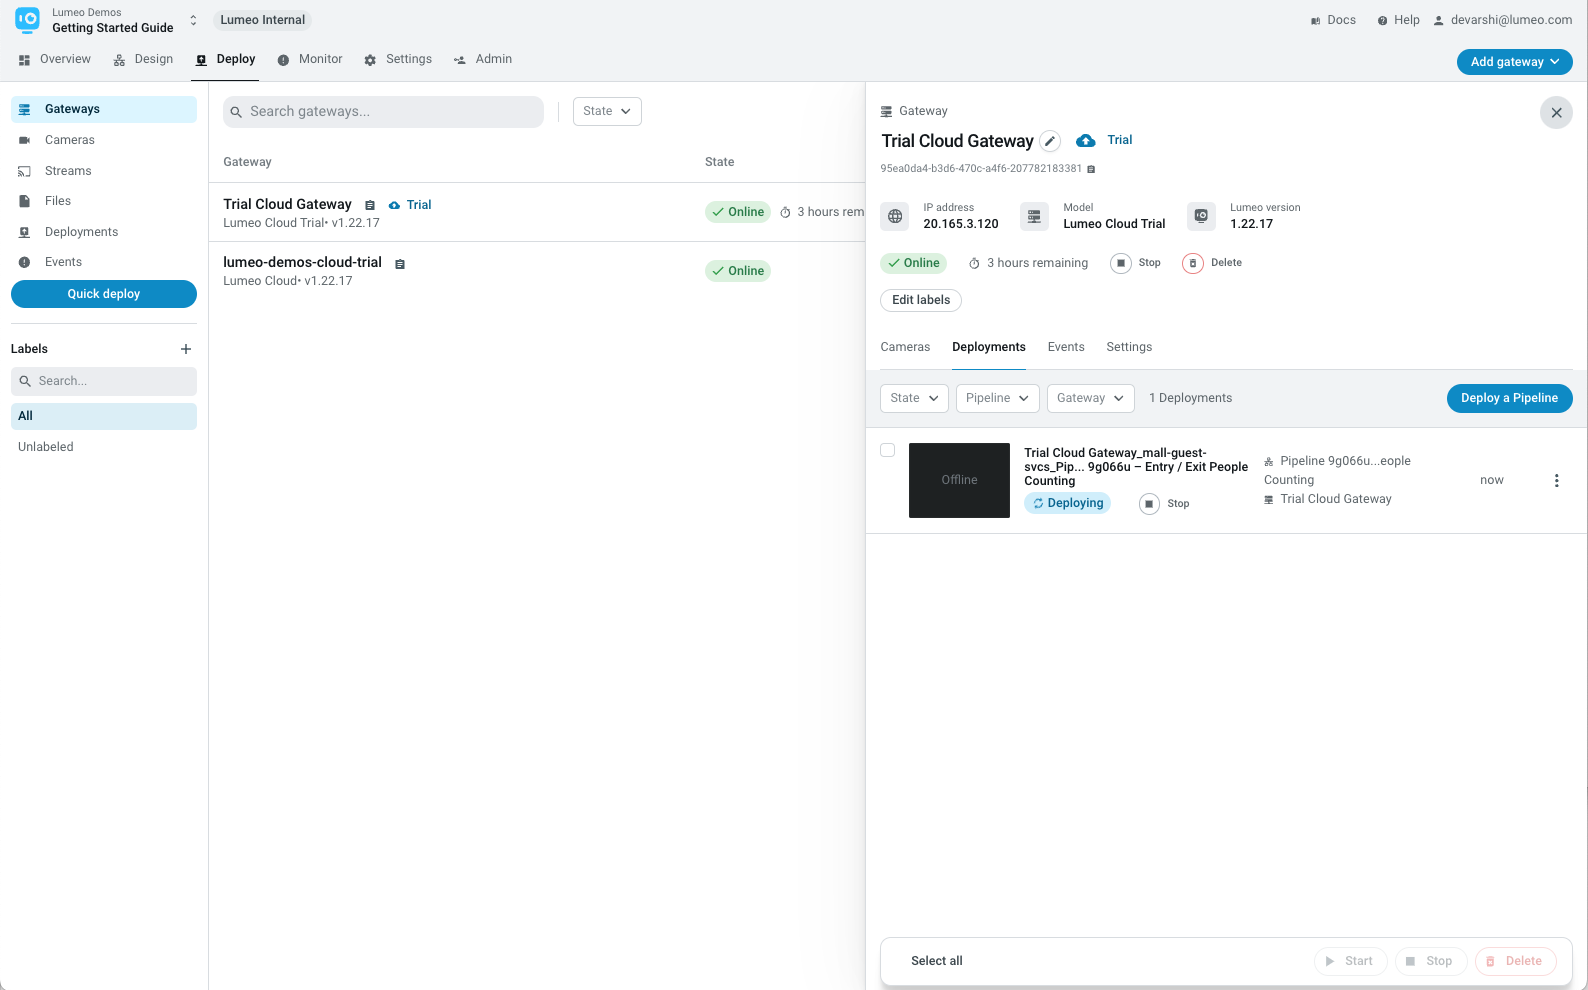
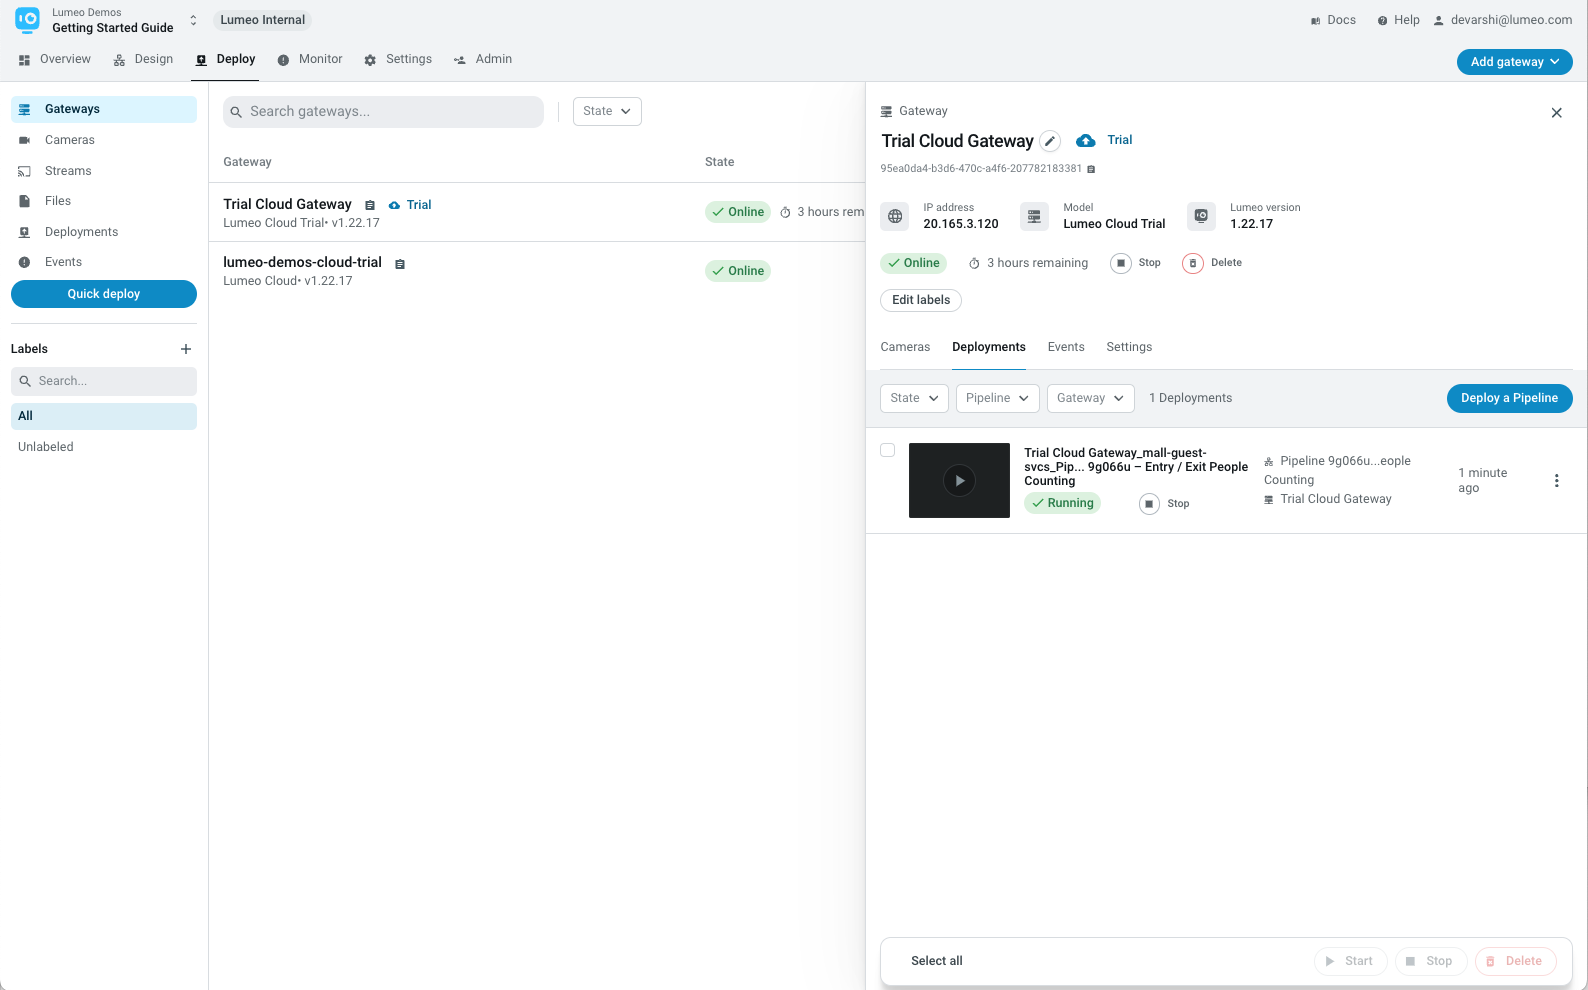
Deployment management
After the pipelines have been deployed, you will be redirected to the Gateway details page, and see the status of each deployment. The status will turn green (running) once the deployment has started. Note that on new gateways, this process can take upto 10-15 minutes.
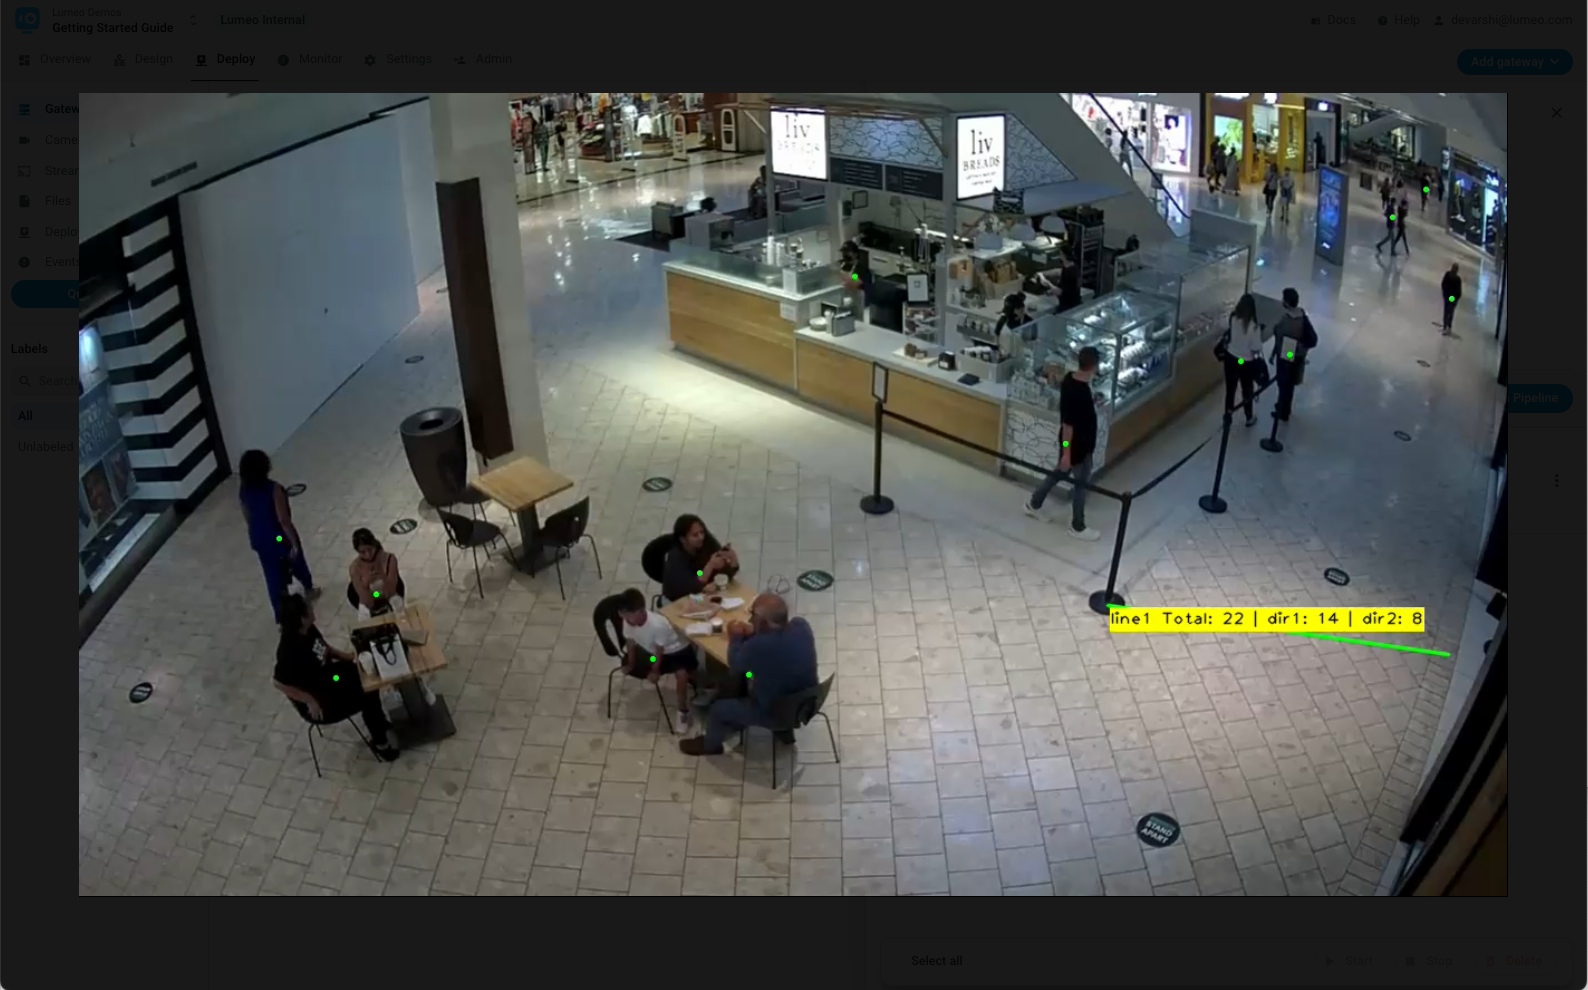
View output streams
With the deployment running, click on the play button to view any output streams generated by the deployment.
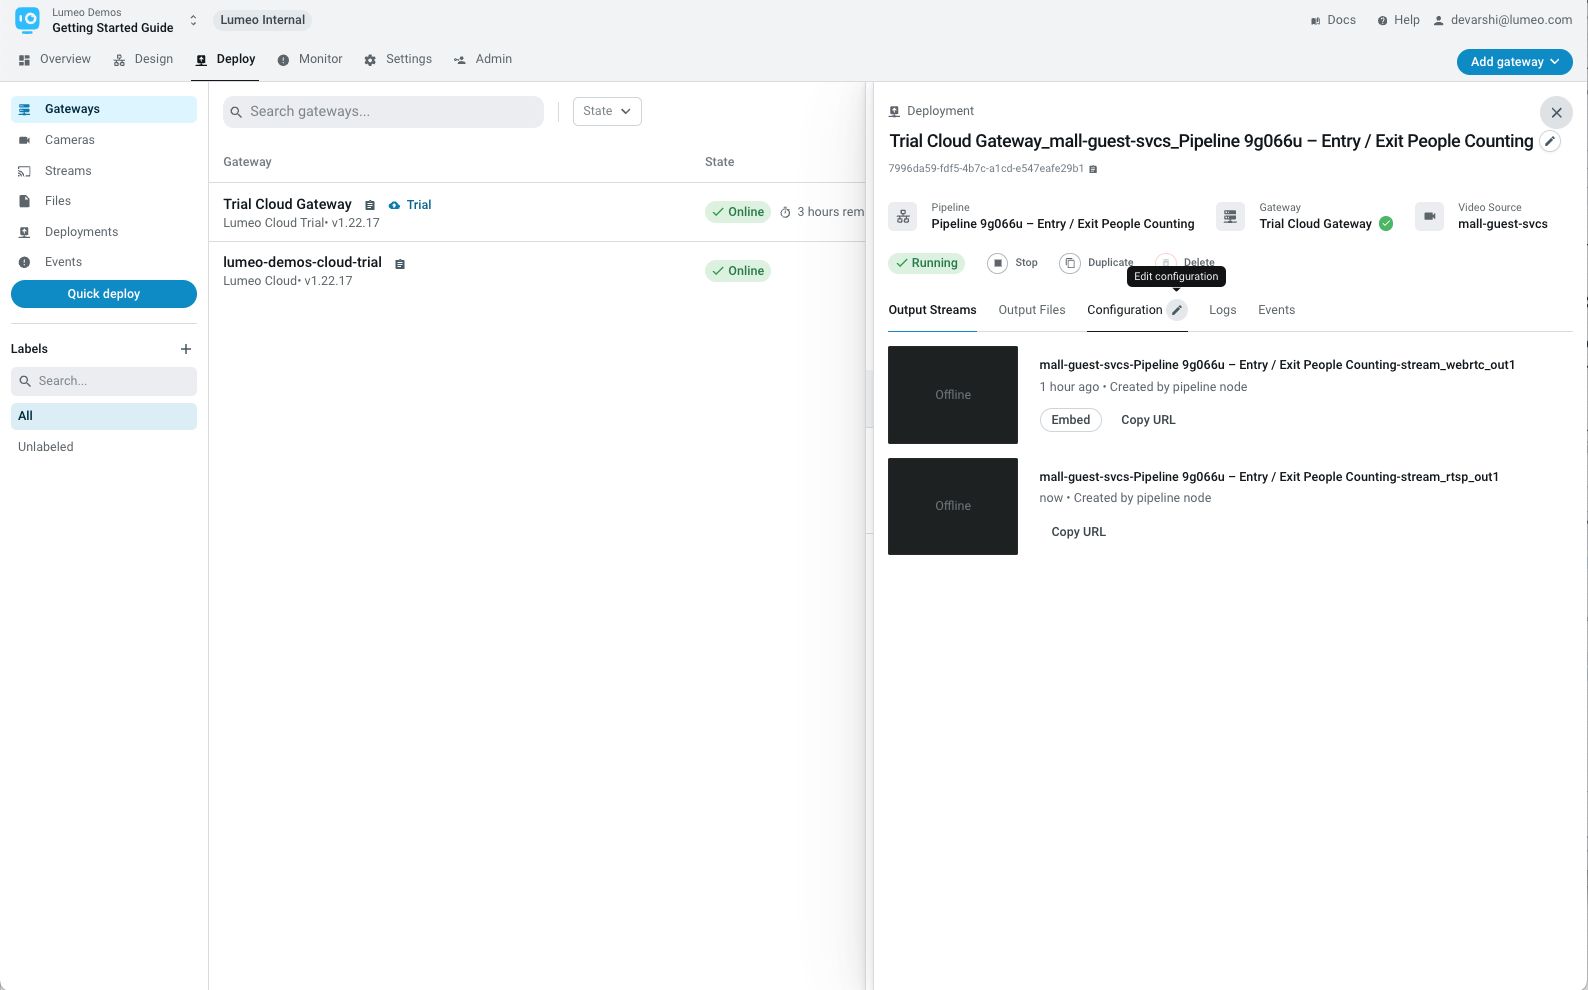
Modifying the deployment
To tweak any deployment settings, click the deployment's name or head over to Deployments section in the left nav.
The deployment detail drawer will show you a list of streams (and let you copy WebRTC URLs to embed or RTSP URLs play in VLC). To modify the deployment settings, click the pencil icon next to the Configuration tab or the Edit Configuration button.
This brings up the configuration editor, where you can make changes and click Deploy again to update the deployment.
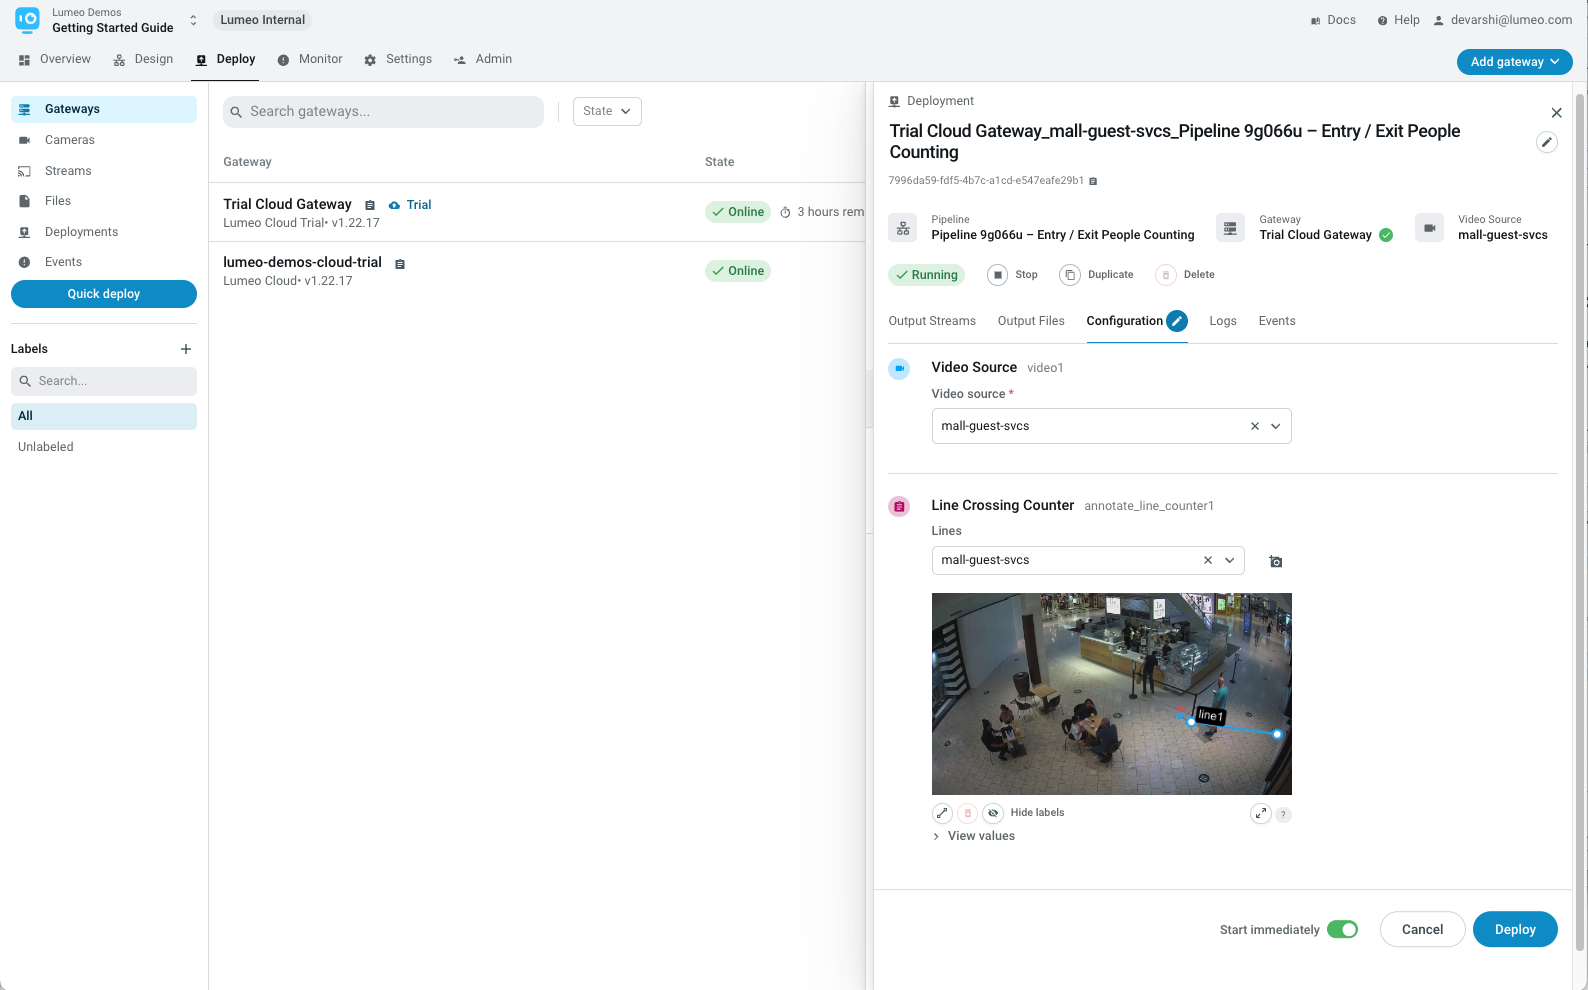
If you wish to further tweak this analytic, click the pipeline name near the top of this drawer to go to the pipeline editor and modify the analytic itself.
Learn more about managing deployments here : Deployments
Updated 11 months ago