
Single Sign On (SSO)
This guide provides step-by-step instructions for setting up SAML2 SSO authentication for Lumeo, which is available on Enterprise plans.
This guide provides step-by-step instructions for setting up SAML2 SSO authentication for Lumeo with examples provided for Okta and Google as Identity Providers (IdPs).
Overview
Step 1. Ensure you have a Lumeo account
Start by signing up for a free Lumeo account at https://lumeo.com/signup with the administrator email + password (Note: this step is only required for initial account creation. Password based logins will be automatically disabled after enabling SSO).
Make sure you use an email address at the same domain that is to be enabled for SSO.
Step 2. Configure Lumeo as an application with your IdP.
To do that, you'll use the following information from Lumeo:
- ACS and Start URLs: https://api.lumeo.com/v1/saml/acs
- Lumeo Entity ID: api.lumeo.com
- Name ID format: Email
- Name ID: Email
See the IDP specific guides below on how to setup the application.
Step 2. Provide the application metadata from the IDP to Lumeo
After configuring your chosen IdP, provide Lumeo support with the following information:
- Your Lumeo account organization name and workspace ID. Found in Settings under the left navigation panel.
- Email domain you use for your user's email addresses. Example :
lumeo.com - entity_id (SSO URL from your IdP)
- metadata URL or metadata contents from the metadata URL
- Certificate expiration date
Once Lumeo has this information, we will complete the SAML2 SSO setup on our end, enabling secure authentication for your organization.
Step 3. Assign the Lumeo application to your users using your IDP
After Lumeo support confirms the setup, follow instructions in your IDP to assign Lumeo application to your users.
Assigned users will be able to login using your IDP SSO, either directly from your IDP or when you enter that email address in Lumeo's login page. Password based logins will be disabled for your organization.
Step 4. Assign Lumeo permissions within Lumeo Console
Lumeo will automatically create new user accounts in Lumeo when an assigned user attempts to sign in using the SSO. These user accounts will not have any permissions assigned initially (see Role Based Access Control).
Your Lumeo account owner or manager will need to assign appropriate permissions to new accounts using Settings -> Members page in Lumeo console.
Alternatively, you can invite users using Settings -> Members page and pre-assign permissions for them. Then, when they accept the invite and login with SSO, they will automatically inherit those permissions.
Common IDP Configurations
Okta
- Log in to your Okta Admin Console.
- Navigate to "Applications" > "Applications".
- Click "Add Application" and then "Create New App".
- Choose "Web" as the platform and "SAML 2.0" as the sign-on method.
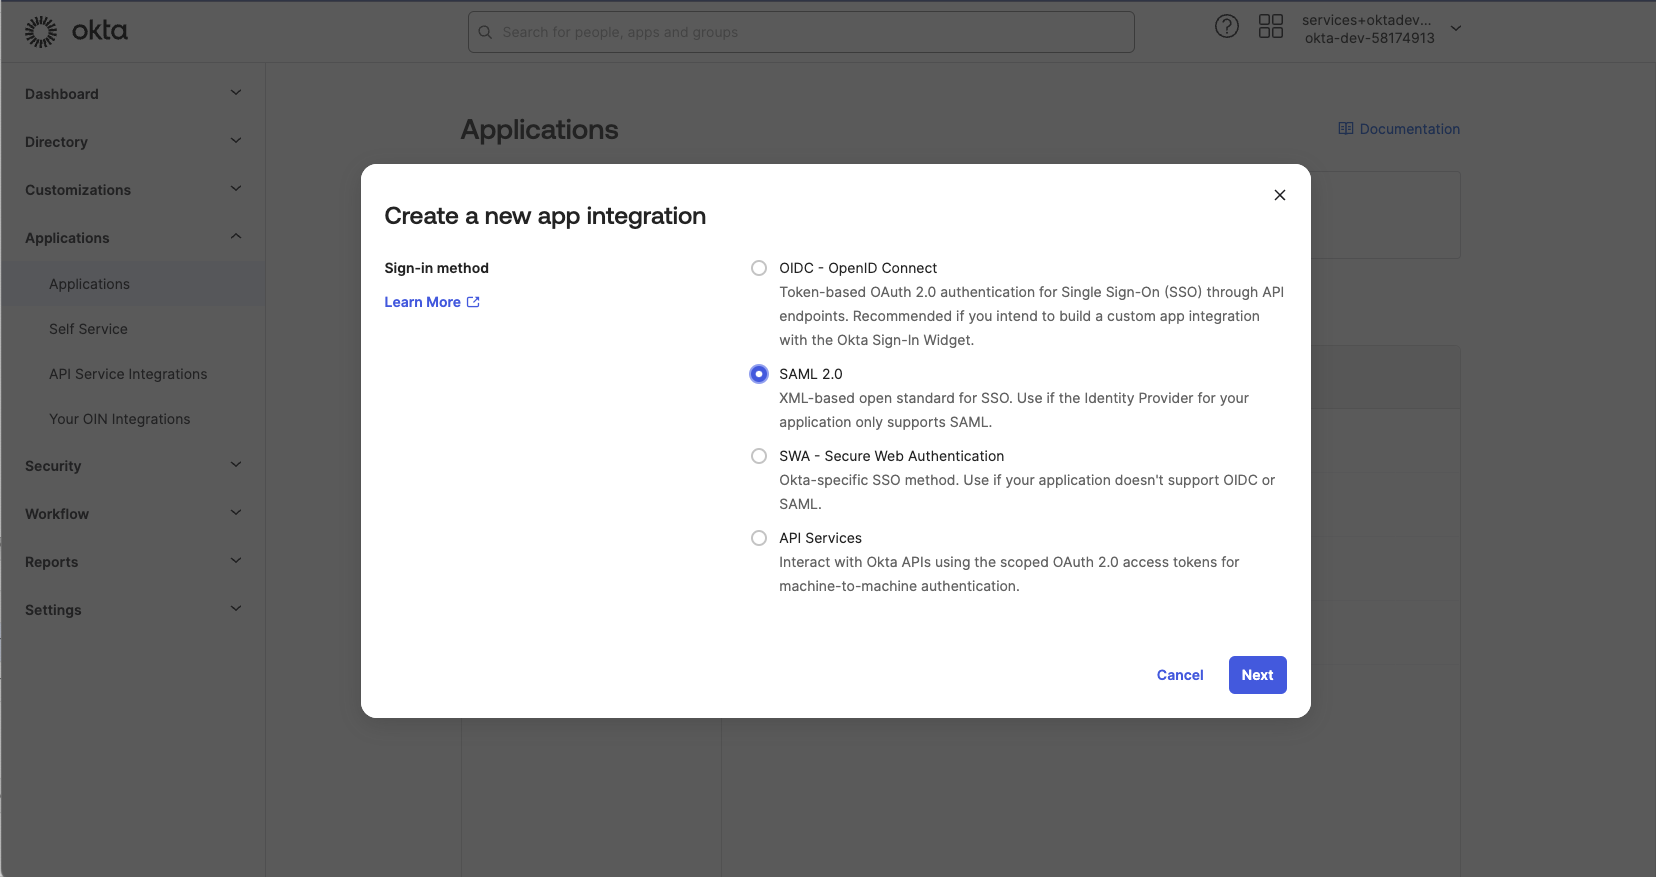
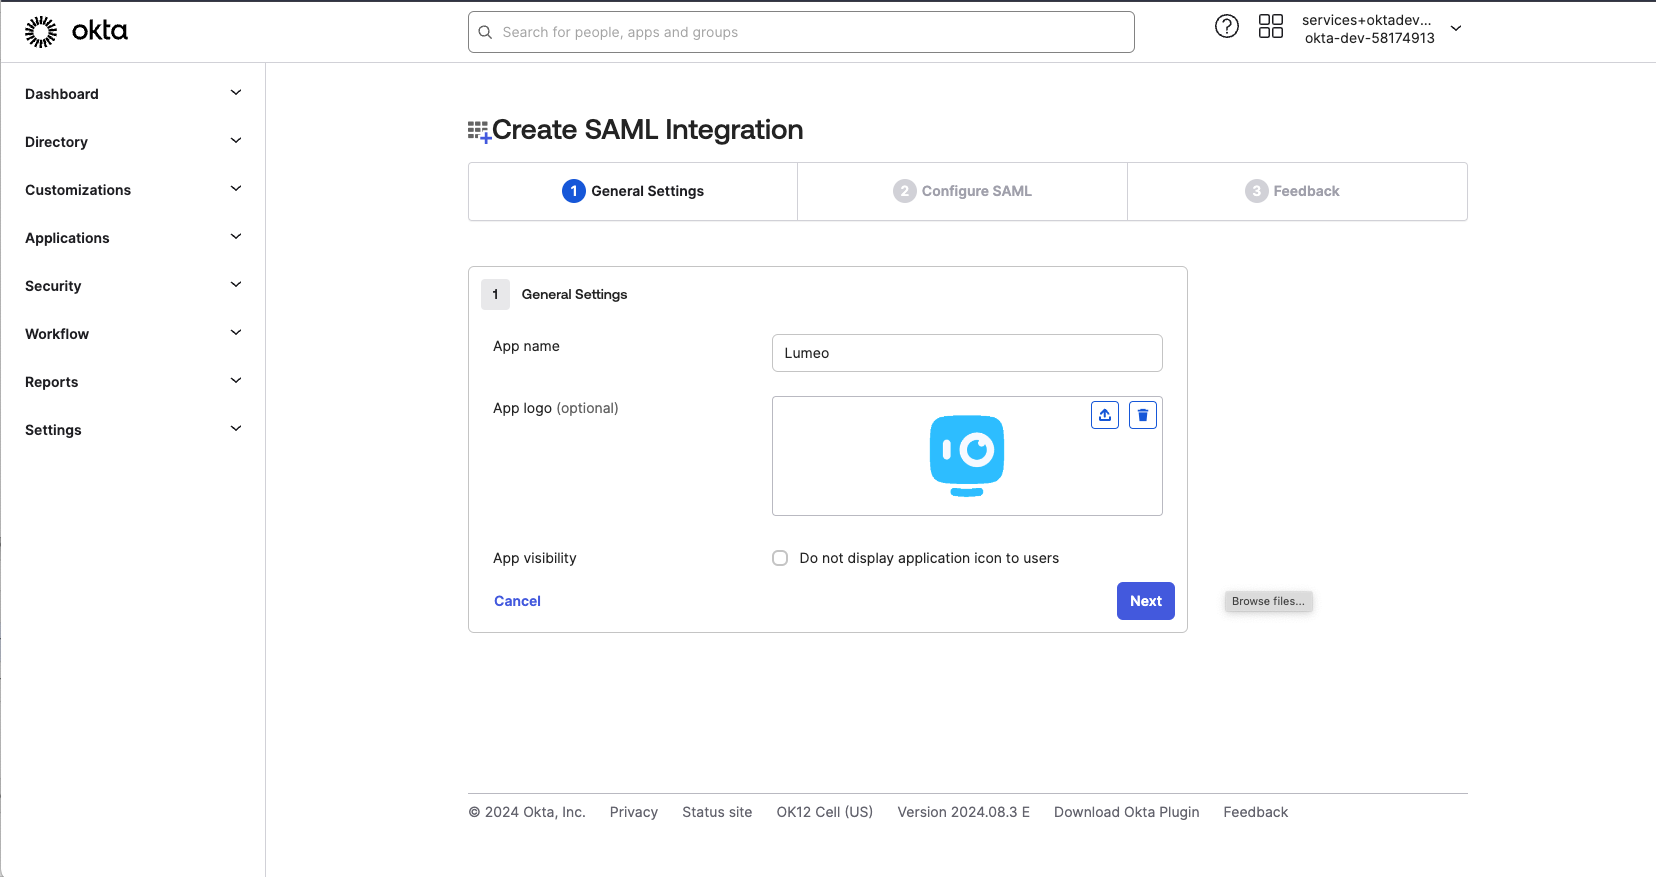
- Enter "Lumeo" as the app name and click "Next".
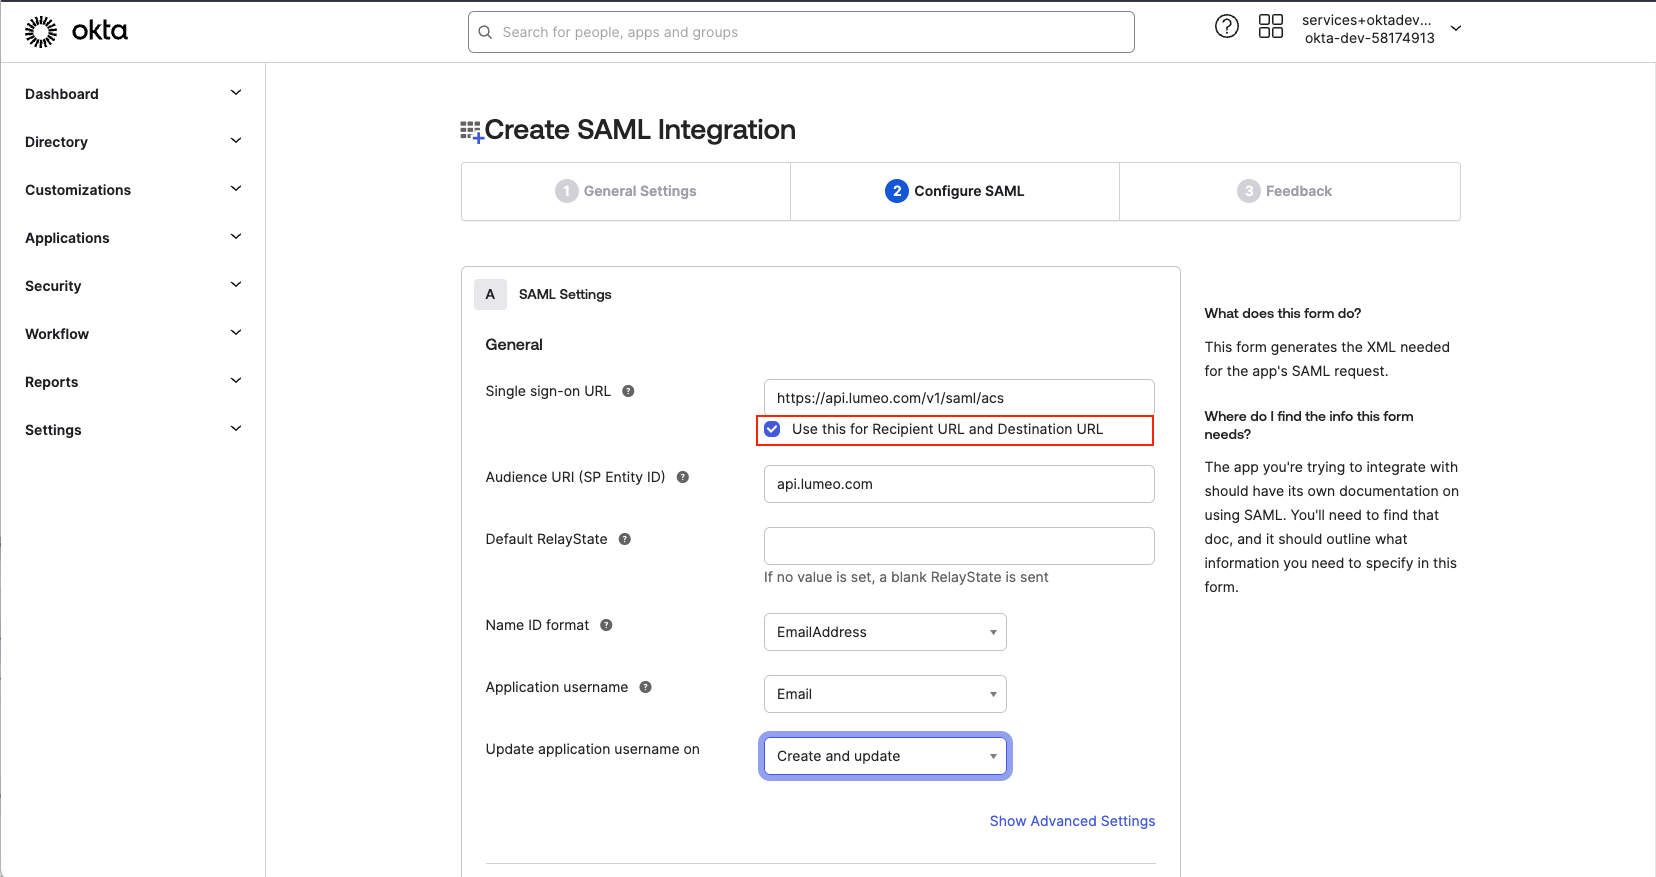
- In the SAML Settings, enter the following:
- Single Sign On URL:
https://api.lumeo.com/v1/saml/acs- Also, check the "Use this for Recipient URL and Destination URL" box.
- Audience URI (SP Entity ID):
api.lumeo.com - Name ID format:
Email - Application username:
Email
- Complete the setup and save the application.
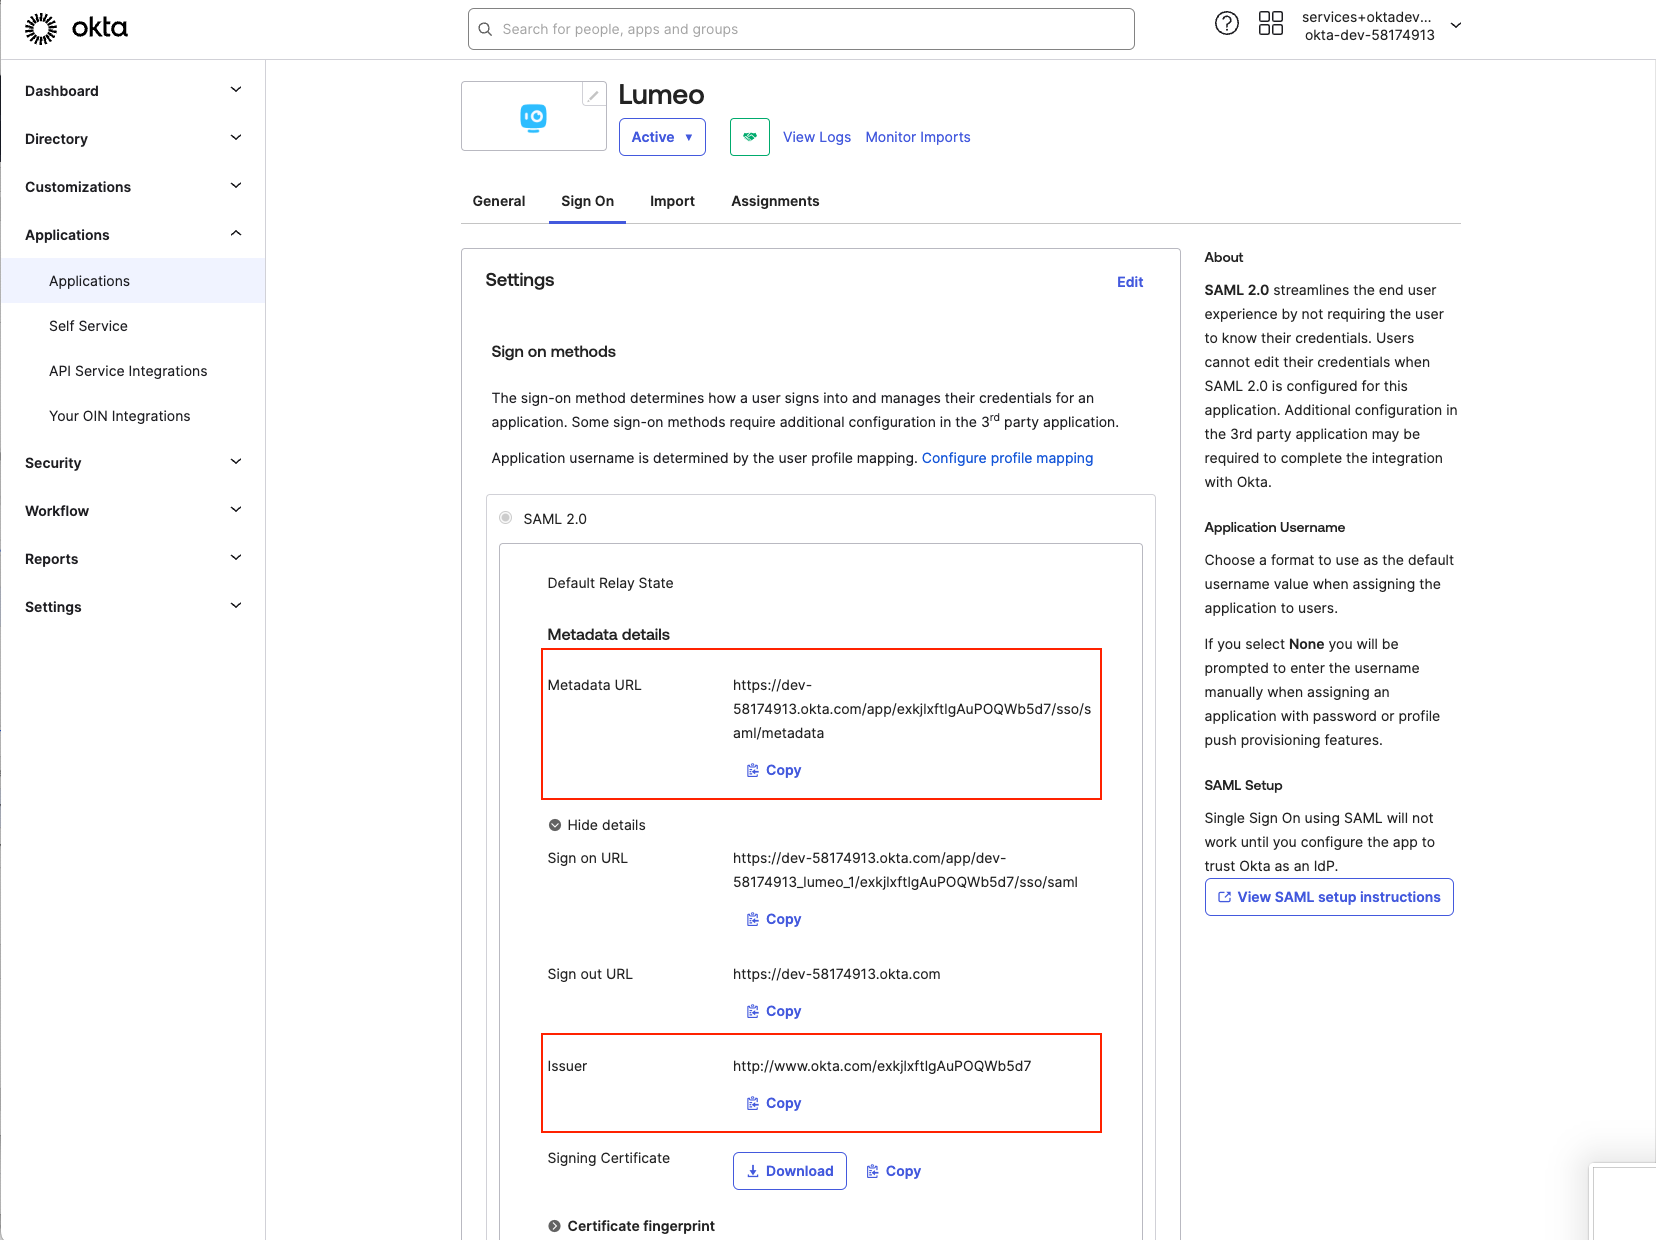
- In the "Sign On" tab of your new Lumeo app, find the "Identity Provider metadata" section. Note down the following information for Lumeo:
- Identity Provider Issuer (entity_id)
- Identity Provider Metadata IR: (metadata URL)
- X.509 Certificate expiration date (scroll down for certificate expiration date)
Google as IdP
- Log in to your Google Admin console.
- Go to "Apps" > "Web and mobile apps".
- Click "Add App" > "Add custom SAML app".
- Enter "Lumeo" as the app name and click "Continue".
- In the "Service Provider Details" section, enter:
- ACS URL:
https://api.lumeo.com/v1/saml/acs - Entity ID:
api.lumeo.com - Start URL:
https://api.lumeo.com/v1/saml/acs
- In the "Name ID" section, set:
- Name ID format :
Email - Name ID:
Basic information -> Primary email
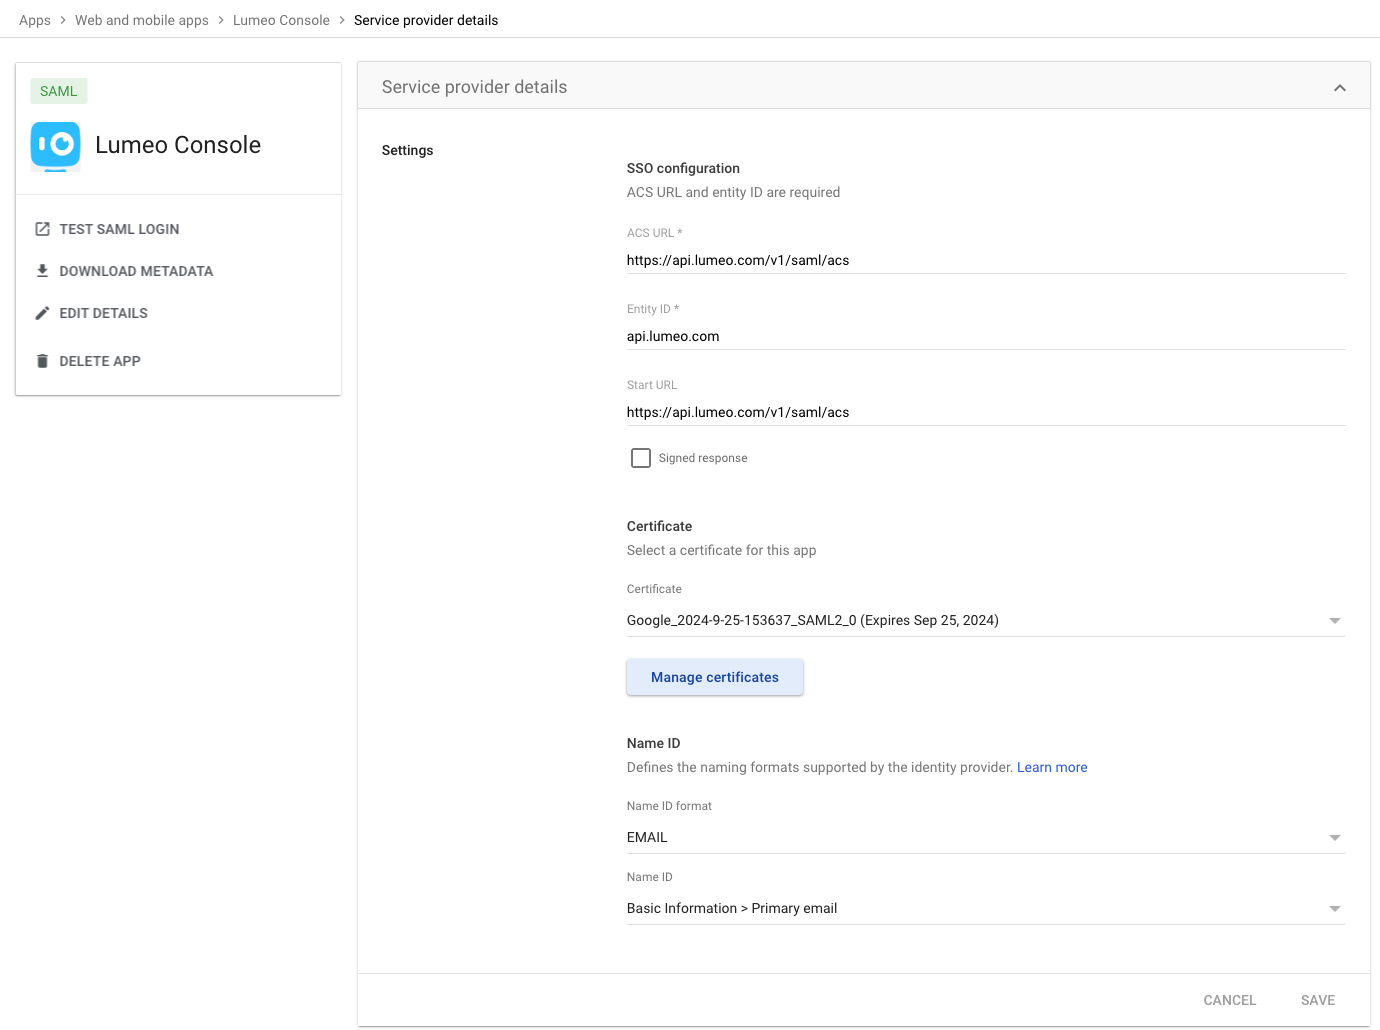
- Complete the setup and save the application.
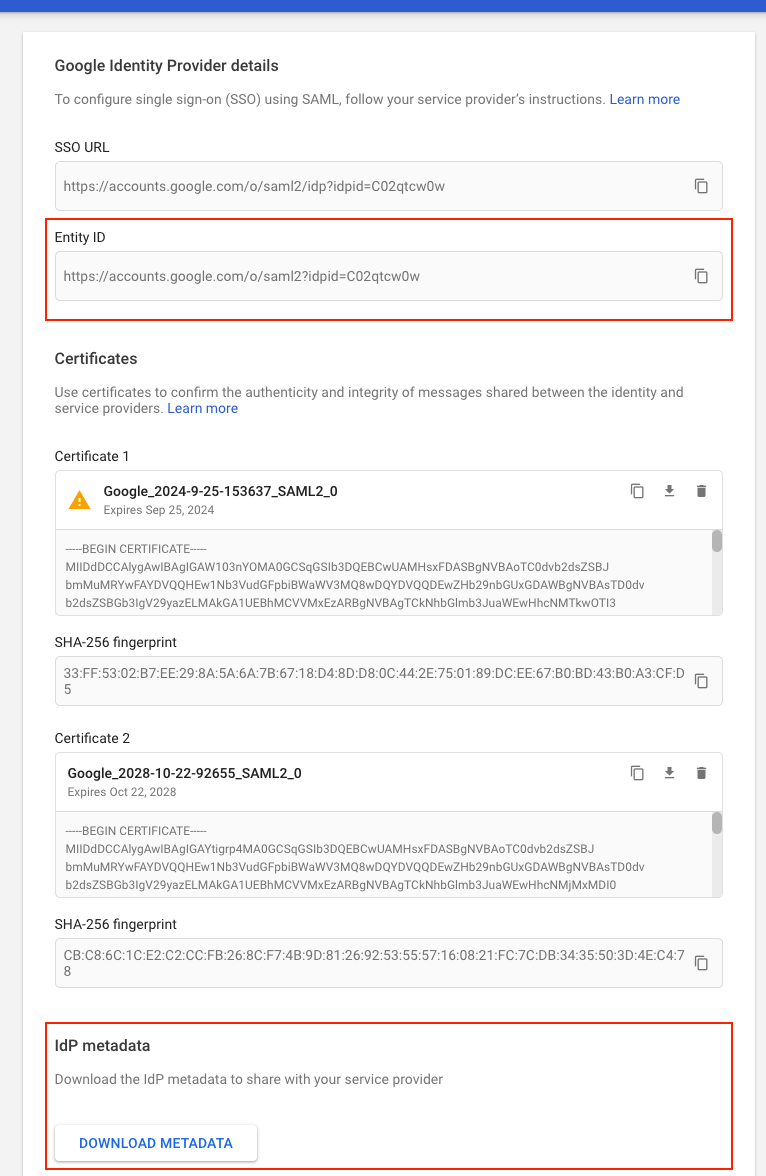
- Click Manage certificates to open the certificates page. Download the IdP metadata and note the Entity ID. Send both to Lumeo support.
Updated 11 months ago