PNM-C32084RQZ Setup
This guide is for integrators and users who are setting up a Hanwha PNM-C32084RQZ camera to work with your Lumeo account.
Overview
The Hanwha Vision PNM-C32084RQZ camera ships with an embedded Jetson, which is factory setup to be a Lumeo-Ready gateway, with a web interface that make it easy to link it to your Lumeo account. Once linked, the device can then be managed from Lumeo Console.
Follow these steps to setup your PNM-C32084RQZ camera.
Initial Setup
Before starting the setupEnsure you have a Lumeo account that is upgraded to the Enterprise plan. See Deployment Quick Start or Account Management for instructions on creating a Lumeo account and upgrading it.
- Power on and plug in the camera into your network.
- Setup a camera password, and login to the camera web interface. Ensure the ports are mapped as shown below or enable the Bridge.
| To camera | To Jetson | Description |
|---|---|---|
| 8080 | 8080 | Optional For ONVIF discovery |
| 8443 | 8443 | RequiredTo access Lumeo Gateway's web interface |
| 8555 | 8555 | Optional To access Lumeo output streams via ONVIF & RTSP |
| 8888 | 8888 | Optional To playback Lumeo output streams in Lumeo Gateway's web interface |
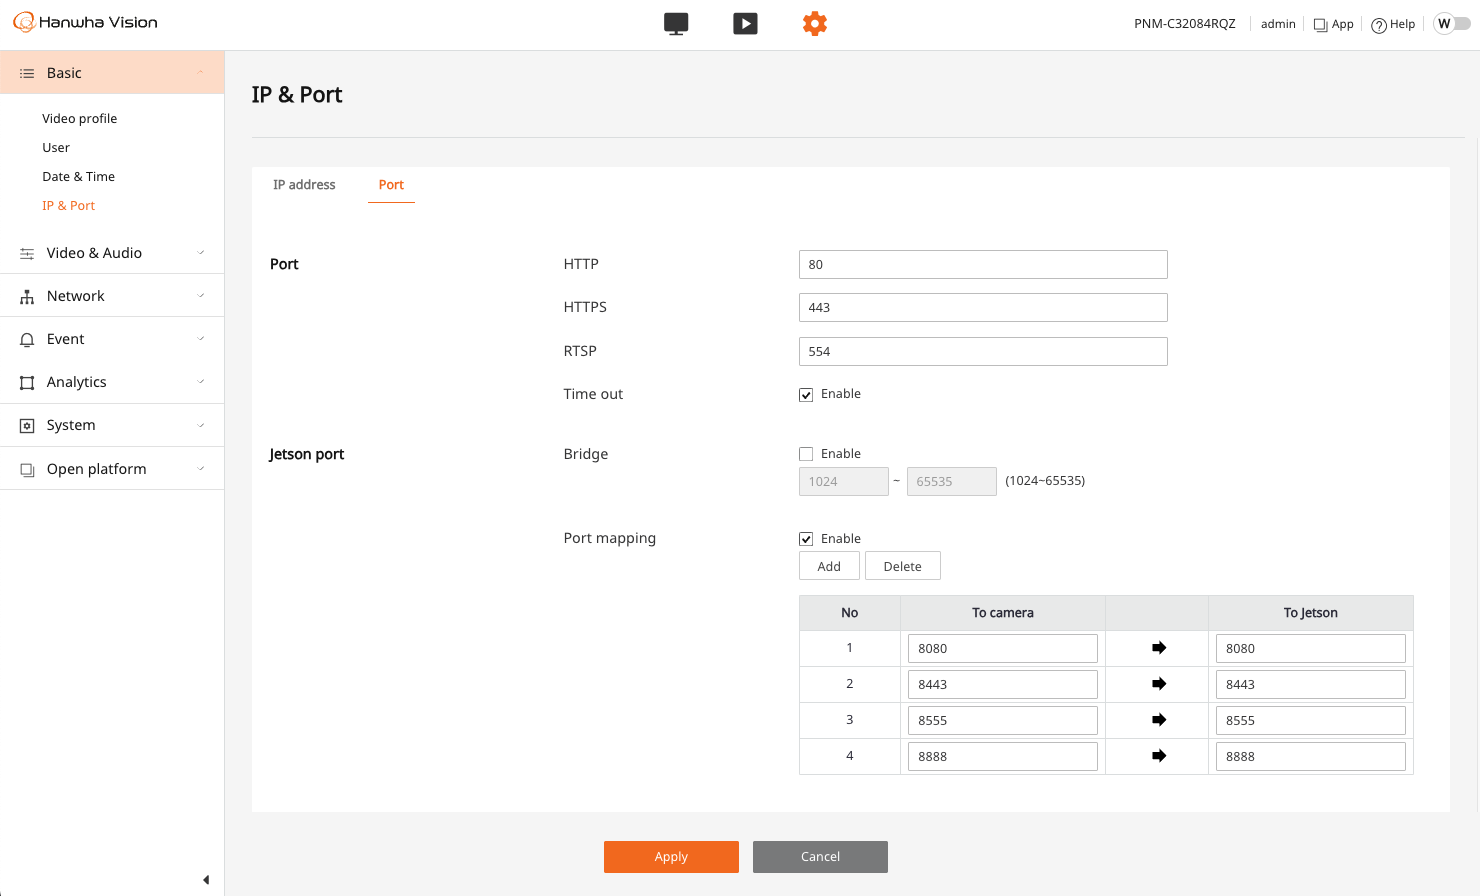
Camera port settings
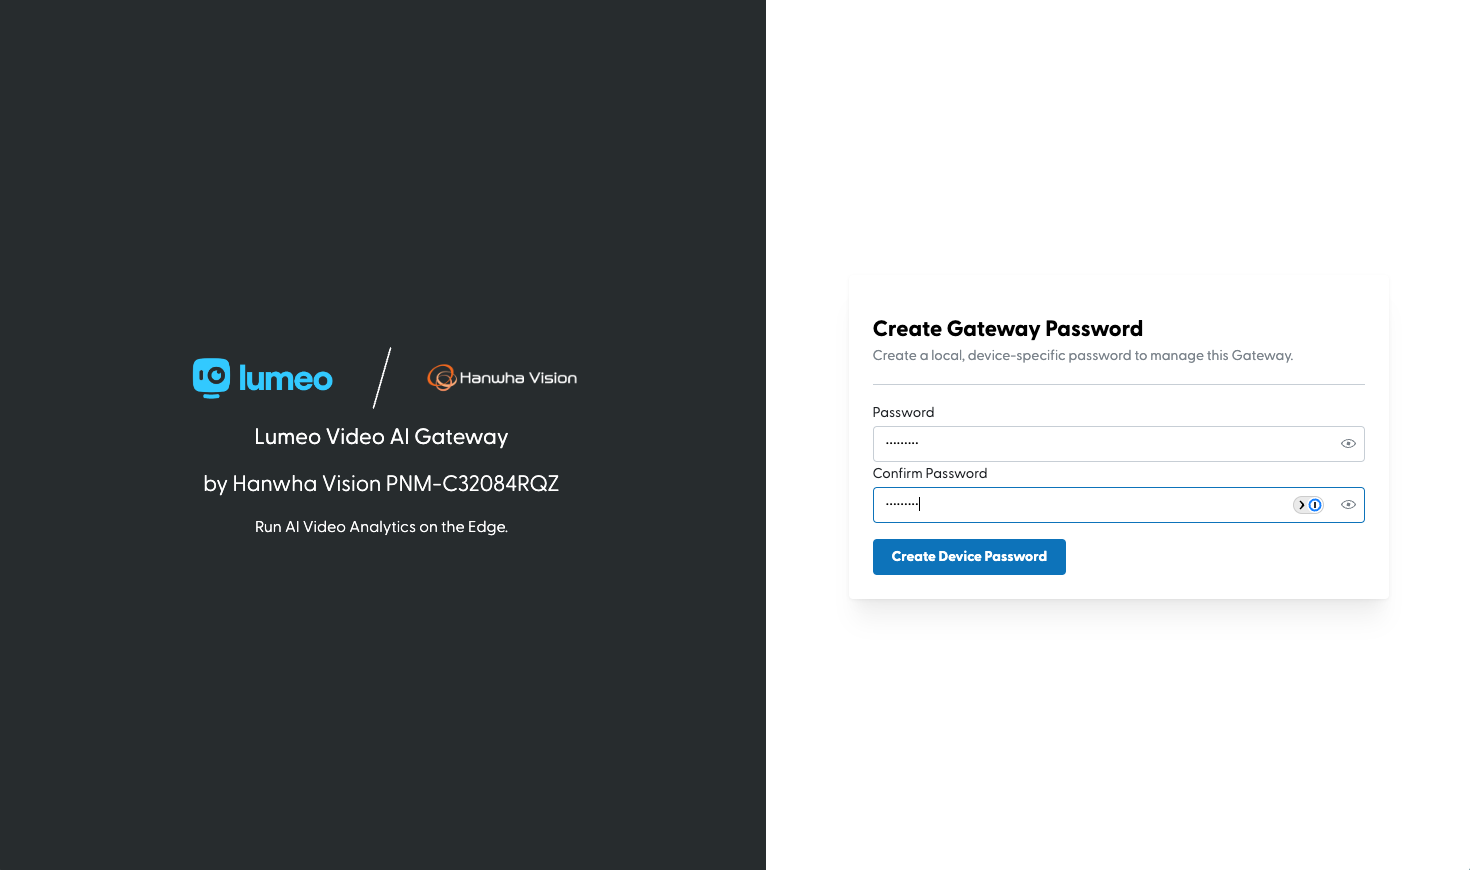
- Navigate to the Gateway management interface using a web browser (at
https://camera-ip:8443), and create a device-specific password. This is separate from your Lumeo account password, and is used just to manage the device.
Heads upBe extra sure to specify the
https://prefix and the port:8443in the browser since this is not a standard HTTPS port.
You will also need to accept the browser warning since device uses self-signed certificates.
- Run a connectivity check to Lumeo cloud services by visiting the Status tab. Ensure there are no connectivity errors. If you see any, refer to Security & Network guide to setup your network to allow the Gateway to connect to Lumeo's cloud services.
As a general note, Lumeo Gateway requires unrestricted outbound connectivity to make secure connections to various Lumeo services and may not work well with VPN or outbound connectivity restricted networks.
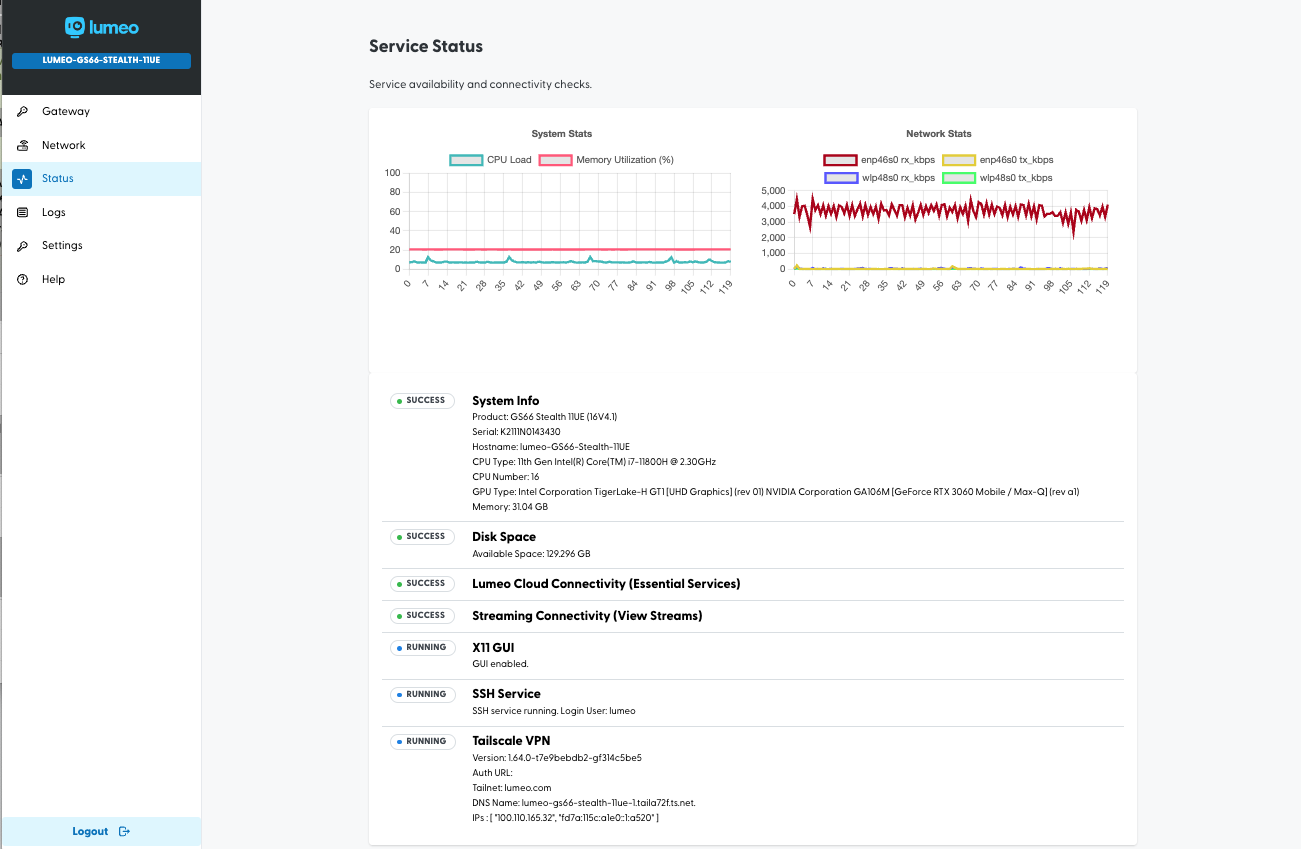
View status and run connectivity check
- Log in to the Lumeo Console and generate a Gateway token to link the Gateway to your Lumeo account in the cloud. Copy the workspace ID (#3 in the image below) and token (#4 in the image below).
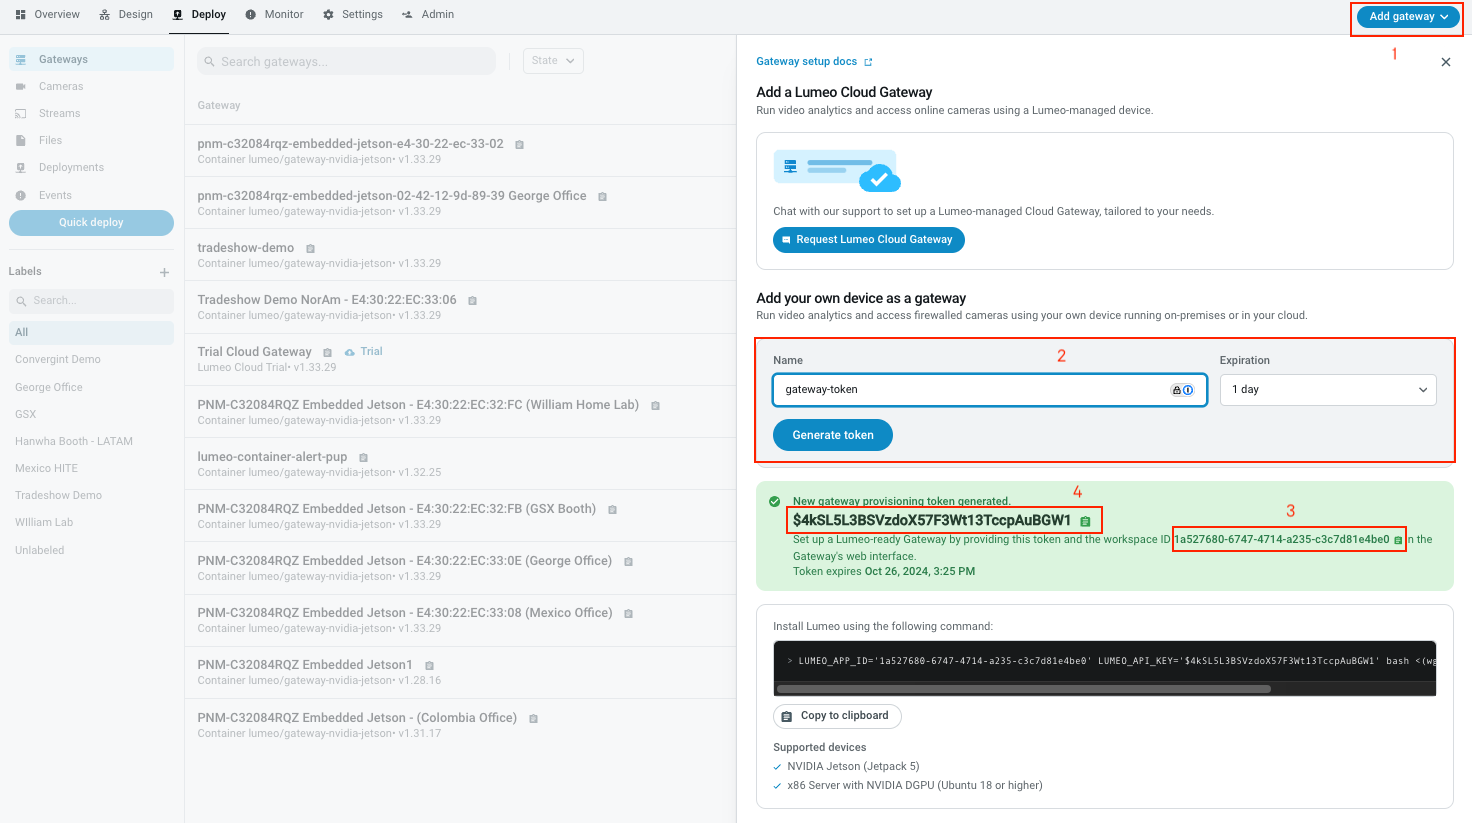
Go to Lumeo web console -> Deploy -> Add Gateway -> Generate token. Copy workspace ID & token.
- Head to the Gateway web interface -> Gateway section. Click on Connect to Lumeo Workspace, and provide the workspace ID and token you copied from the Console.
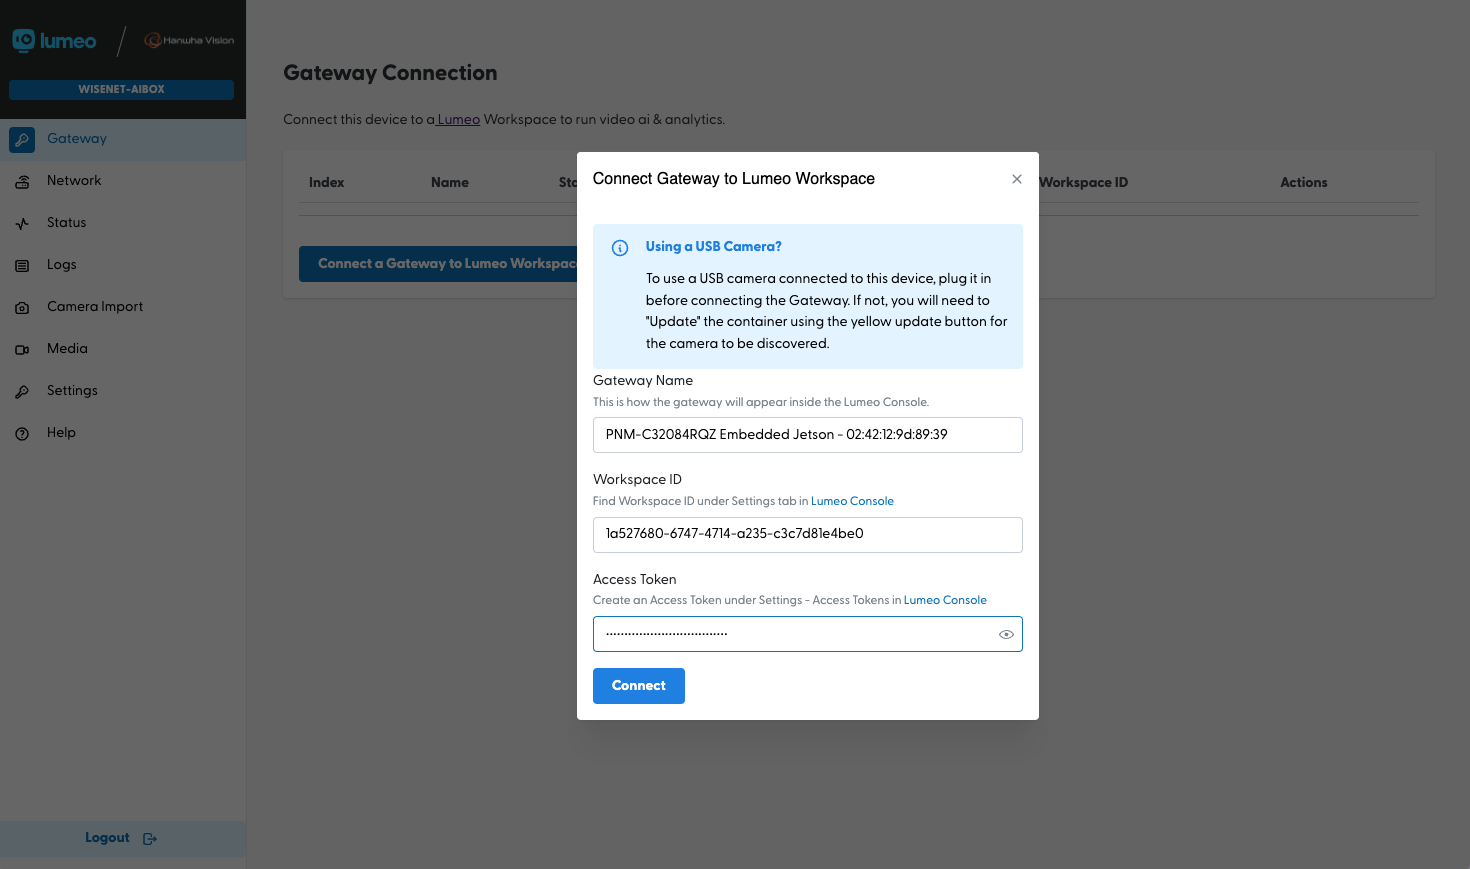
Provide the token and workspace ID. Then click Connect
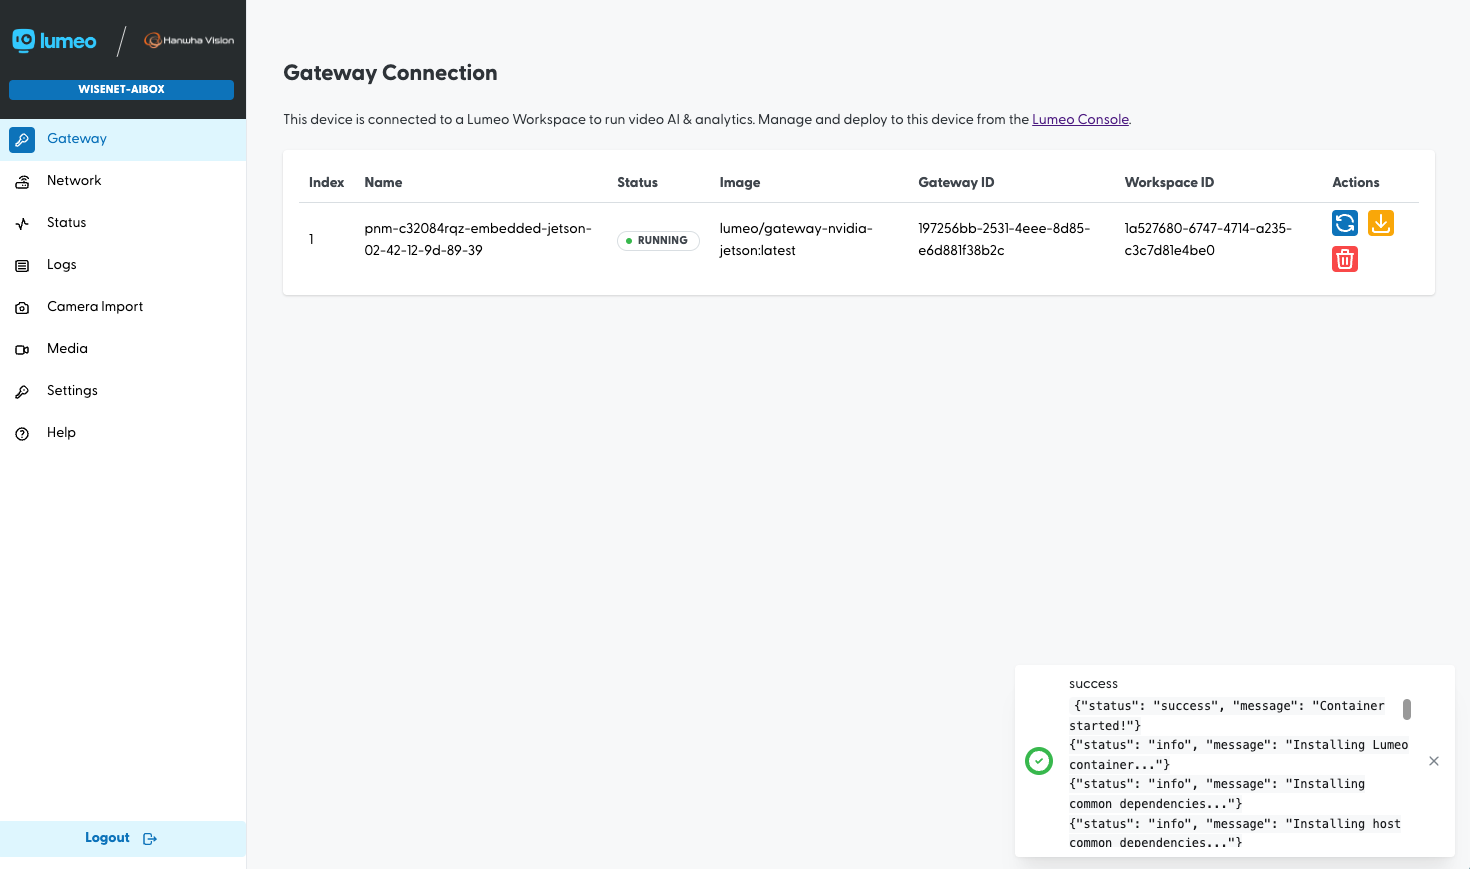
When connected, you will see the gateway in the section here. Verify that the status is Running.
- Add the Camera to Lumeo console. Go to Gateway Web interface -> Camera Import -> Hanwha PNM-C32084RQZ and click "Add to Lumeo". Ensure you check the "Configure Camera" option to set camera settings optimally for Lumeo.
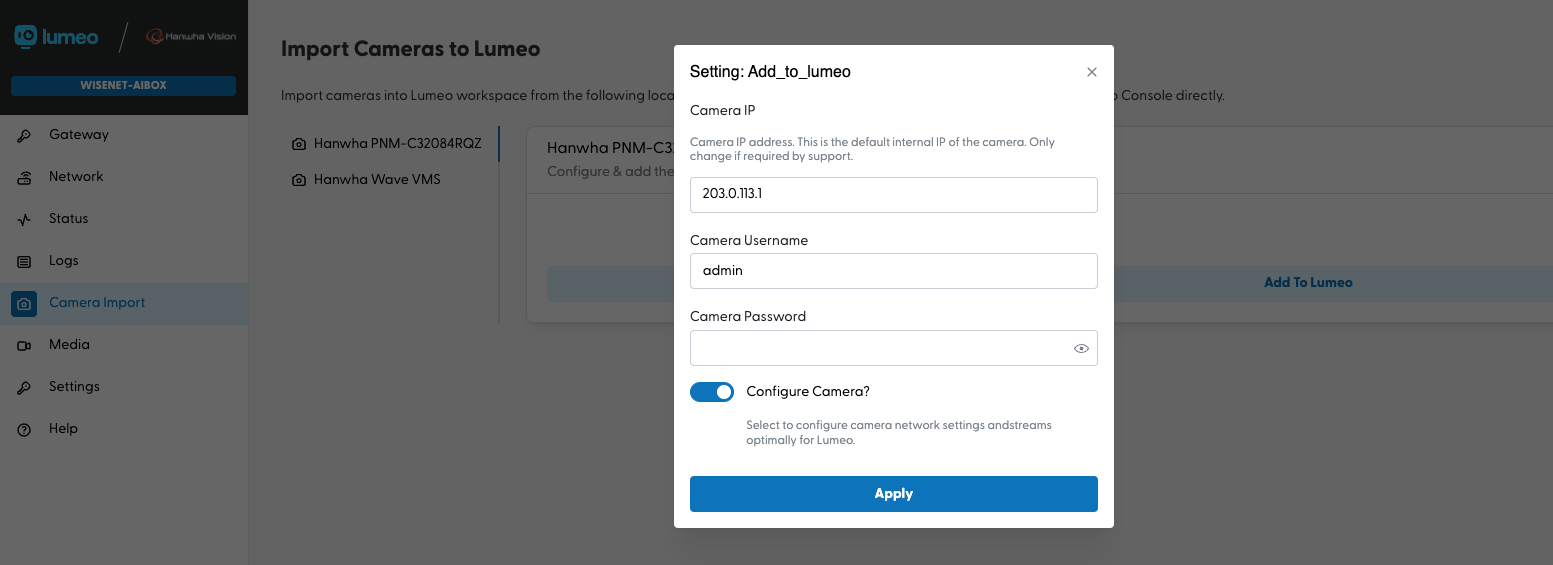
Provide camera credentials to add the camera to Lumeo
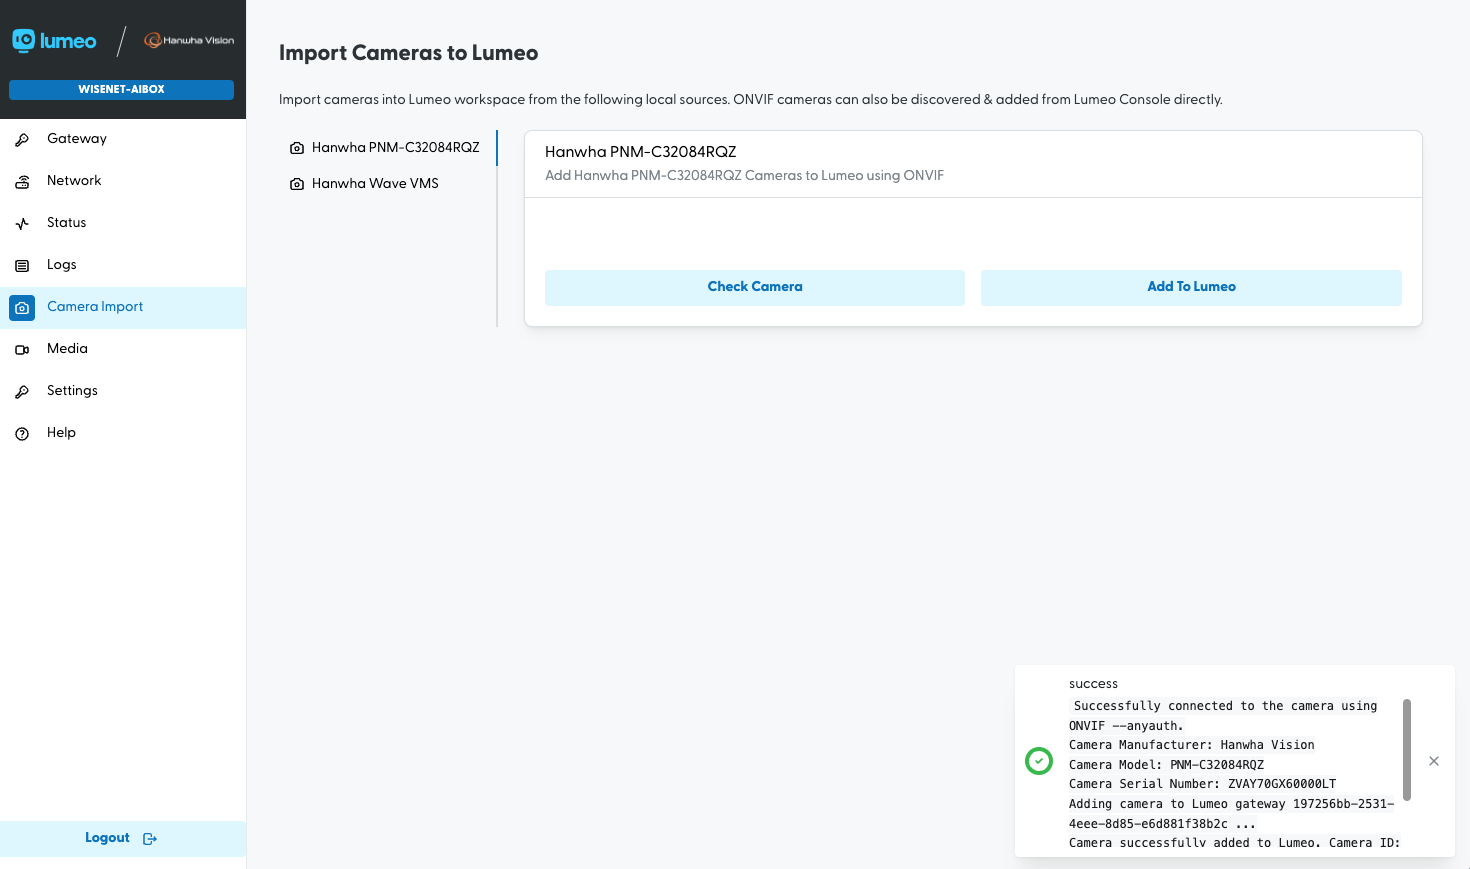
Camera added successfully
- Go to Lumeo Web console -> Deploy -> Gateways, and verify that the Gateway and Camera appear in your Lumeo web console.
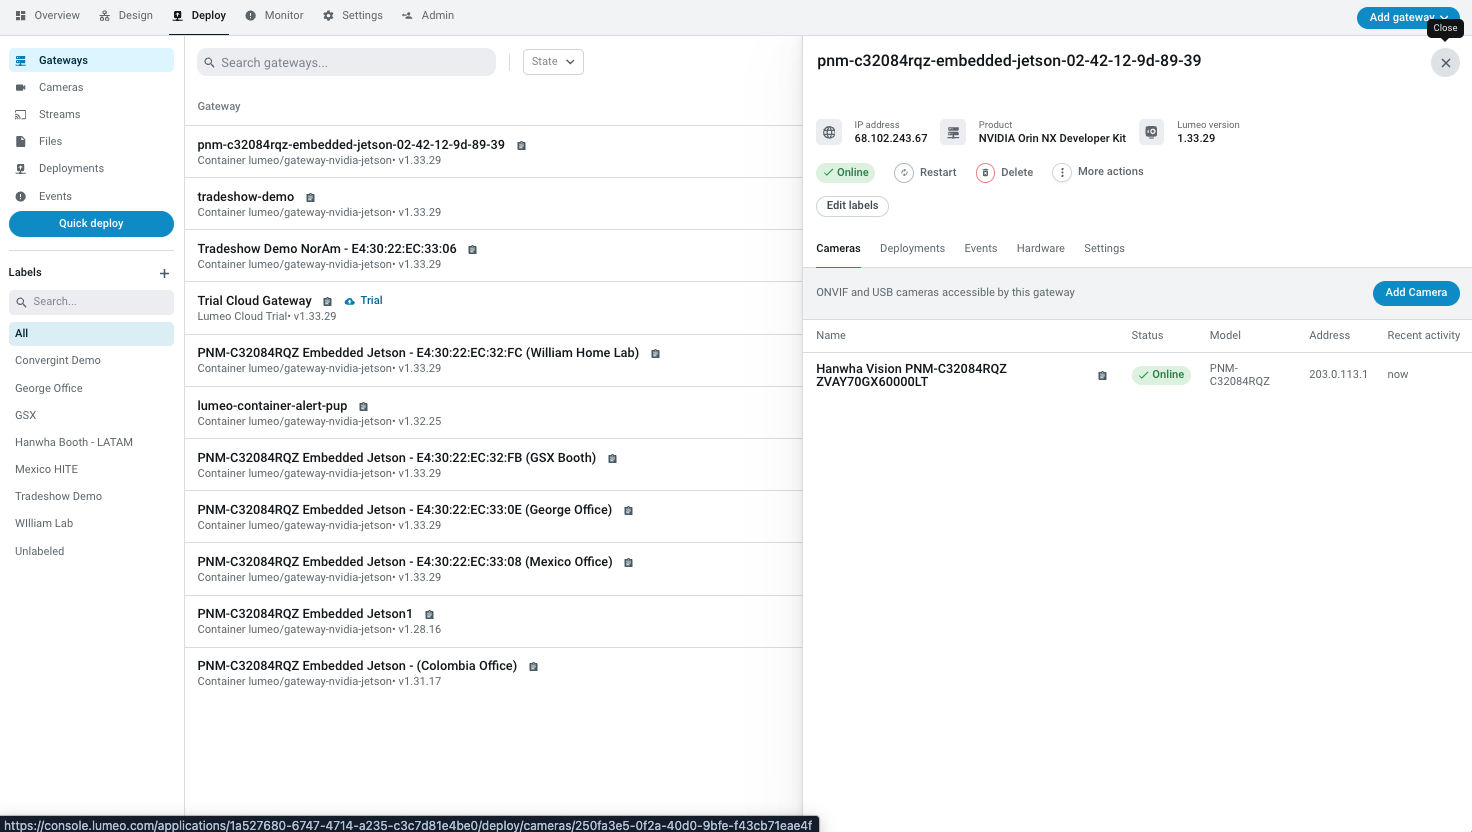
Gateways page lists your new gateway, and clicking on it shows you the camera linked to it.
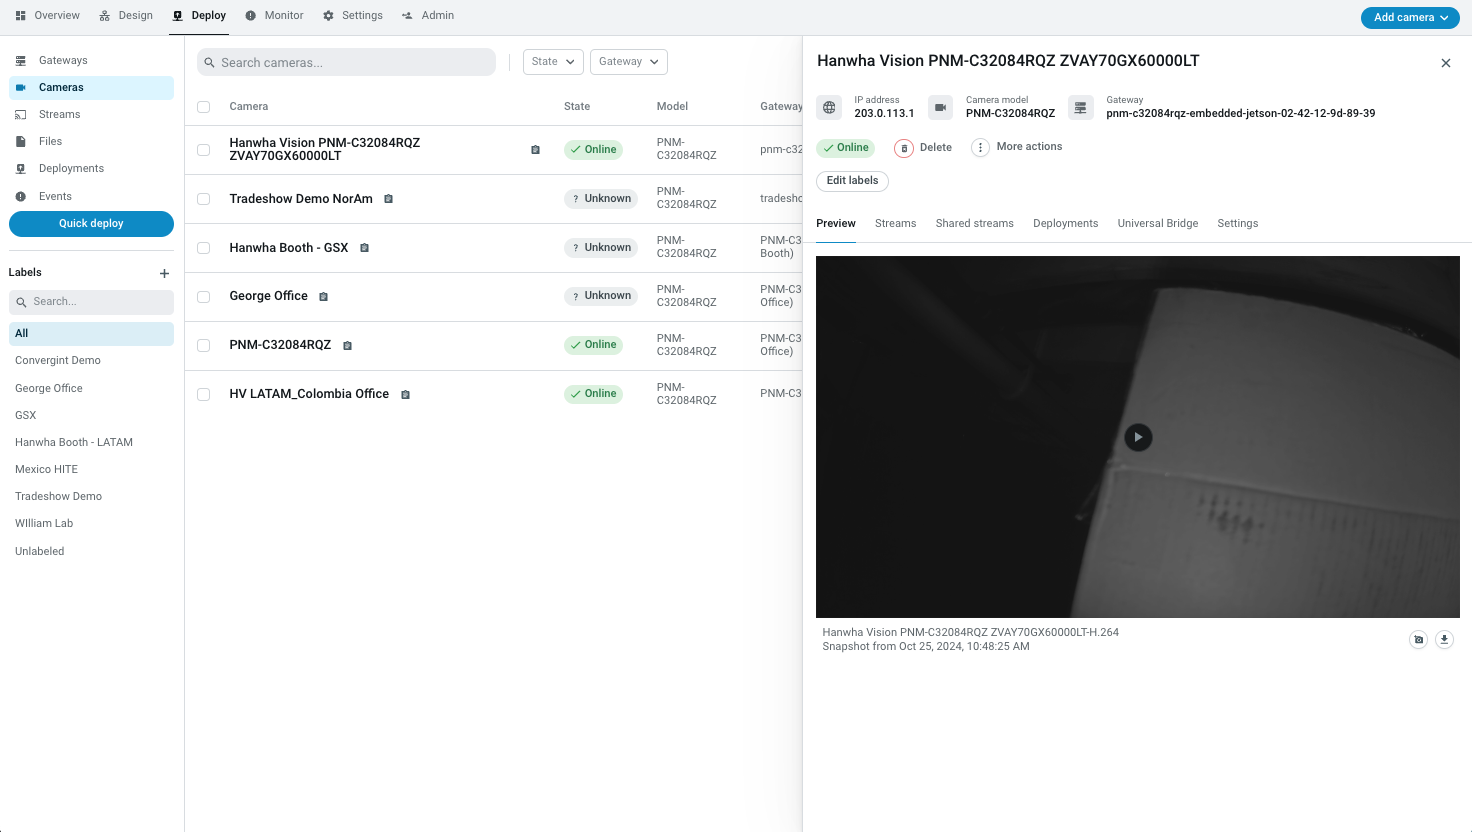
Head to Cameras section and click the camera name to view it. Each sensor will appear as a separate "Stream" under the Camera details page -> Stream tab.
- You are now ready to setup other cameras and deploy analytics to this device from the Lumeo Console. If you want to process other Cameras on this embedded Jetson, follow the Camera Setup Guide to link other Cameras to your Lumeo workspace.
Note that this gateway is embedded within the Hanwha camera and hence cannot discover other cameras on your network. You can add other cameras manually or as RTSP streams.
If you need to set the device up for remote access, see Additional Settings section under Lumeo-Ready Gateways page.
Deploying Analytics
Follow the Quick Deploy process outlined in Deployments to quickly deploy analytics with this gateway and camera.
When deploying a new analytic for the first time on the PNM-C32084RQZ, we strongly recommend that you stop all other running deployments, then deploy the analytic and wait for it to get into Running state. After you have all the analytics running once, you can then start them all up together.
Note that there is a Hanwha Vision category in the Solutions gallery with pre-built templates that are optimized for the PNM-C32084RQZ. You are free to deploy other analytics, but do note that performance may vary or you may not be able to deploy them on all channels of the camera. Contact Lumeo support if you have questions about other specific analytics.

Hanwha Vision category in Quick deploy.
View output streams locally
You can start a local media server on the Gateway to view gateway's output streams locally. To do so, head to Settings -> Media Server, and enable it, setting a media password.
Then click the Local Streams tab below and "Refresh Streams" if you don't see any output streams in the list.
Note: You must first deploy pipelines with output RTSP streams on the gateway using Lumeo's web console for the Local streams to appear here.
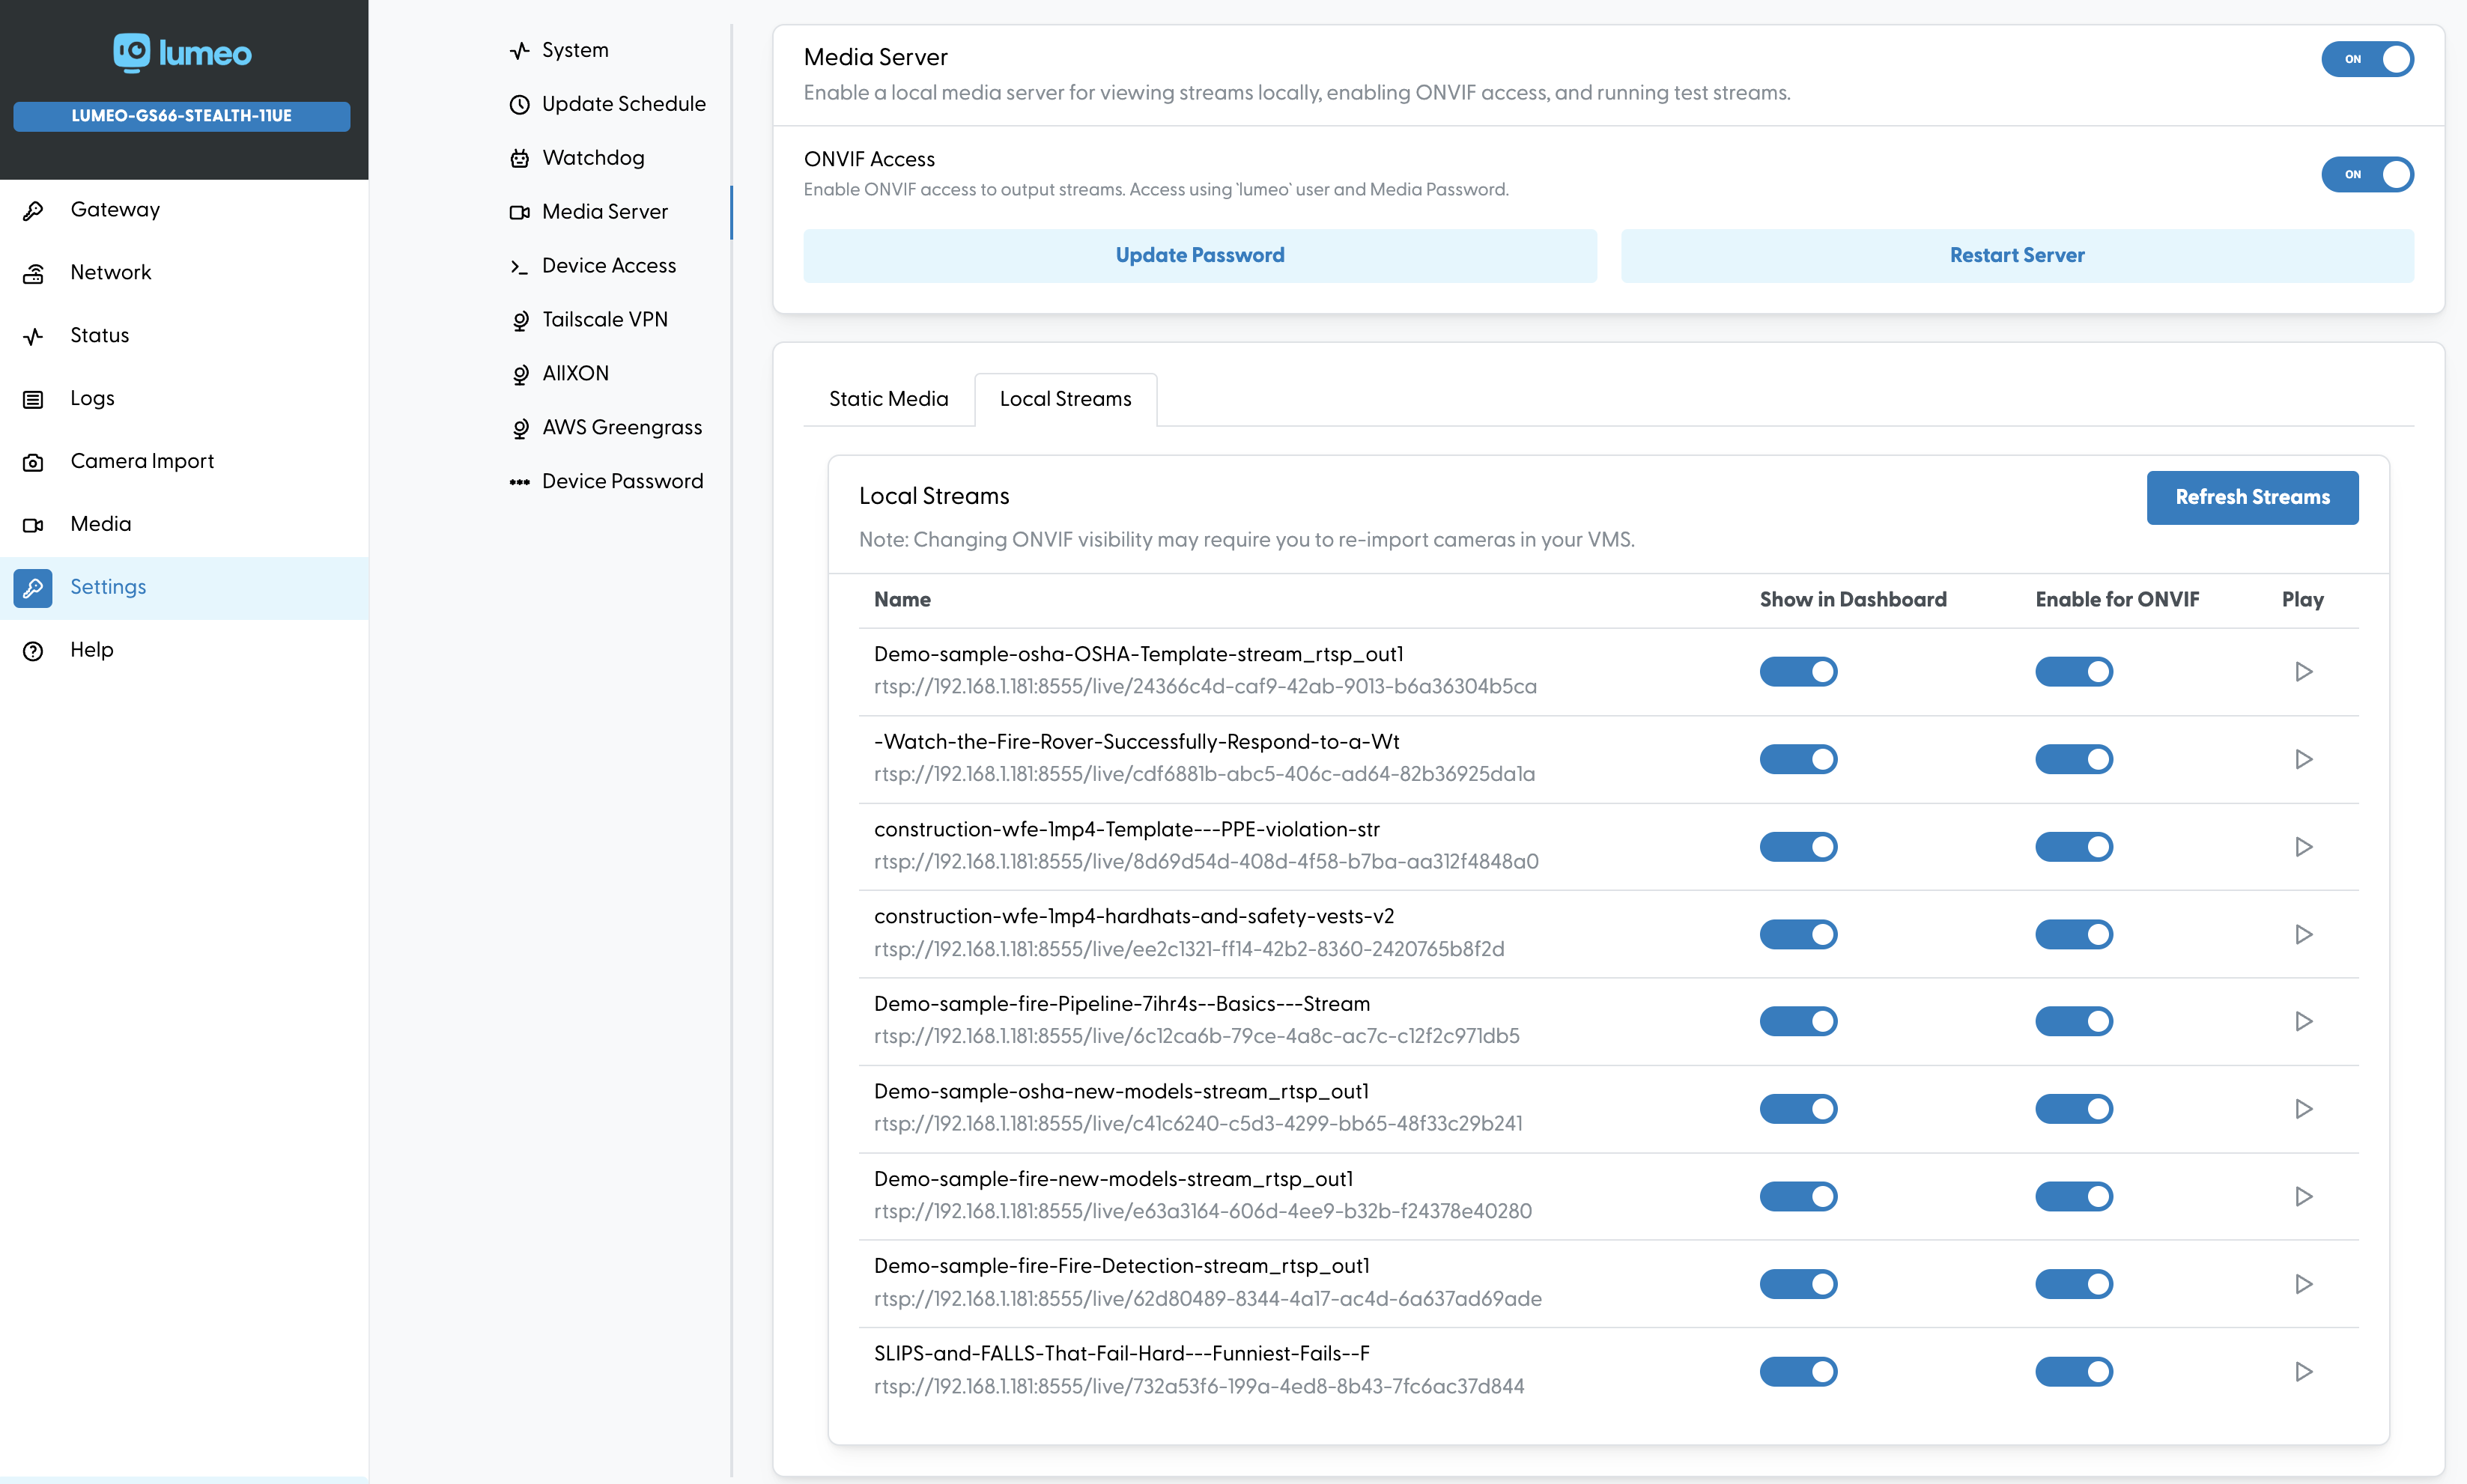
Turn on the media server, view list of Local output streams below, and refresh them if you don't see any. Toggle "Show in Dashboard" off for any streams you don't want to view in the Media view on the left.
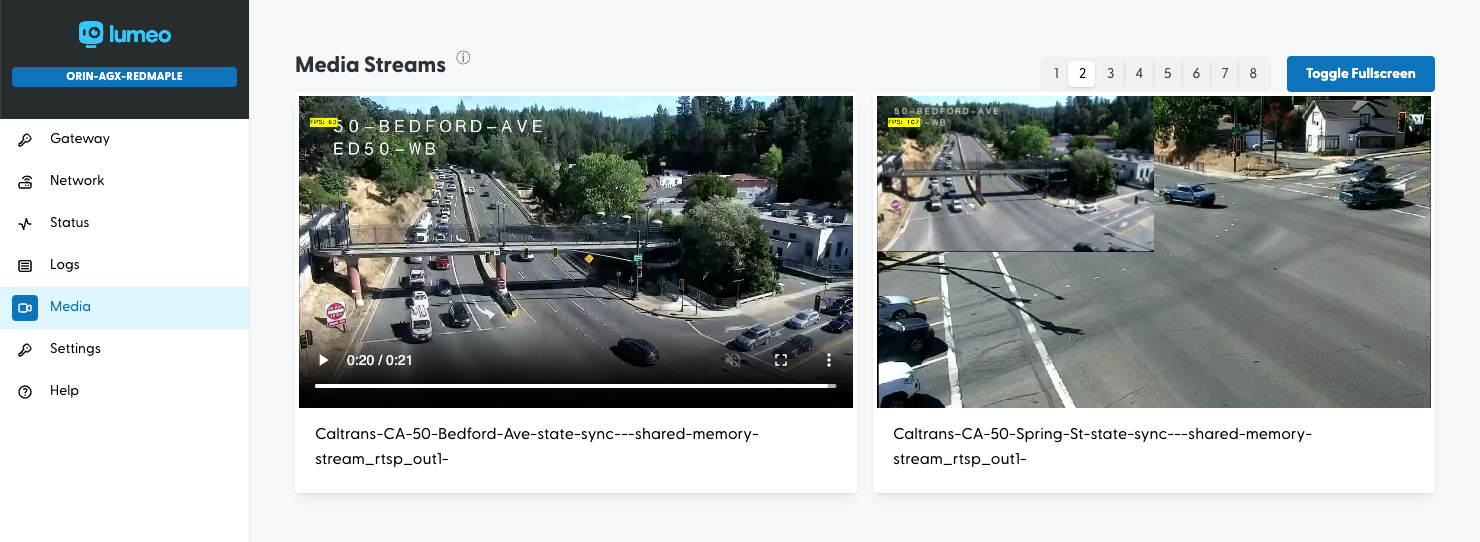
Playback Gateway streams locally under the Media section. You will need to sign in using the Media Server credentials (username : lumeo , password: <media password>) when prompted.
Sample RTSP streams
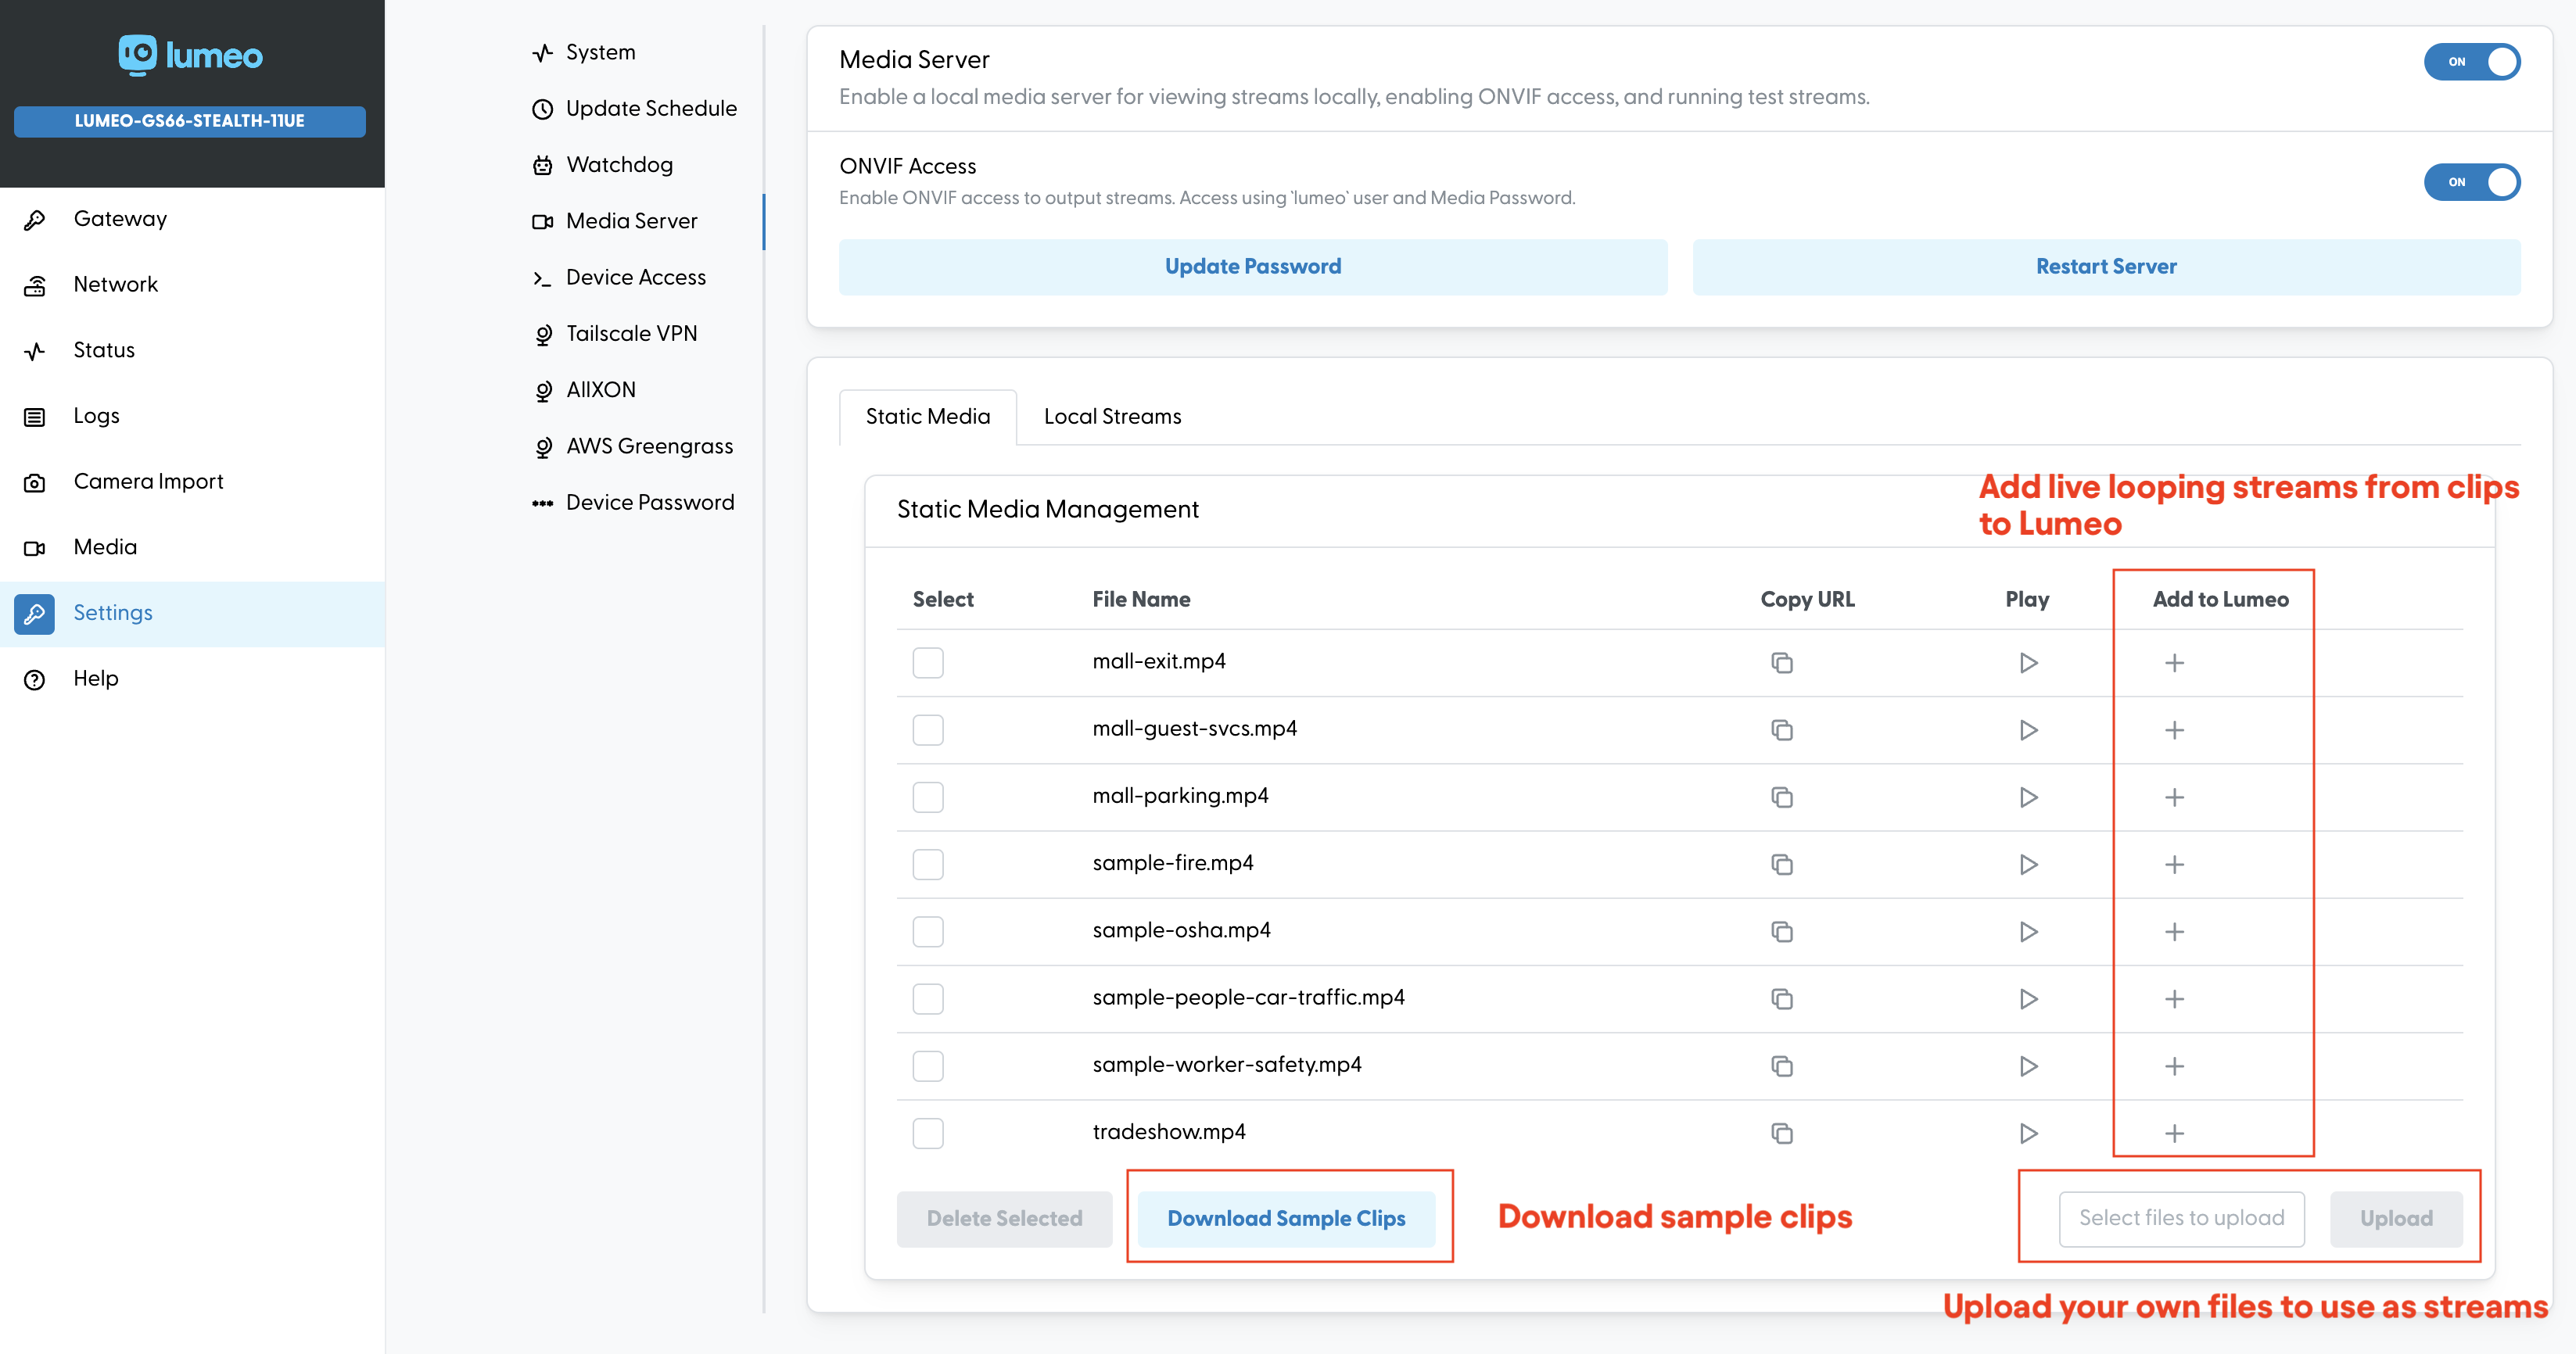
Head to Settings -> Media Server and enable the Media server.
After enabling the Media Server, head to the "Static Media" tab to download sample clips or upload your own files to use as streams, and then add streams generated from those sample clips to Lumeo by using the "+" Add to Lumeo button.
Import into VMS using ONVIF
After you have deployed analytics to the Gateway that generate output RTSP streams, you can import Lumeo's output streams into your VMS using ONVIF.
Enable ONVIF access
Head to Settings -> Media Server and enable the Media server and ONVIF Access. You will need to set a Media password when enabling the Media server, which will also be your ONVIF password.
This will enable ONVIF access for output RTSP streams, and then you can select specific output RTSP streams available via ONVIF using the Local Streams tab below.
Note: You must first deploy pipelines with output RTSP streams on the gateway using Lumeo's web console for the Local streams to appear here.
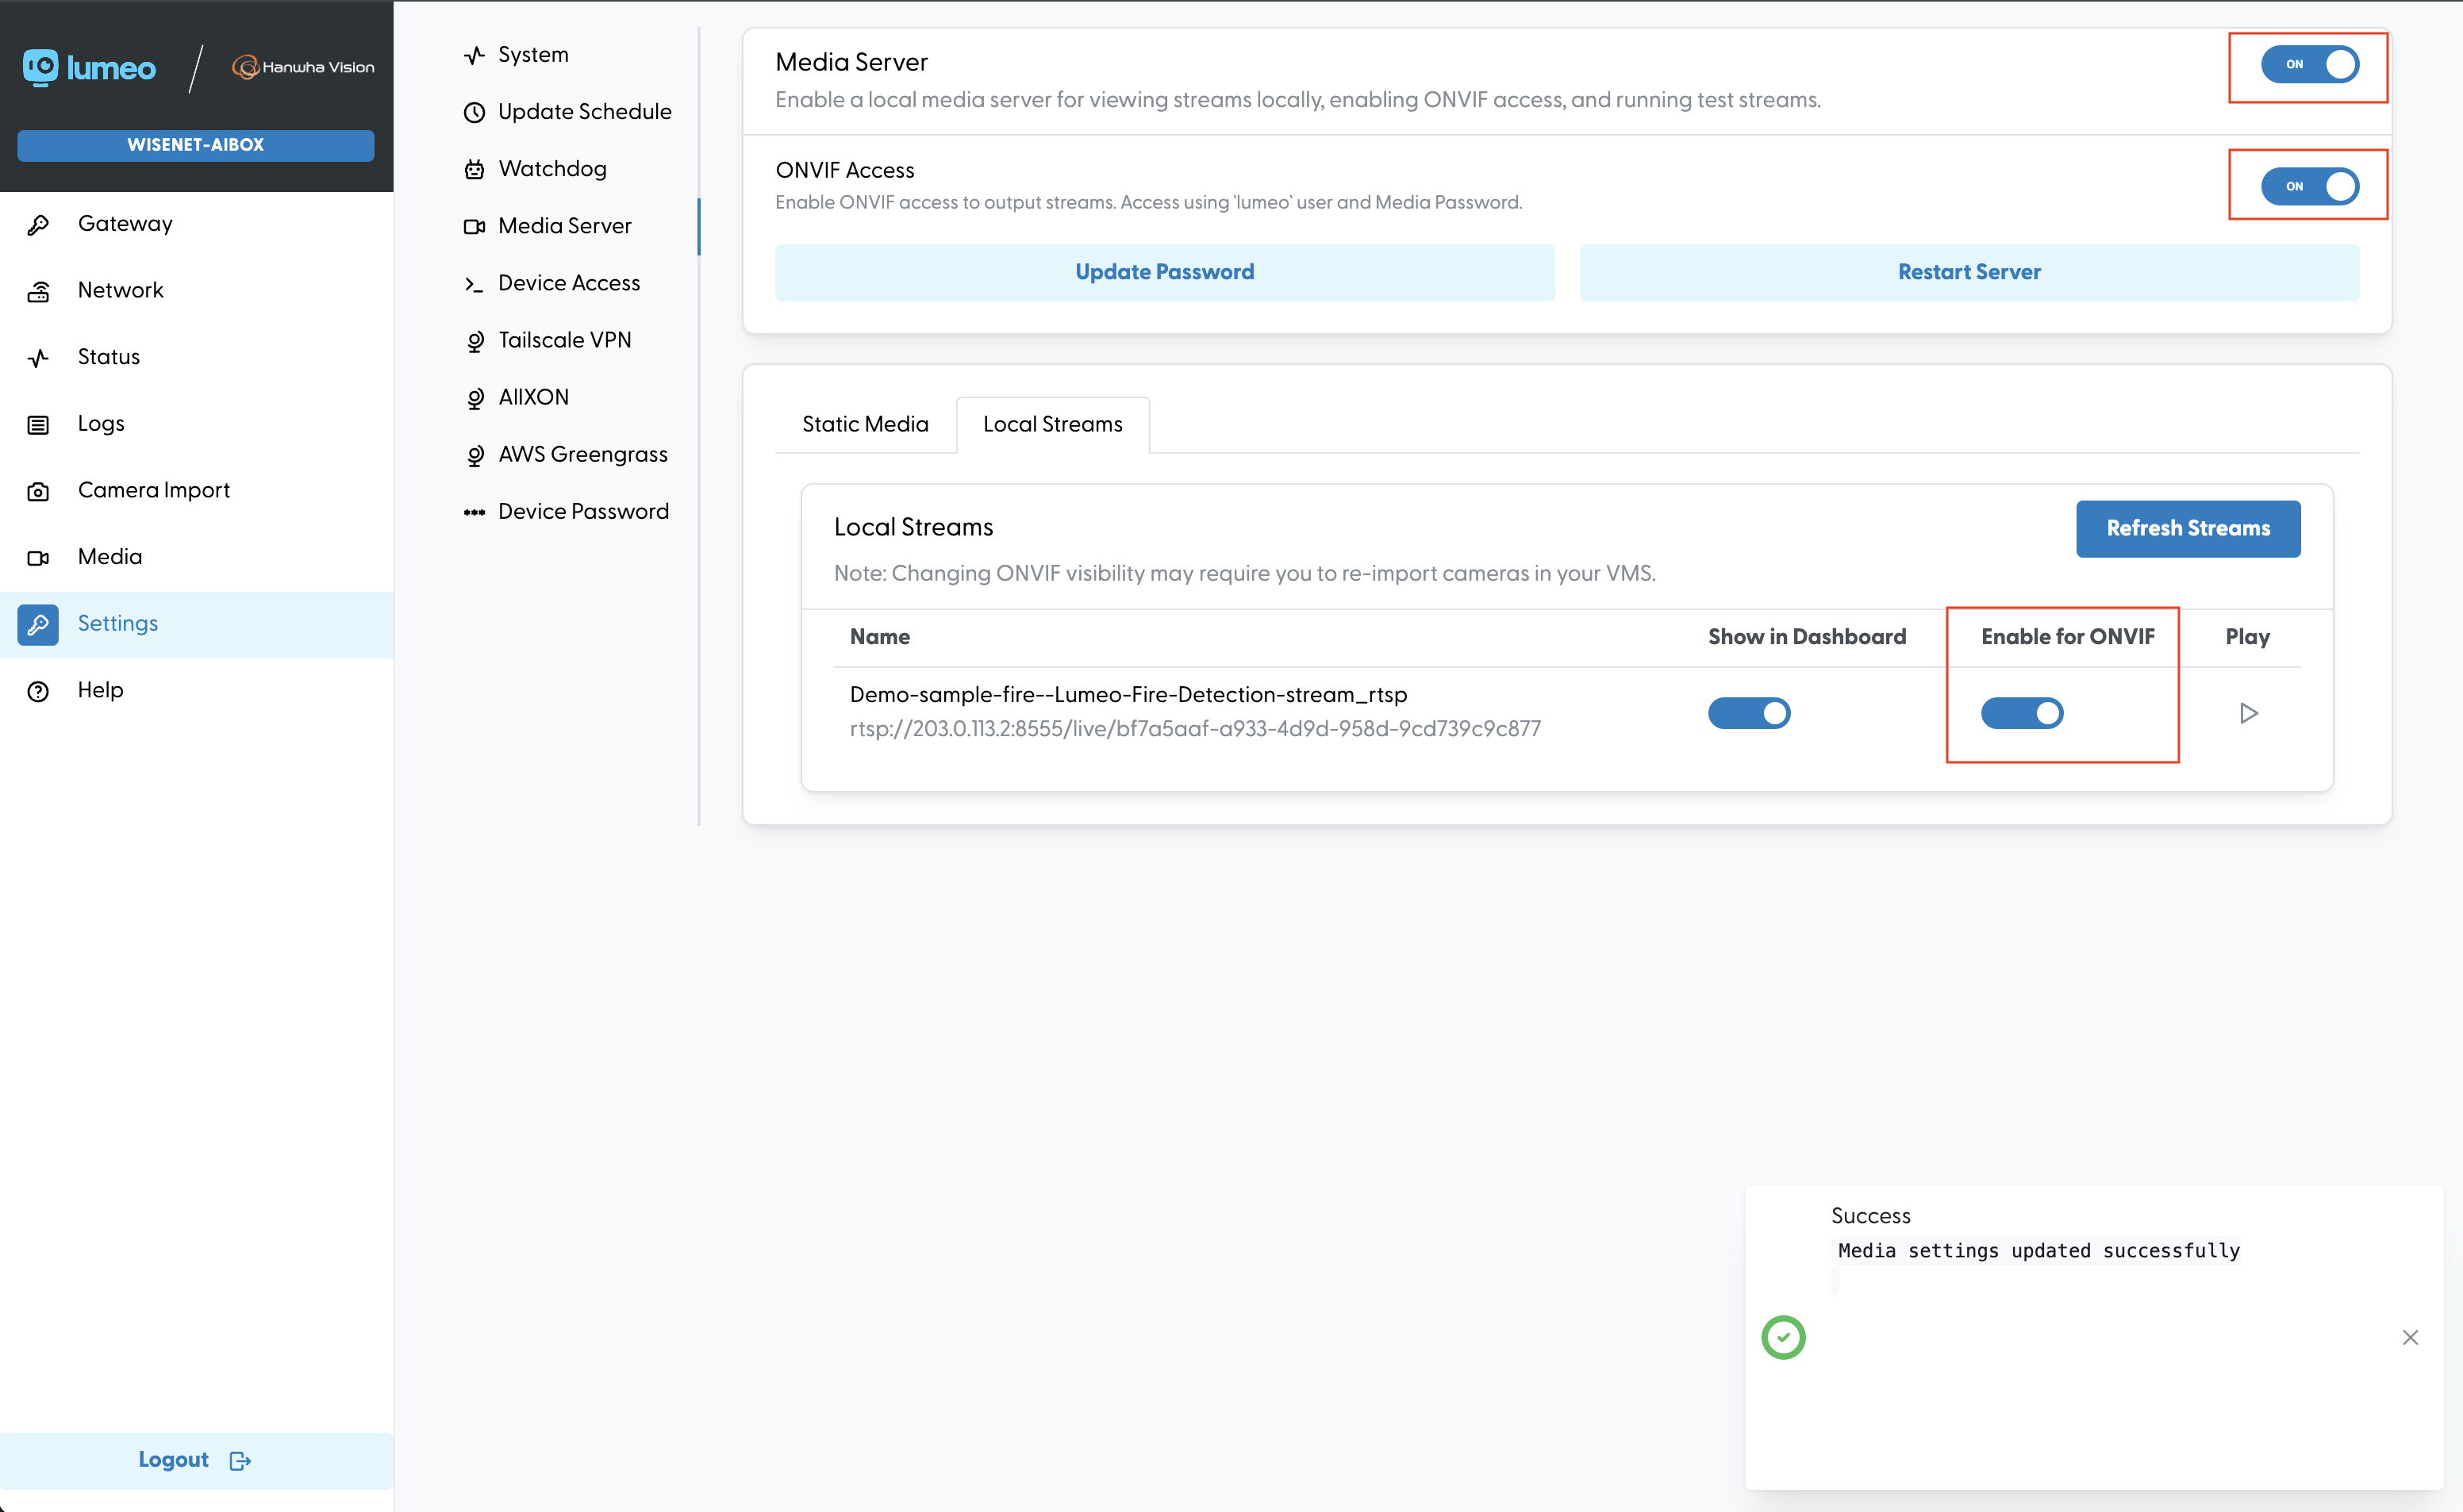
You can then access these selected RTSP output streams using ONVIF (username : lumeo, password : <media password>).
ONVIF device URL for the embedded Jetson is : http://<gateway-ip>:8080/onvif/device_service
Import ONVIF device into the VMS
The next steps to import the device will vary by VMS, but in general, specify the ONVIF device IP as the camera's IP address and port 8080.
The example below shows how to import into Hanwha Wave VMS.
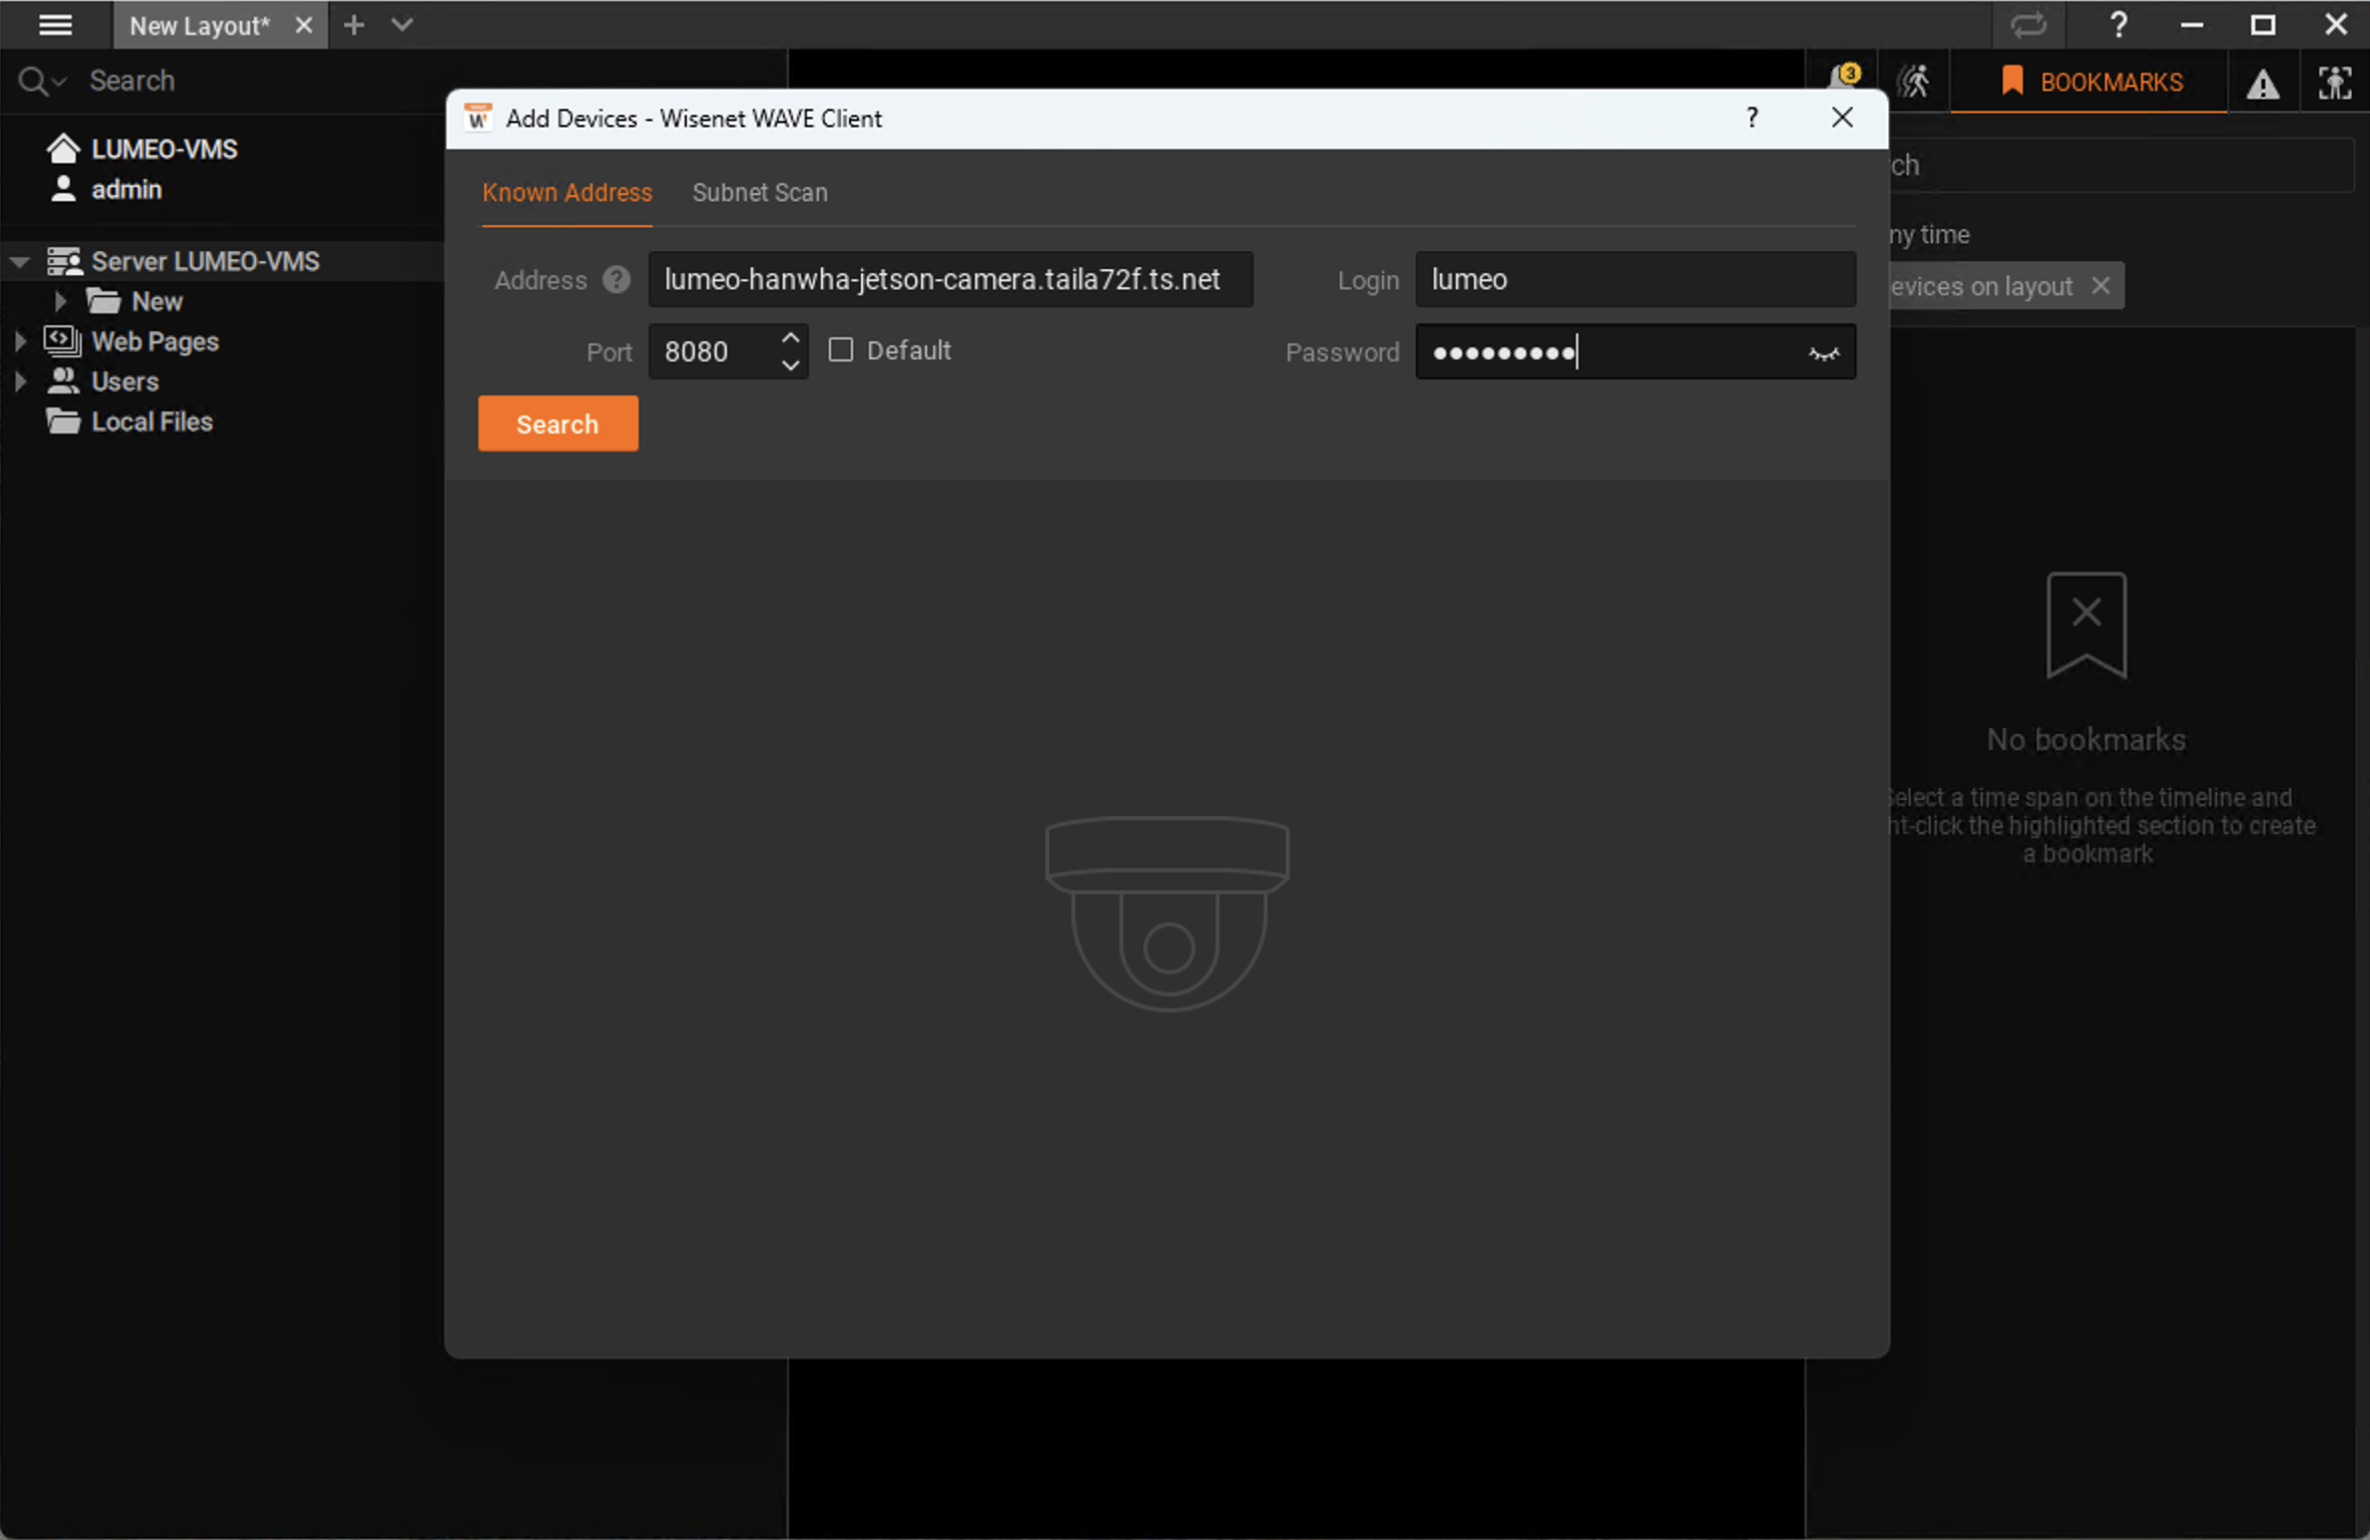
Right click Server -> Add device. Specify camera's IP address, port 8080, Login : lumeo, Password : <media password>. Then click Search.
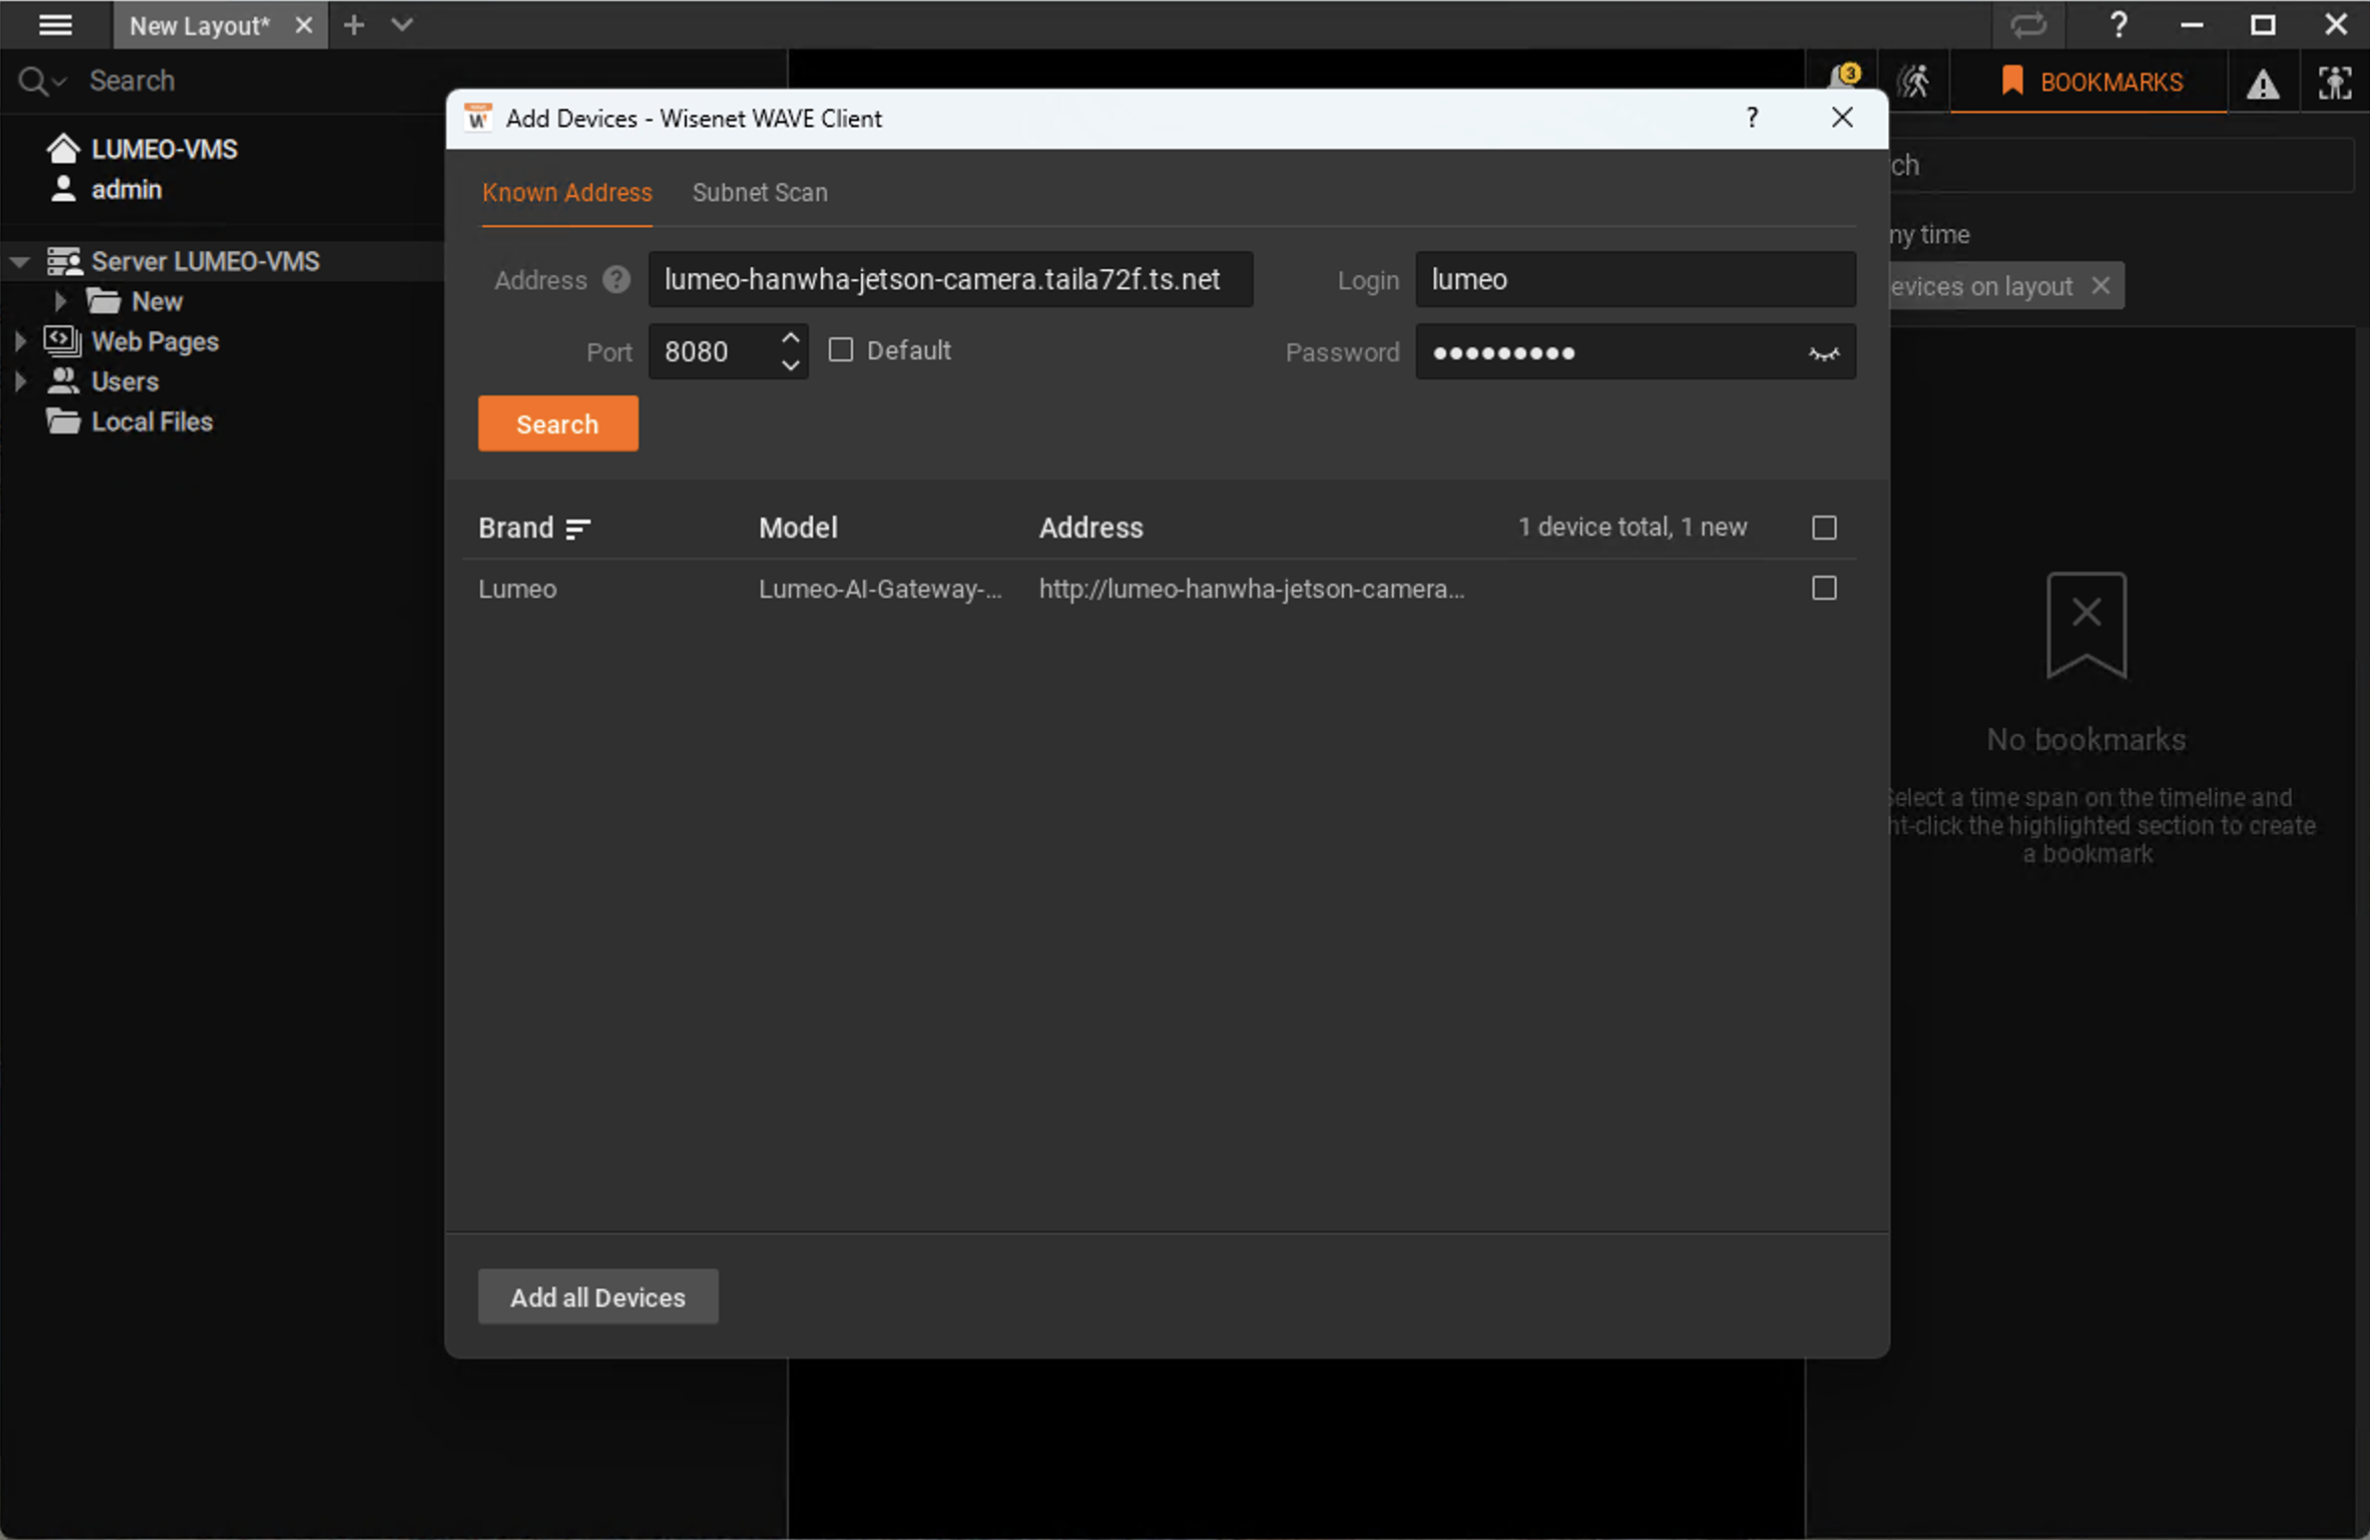
Check box next to the discovered device, which will have the model "Lumeo-AI-Gateway". Click Add all devices.
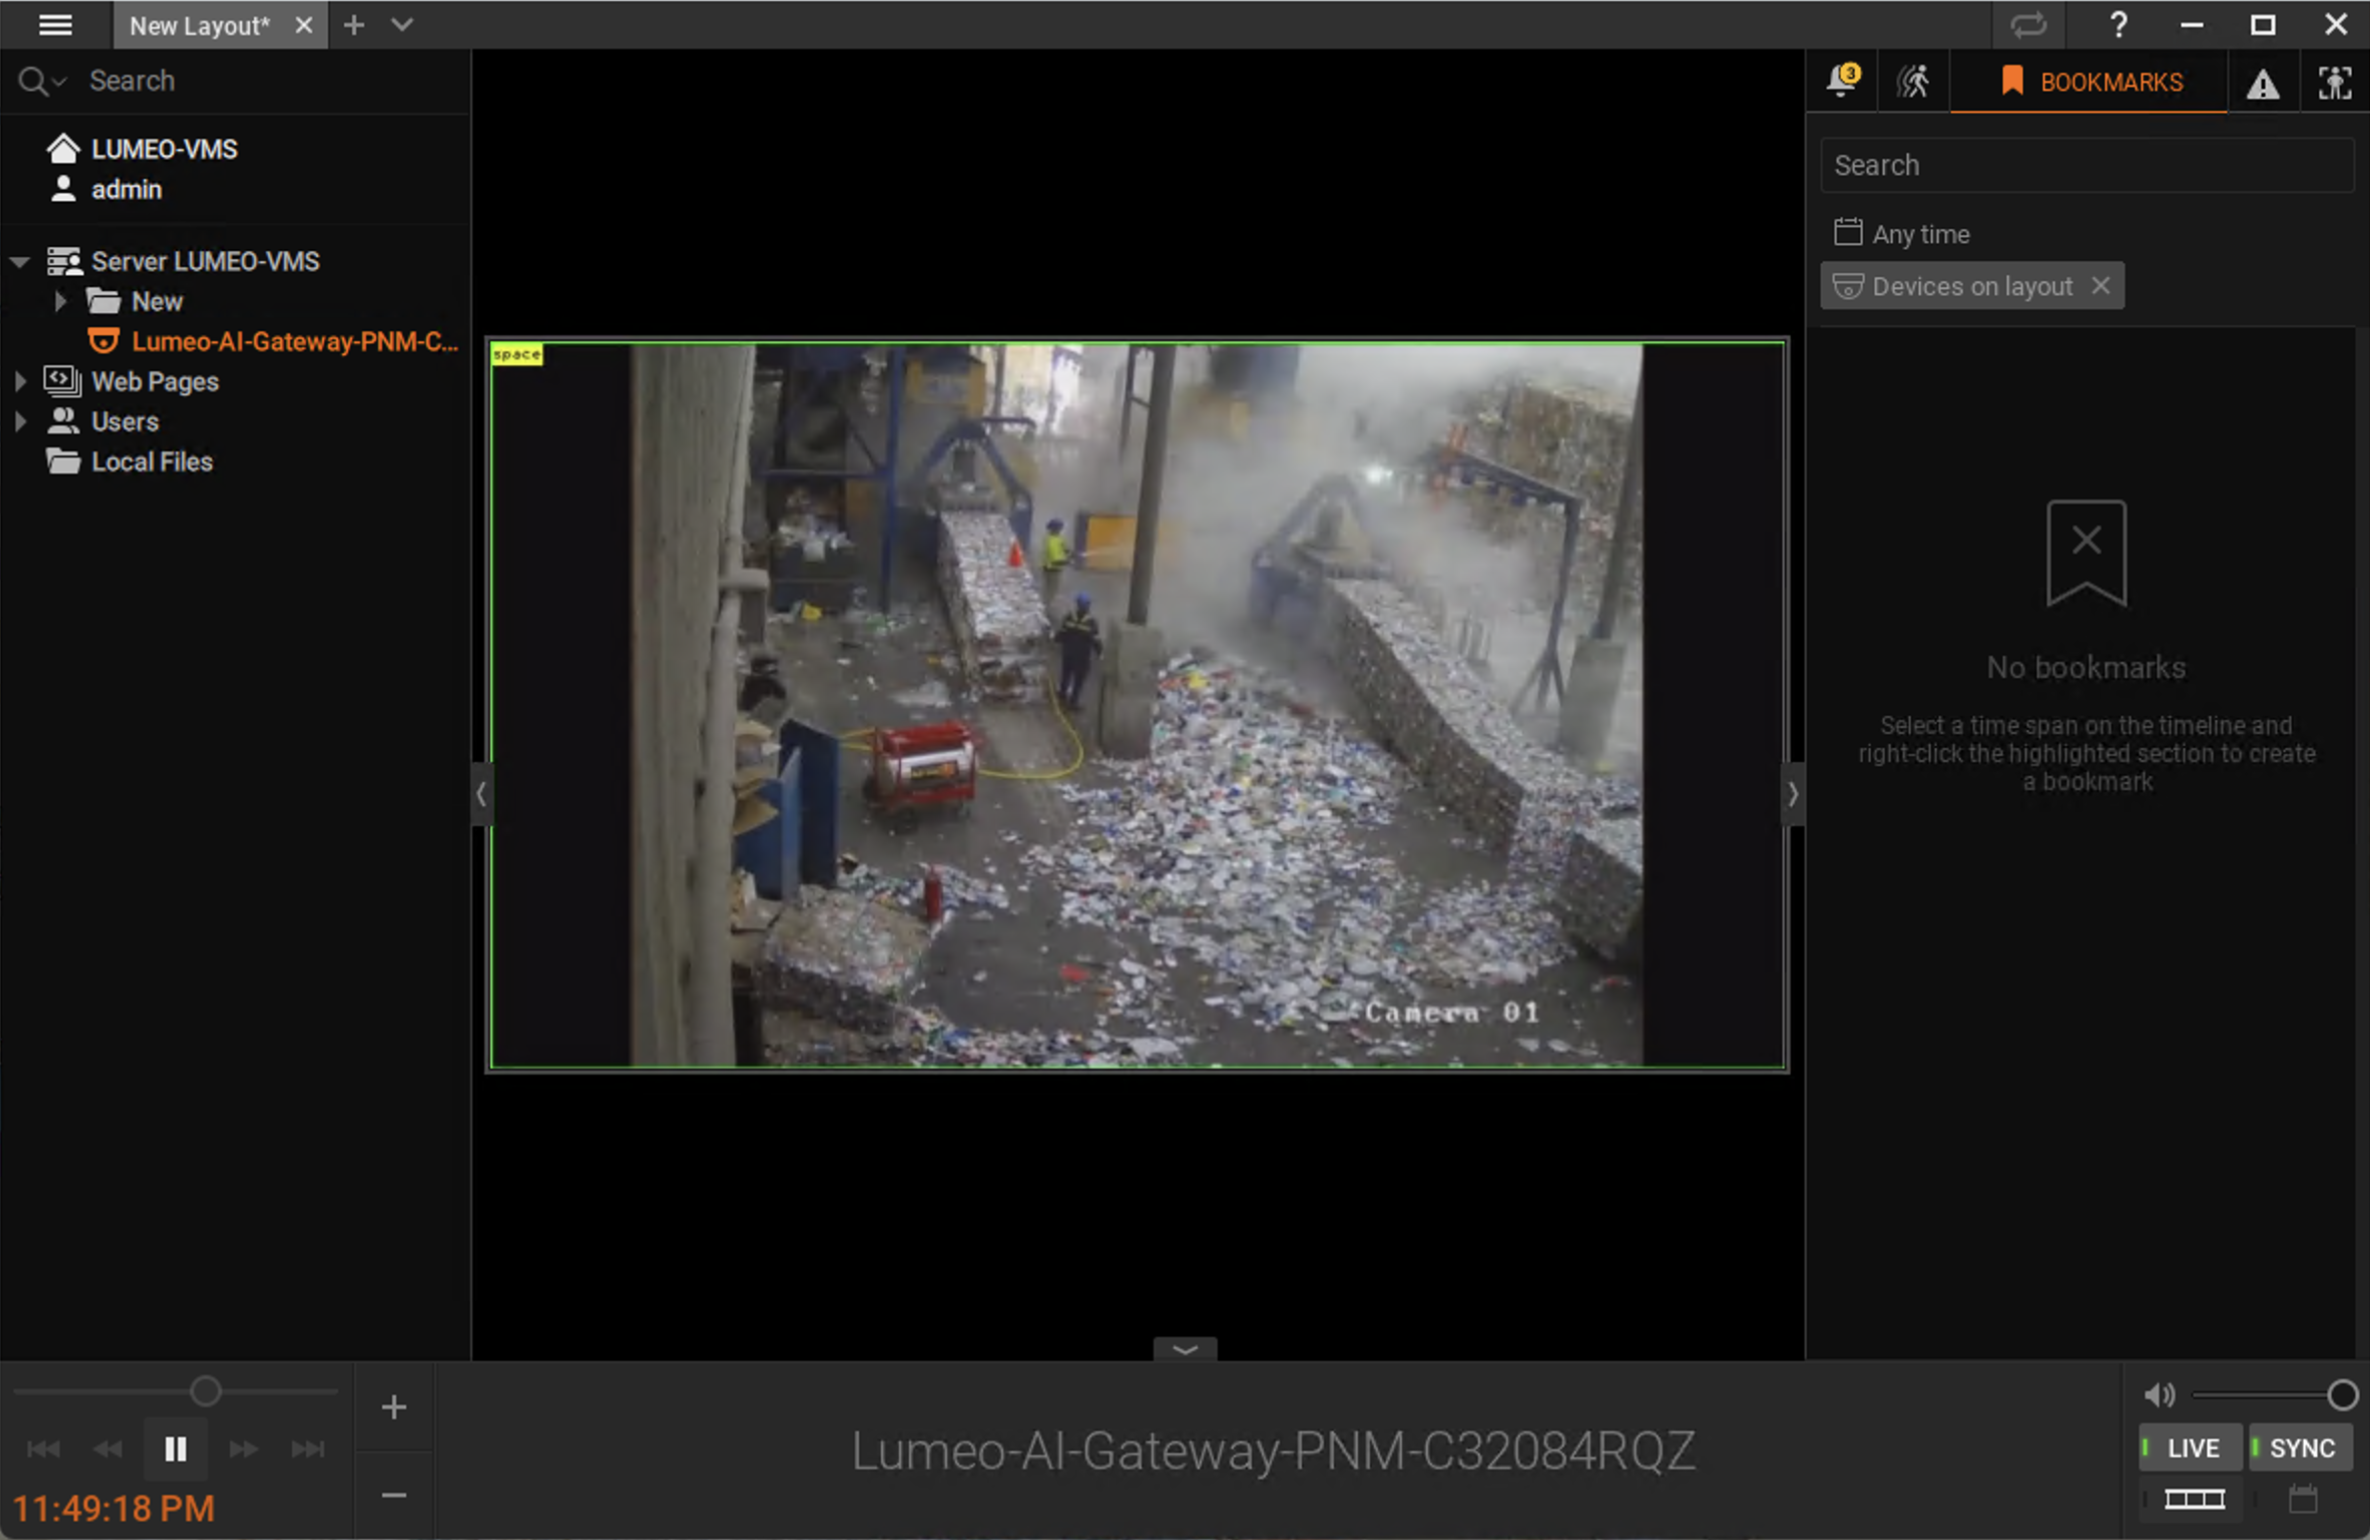
After device has been added successfully, you can view all the streams it provides under "Lumeo-AI-Gateway-PNM-C32084RQZ" device.
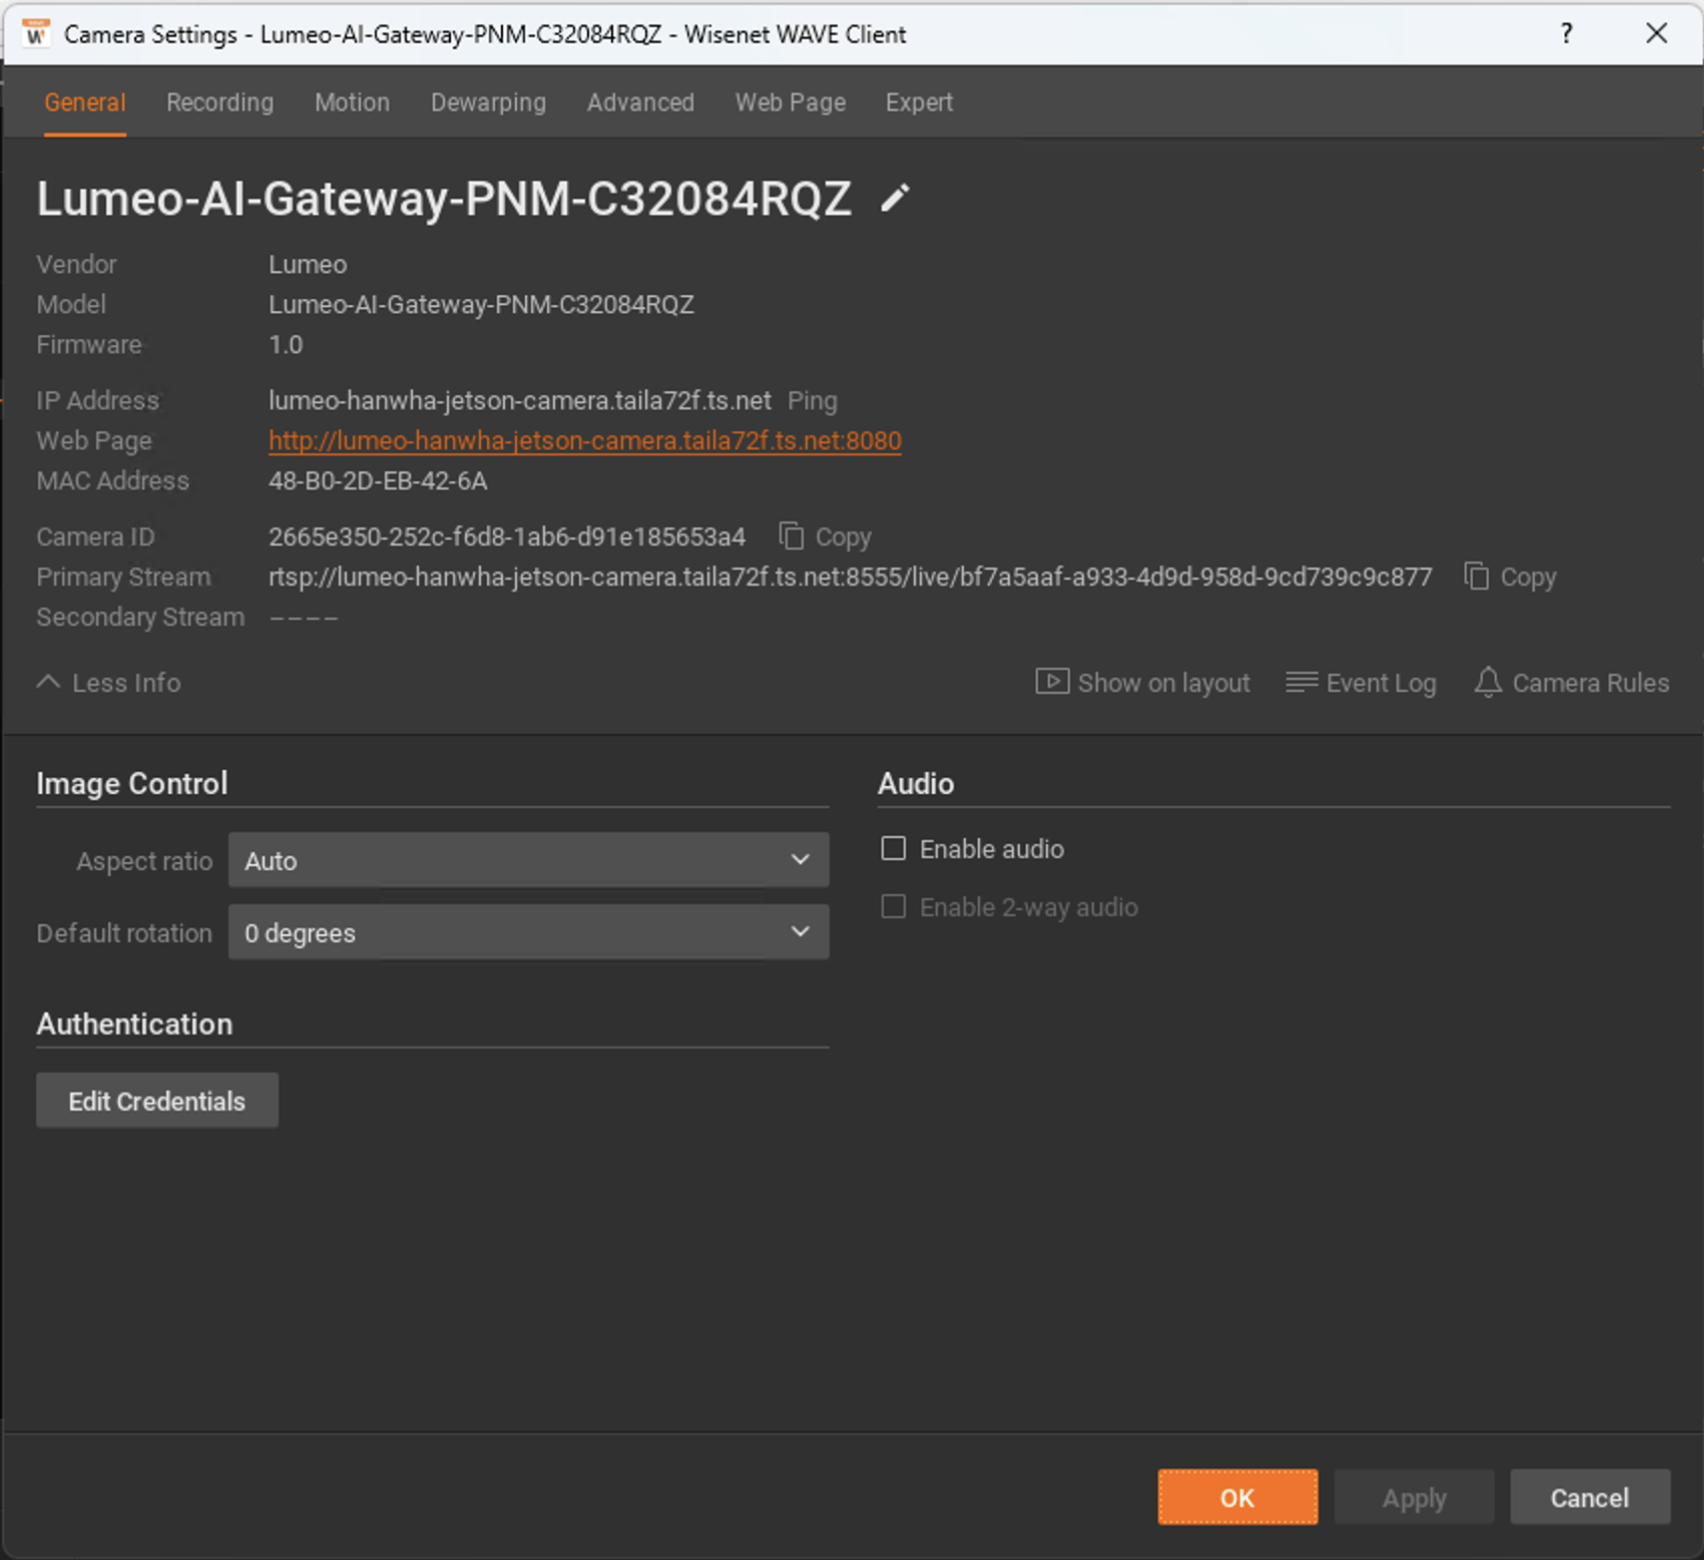
Imported device details.
Updated 6 months ago
