
Developer Quick Start - Custom Workflows
Follow these steps to design and deploy your first vision solution with Lumeo
Overview
This is a Step by step guide to building & deploying your first vision Pipeline using Lumeo. You will do so with 3 key activities :
- Design a pipeline
- Provision a Gateway and a Camera or Stream to run the Pipeline
- Deploy your pipeline to the Gateway and preview or embed output Streams in the browser.
What will you need :
- A Nvidia family device (Jetson NX, Orin, x86 with DGPU etc.) to run the pipeline. If you don't have one handy, every new Lumeo account comes with a free Trial of a Lumeo Cloud gateway that you can use to run the pipeline.
- A USB camera or an IP camera to use as an input source. If you don't have one, you can use a RTSP stream or a clip as an input source.
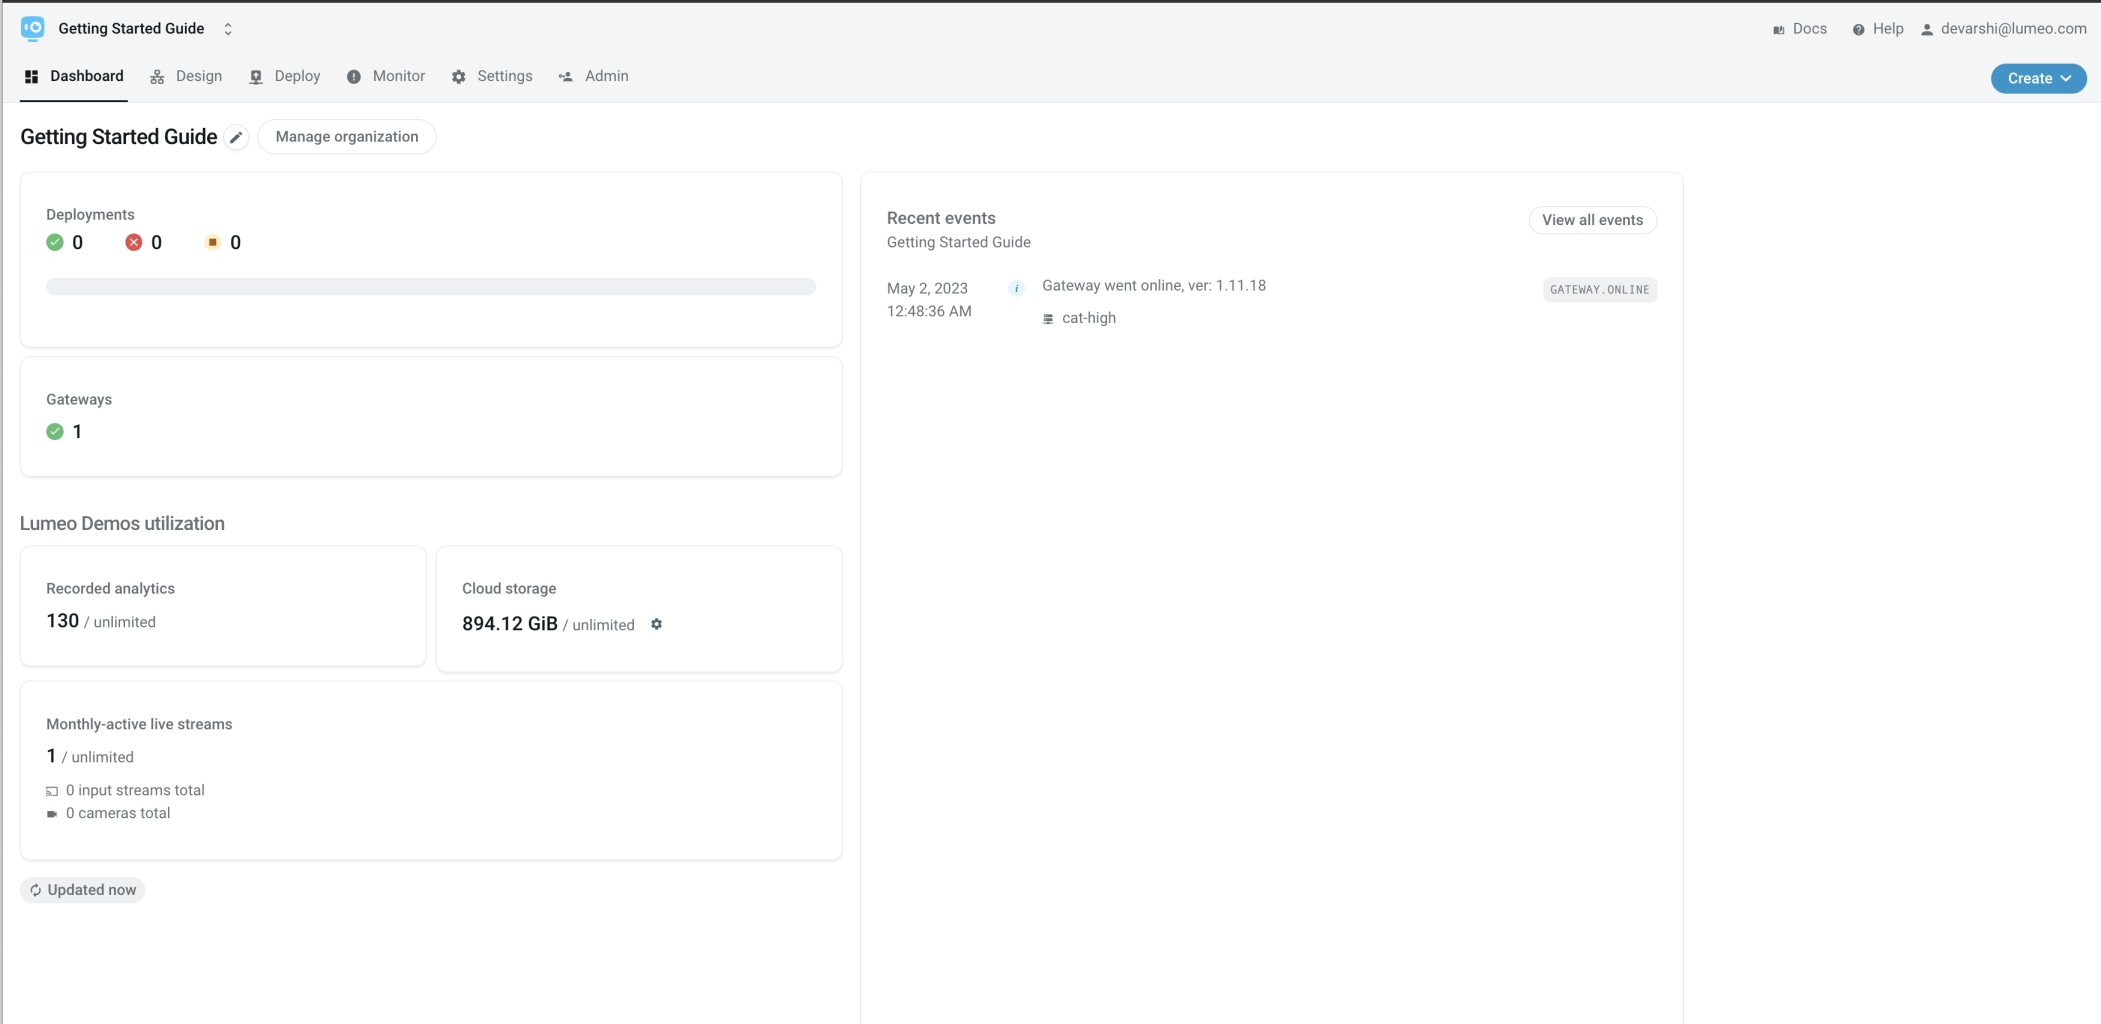
Solution Dashboard
Video Guide
Design your first pipeline : Count People
For this guide, we will start with one of Lumeo's pre-built templates. Head over to Design -> Solutions section and pick the "Entry / Exit People Counting" template. This will drop you into the Pipeline Editor where you can drag and drop nodes to create a pipeline that processes video.
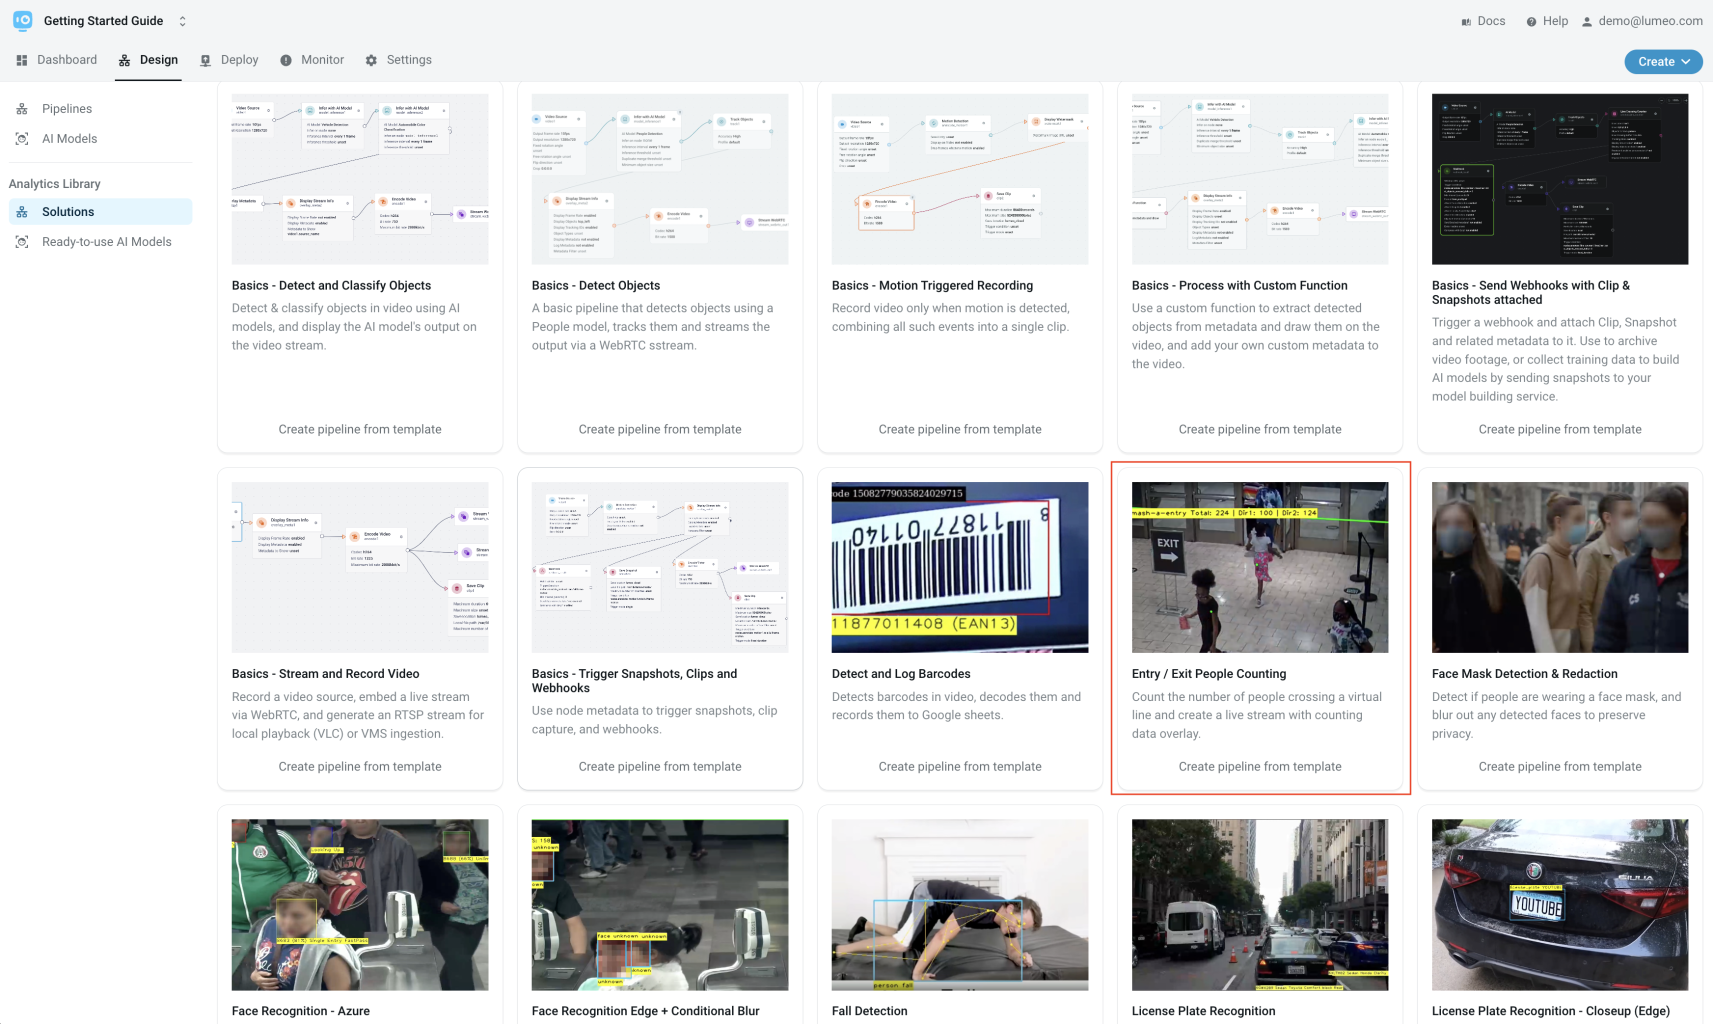
Solution Templates
You can see that this pipeline contains a series of Nodes which process the video sequentially.
It starts with a Video Source, then runs a People Detection AI Model to detect people, Tracks them, then counts them using the Line Counter and finally outputs an annotated WebRTC and RTSP stream.
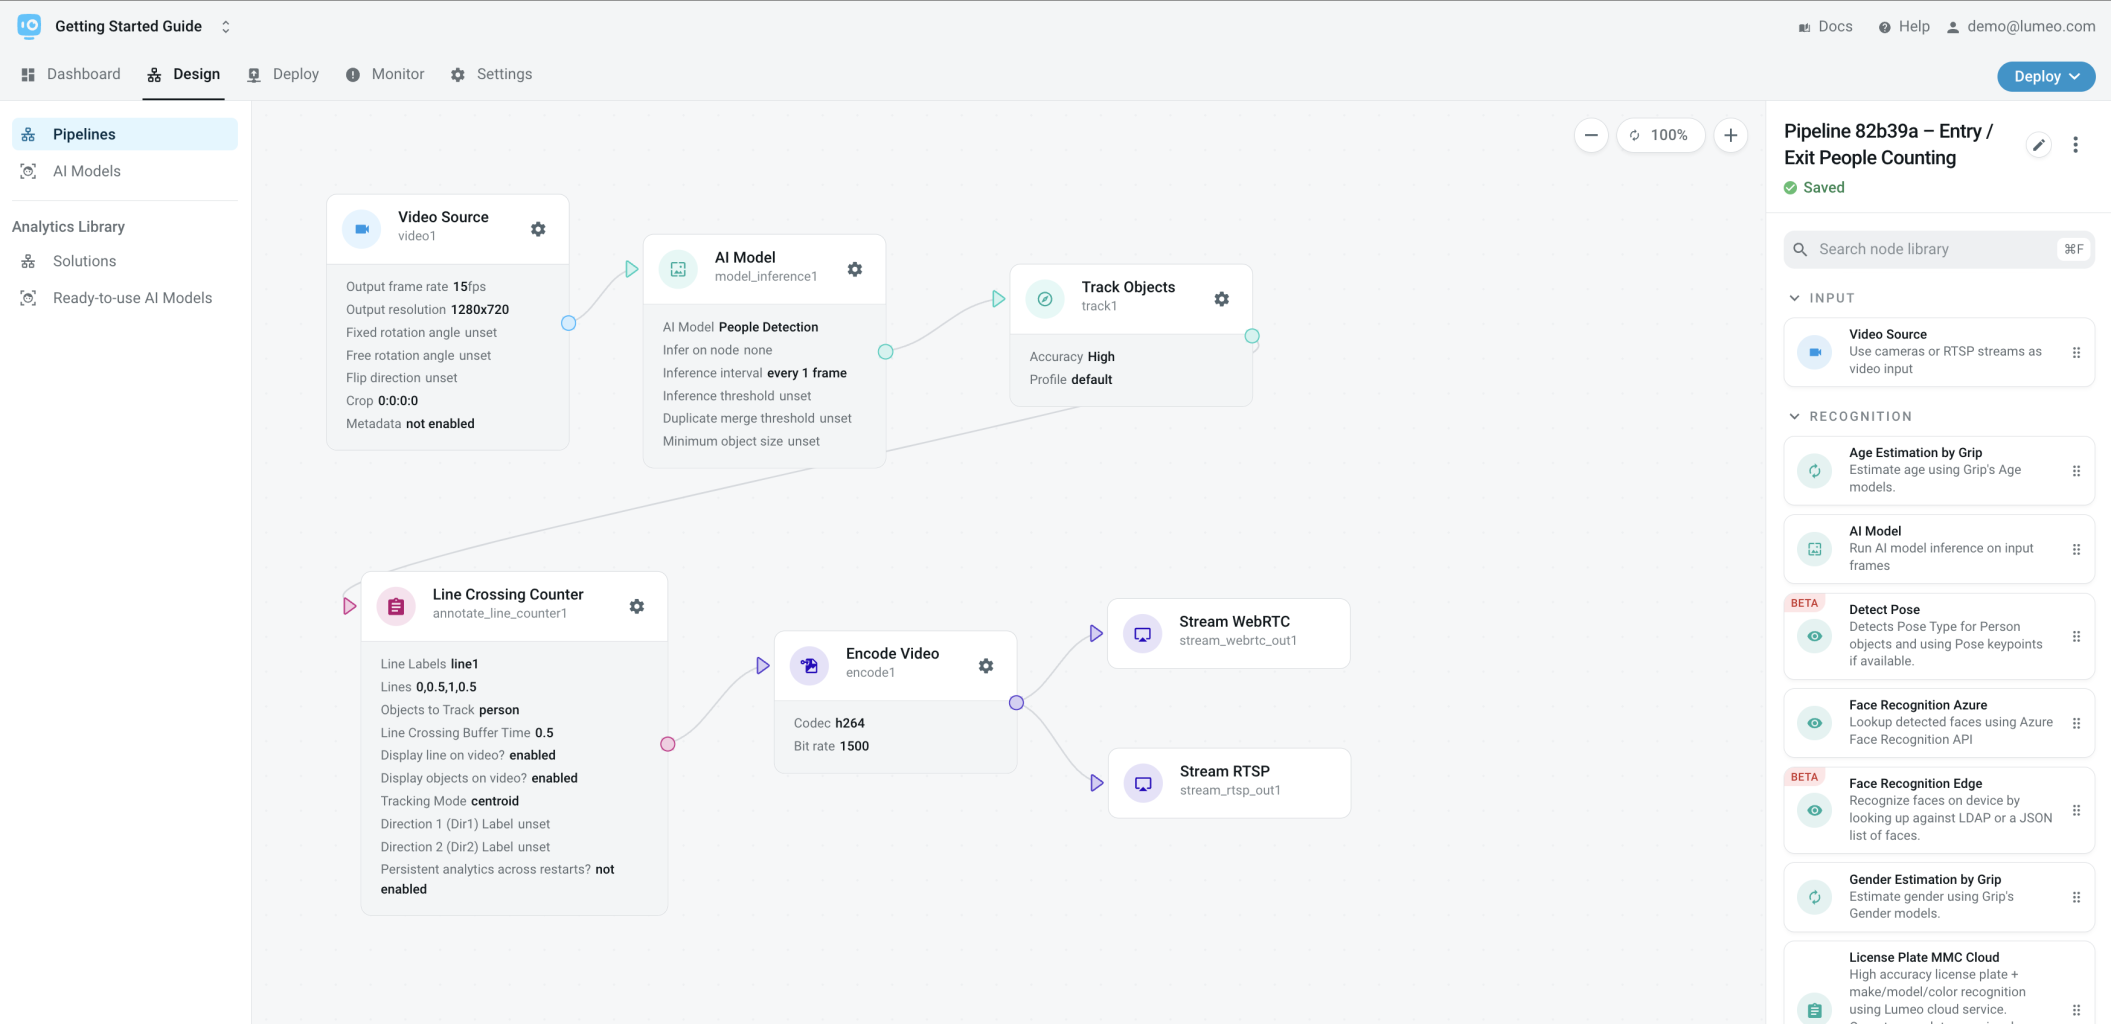
People Counting Pipeline
You can click on the Gear icon on each node to view and change it's properties, and browse through the Node library on the right.
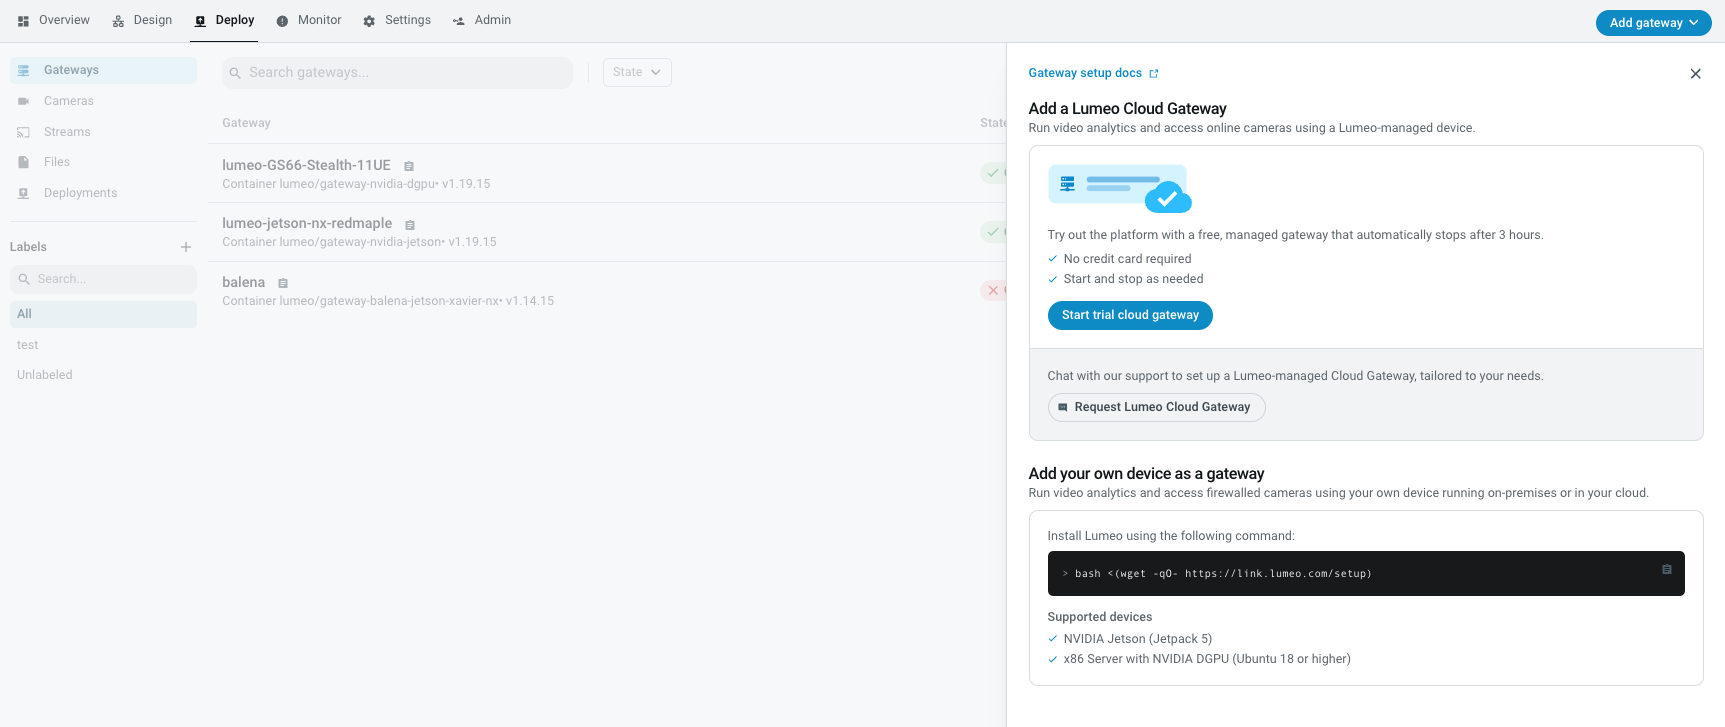
Setup a Gateway by installing Lumeo on it
Use Lumeo Cloud Gateway
Now head over to the Deploy -> Gateways page. Gateways are servers or devices that run the Pipeline. Every new Lumeo account comes with a Cloud gateway Trial which we will use for this Guide.
Lumeo Cloud Trial Gateway LimitsNote that trial gateways are limited to a 3 hour runtime, after which they will automatically stop. You can restart them anytime from the Console.
Create a Lumeo Cloud Gateway by clicking Add Gateway -> Start trial cloud gateway. This will set you up with a Lumeo Cloud Gateway in your account.
Start a trial cloud gateway
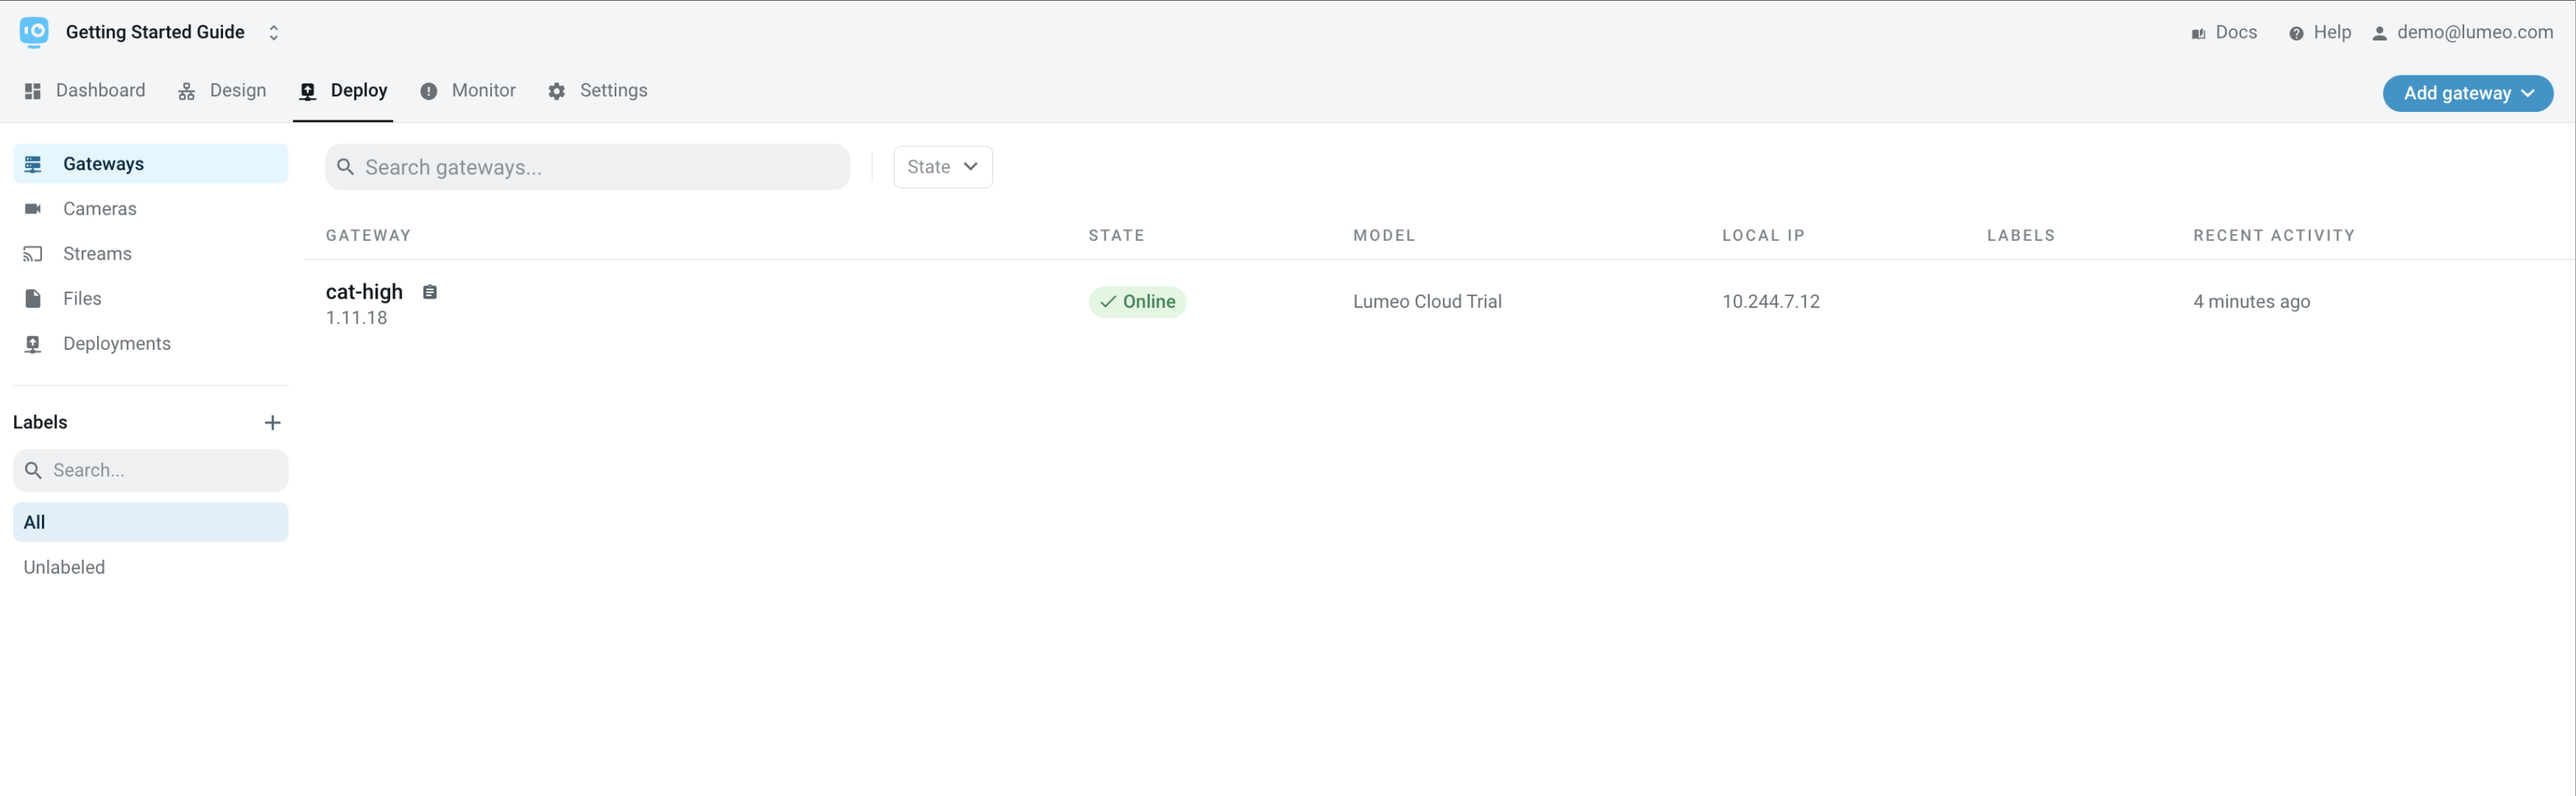
Lumeo Gateways in your workspace.
Setup your own Gateway
However, if you have another Nvidia device handy that you'd like to use (ex. Jetson NX, AGX, Orin, or x86 server with Nvidia DGPU) you can do so.
Gateway Limit on Free accountsFree accounts are limited to 1 gateway per Workspace, so you will need to delete the Trial gateway setup in your account before you can add a new one. To do so, click on the Gateway name and then the Delete button.
Then click Add Gateway in the top right corner to add a new one. This will show you the installer instructions that you must run on your gateway device (Nvidia enabled devices only for now). Run the installer on the device and return back to the Console when done.
If you have a Lumeo-ready Gateway device, you can set it up following instructions under Lumeo-Ready Gateways instead.
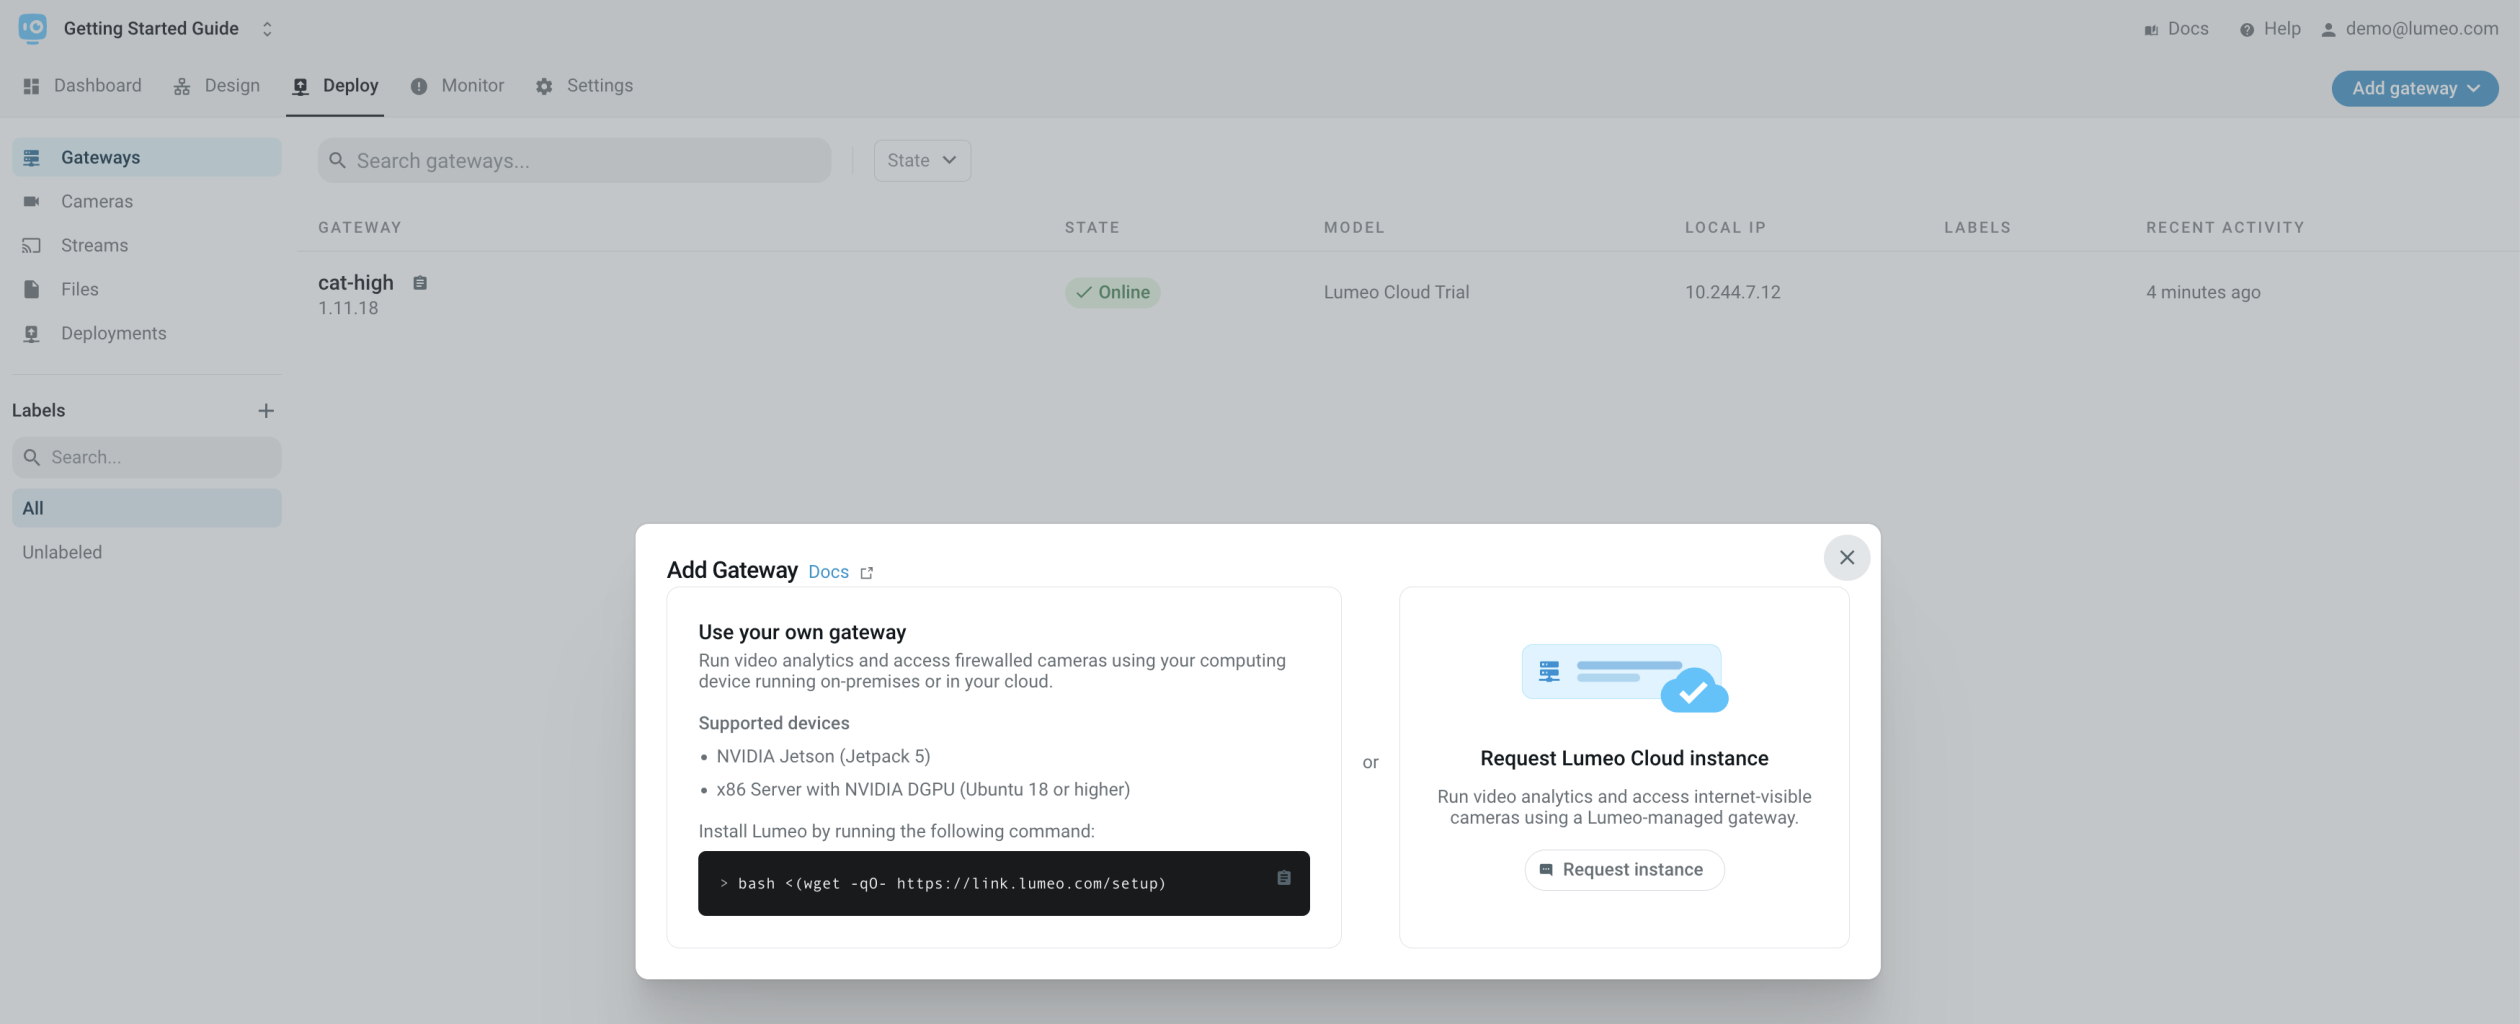
Add new Gateway Dialog
Installer Tips
- When the installer asks you if you want to set the device up as a new gateway, answer
y- When the installer asks you to login to Lumeo, use the same credentials you use to login to the Console
- If you plan to use USB cameras with Lumeo, ensure they are plugged in before running the installer.
$bash <(wget -qO- https://link.lumeo.com/setup)

Redirecting output to ‘wget-log.1’.
==============================================


              ▄███████▄
          ▄███████████████▄
       ▄████████████████████▄
     ████▀▀▀▀▀▀▀▀▀▀▀▀▀▀▀▀▀▀███▄
    ██▀              ▄▄█▄▄   ██▄
   ▐█▌              █    ██▌  ██▌
   ██▌              █▄  ▄███   ██
   ▀█▌              ▀████▄█▀  ▐██
    ███               ▀▀▀▀    ██▀
     ███▄▄▄▄▄▄▄▄▄▄▄▄▄▄▄▄▄▄▄▄███▀
      ▀████████████████████▀▀▀
         ▀▀█████████████▀▀
             ██▀▀▀██▌
             ███▌ ▐███


Lumeo Gateway Installer
==============================================

Release (Hit enter to install 0.1.18):

------------------------------------
Downloading Lumeo Gateway Installer..
------------------------------------
lumeod-0.1.18-in 100%[=======>]   7.57M  48.4MB/s    in 0.2s


------------------------------------
Installing binaries & dependencies..
------------------------------------
[sudo] password for pi:

23ffc7a7399afe6cd1b8366de631babf1fc9ac66e8fd69431b2fb00100b78bc7
Verifying archive integrity...  100%   MD5 checksums are OK. All good.
Uncompressing Lumeod 0.1.18 AARCH64 Linux Installer  100%

gst-plugins-lume 100%[=======>]   1.31M  --.-KB/s    in 0.08s
gst-video-analyt 100%[=======>] 820.50K   932KB/s    in 0.9s
lumeopipeline_1. 100%[=======>]  10.08K  --.-KB/s    in 0s

------------------------------------
Provisioning (optional)
------------------------------------
Set up as a new Gateway ? (y/n)
y
Application ID (from Console):
d0daacb9-9deb-4ee2-ac4c-a0c7019e62e5

Logging into Lumeo, use your Console email & password.
Username: [email protected]
Password: [hidden]

Device successfully linked to application. Device ID: e7299979-95de-426f-81b7-2326020523f5
------------------------------------
Starting services...
------------------------------------
● lumeod.service - Lumeo Gateway Daemon
   Loaded: loaded (/etc/systemd/system/lumeod.service; enabled; v
   Active: active (running) since Wed 2020-11-11 07:37:22 PST; 45
 Main PID: 28618 (lumeod)
    Tasks: 3 (limit: 4183)
   CGroup: /system.slice/lumeod.service
           └─28618 /usr/bin/lumeod run --non-interactive

Nov 11 07:37:22 lumeojetson-redmaple.local systemd[1]: Stopped Lu
Nov 11 07:37:22 lumeojetson-redmaple.local systemd[1]: Started Lu
Nov 11 07:37:22 lumeojetson-redmaple.local lumeod[28618]: Checkin
Nov 11 07:37:22 lumeojetson-redmaple.local lumeod[28618]: Checkin
Once the installer succeeds, refresh the Gateways page, and you should see the Gateway device listed there.
Discover and link IP or USB cameras using the Gateway
Next, head on over to Gateways --> Gateway name page, and click Add Camera. If you have any IP cameras on the network or USB cameras connected to the Gateway device, they will show up on the Add Camera page. You may have to wait for a few seconds for the Discovery to complete.
If you don't have either, or if your cameras don't show up under in this list, head on to the next step and setup a public stream to test your Pipeline.
Note that Lumeo Cloud Gateways do not have any discoverable cameras.
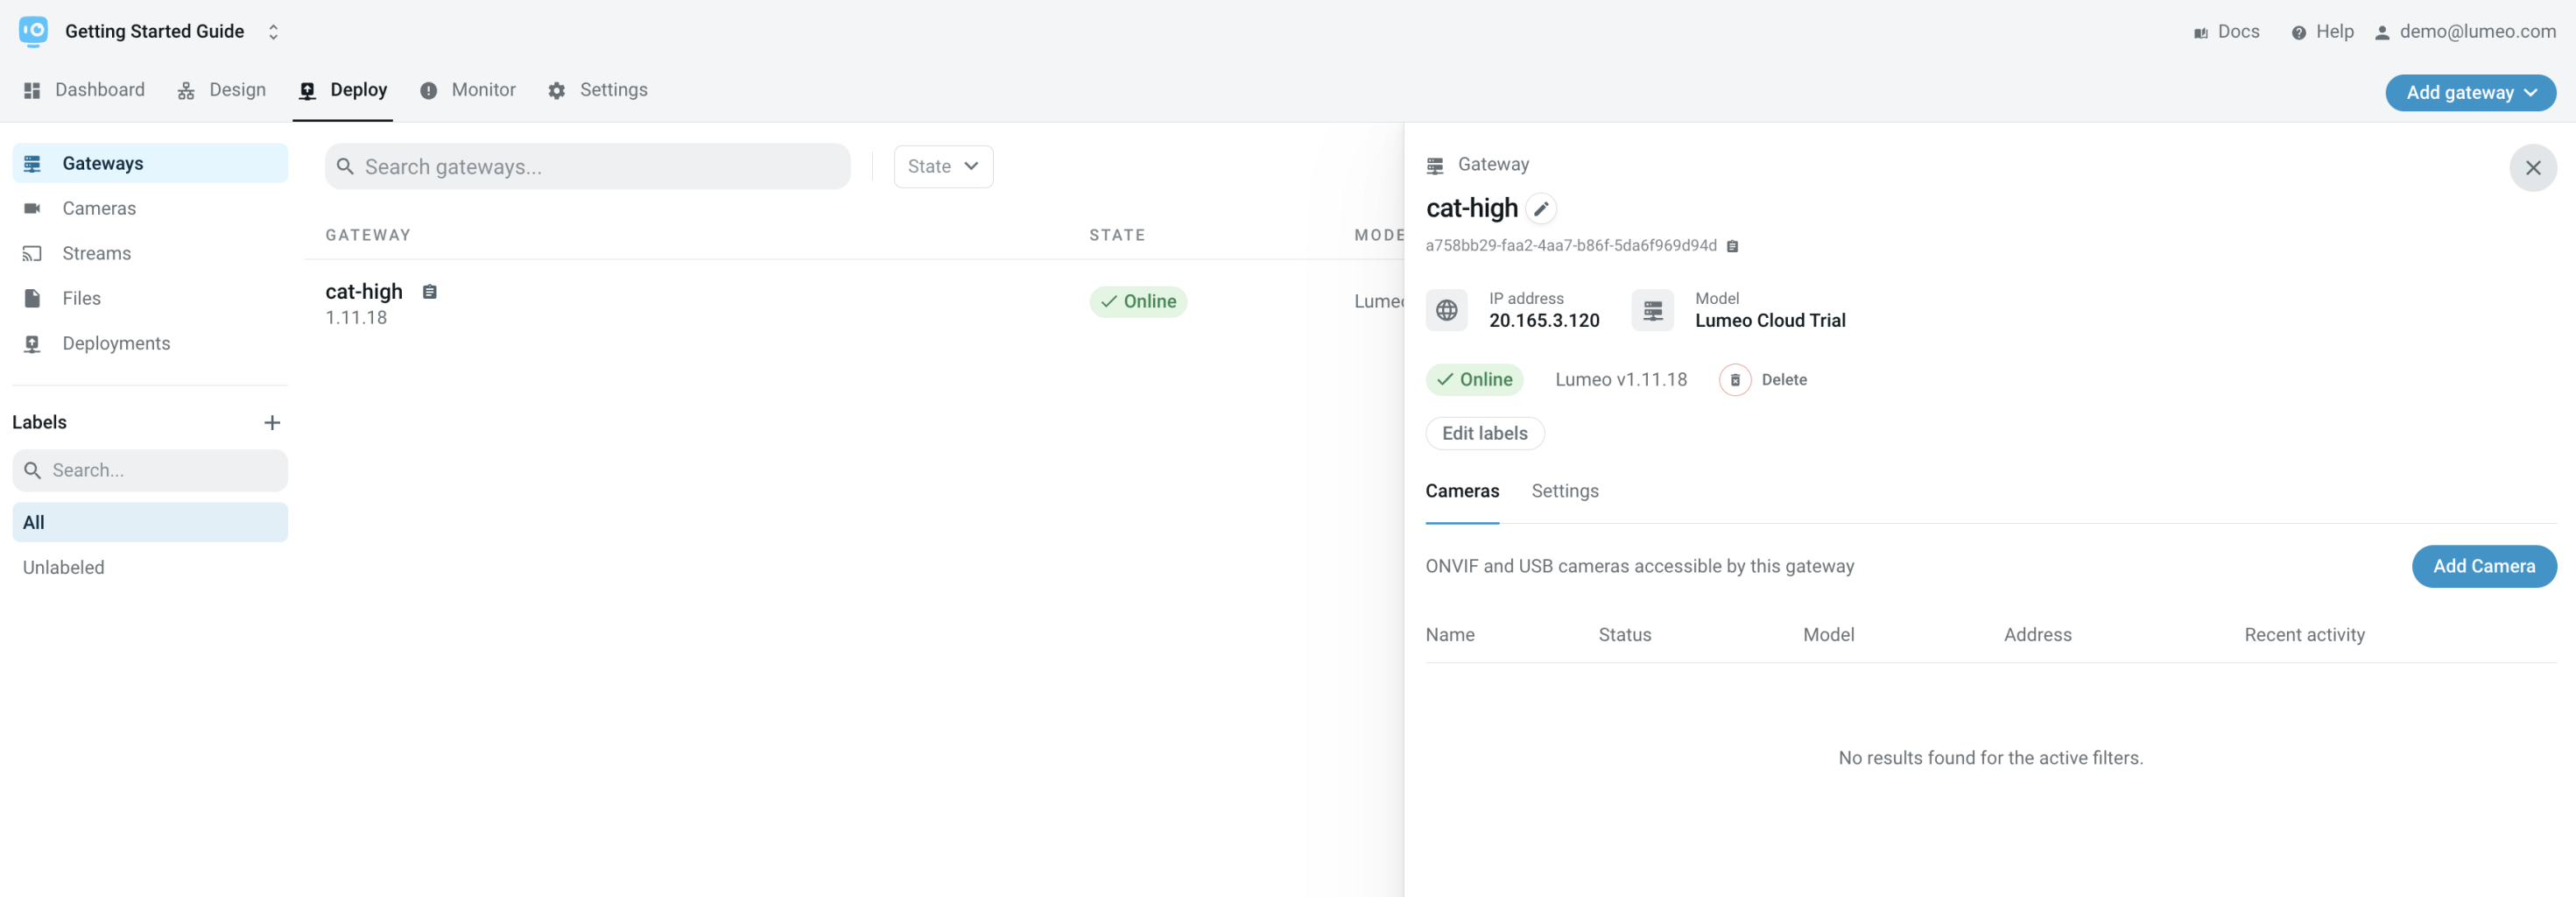
Gateway detail -> Add Camera button
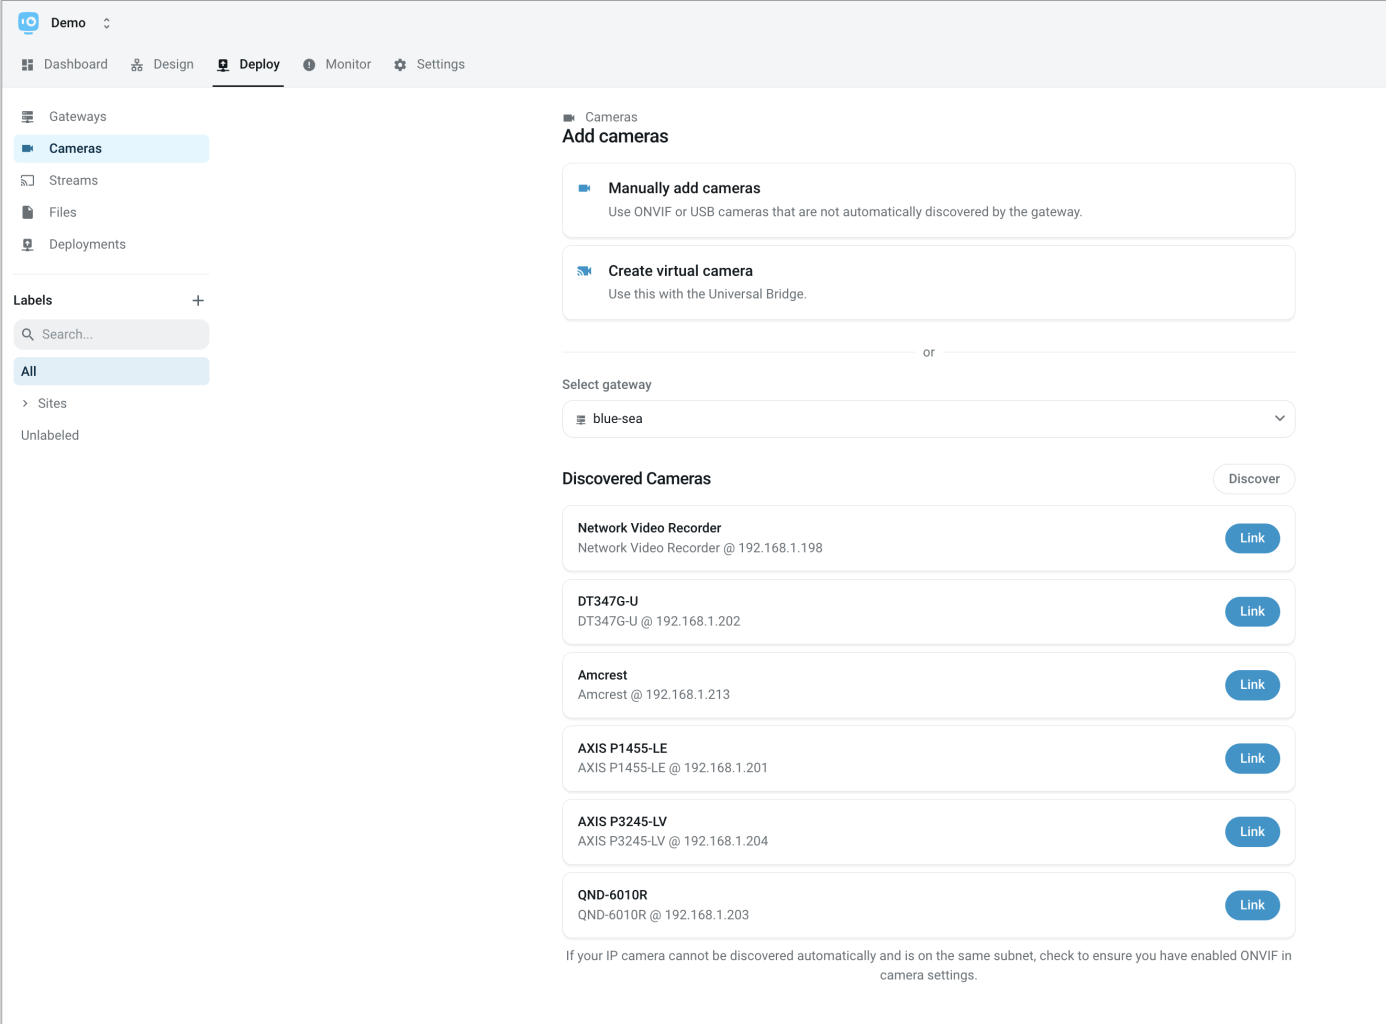
Cameras discovered by the Gateway
You can now click the "Link" button to link the Camera(s) to the Gateway.
(or) Configure a publicly available Stream
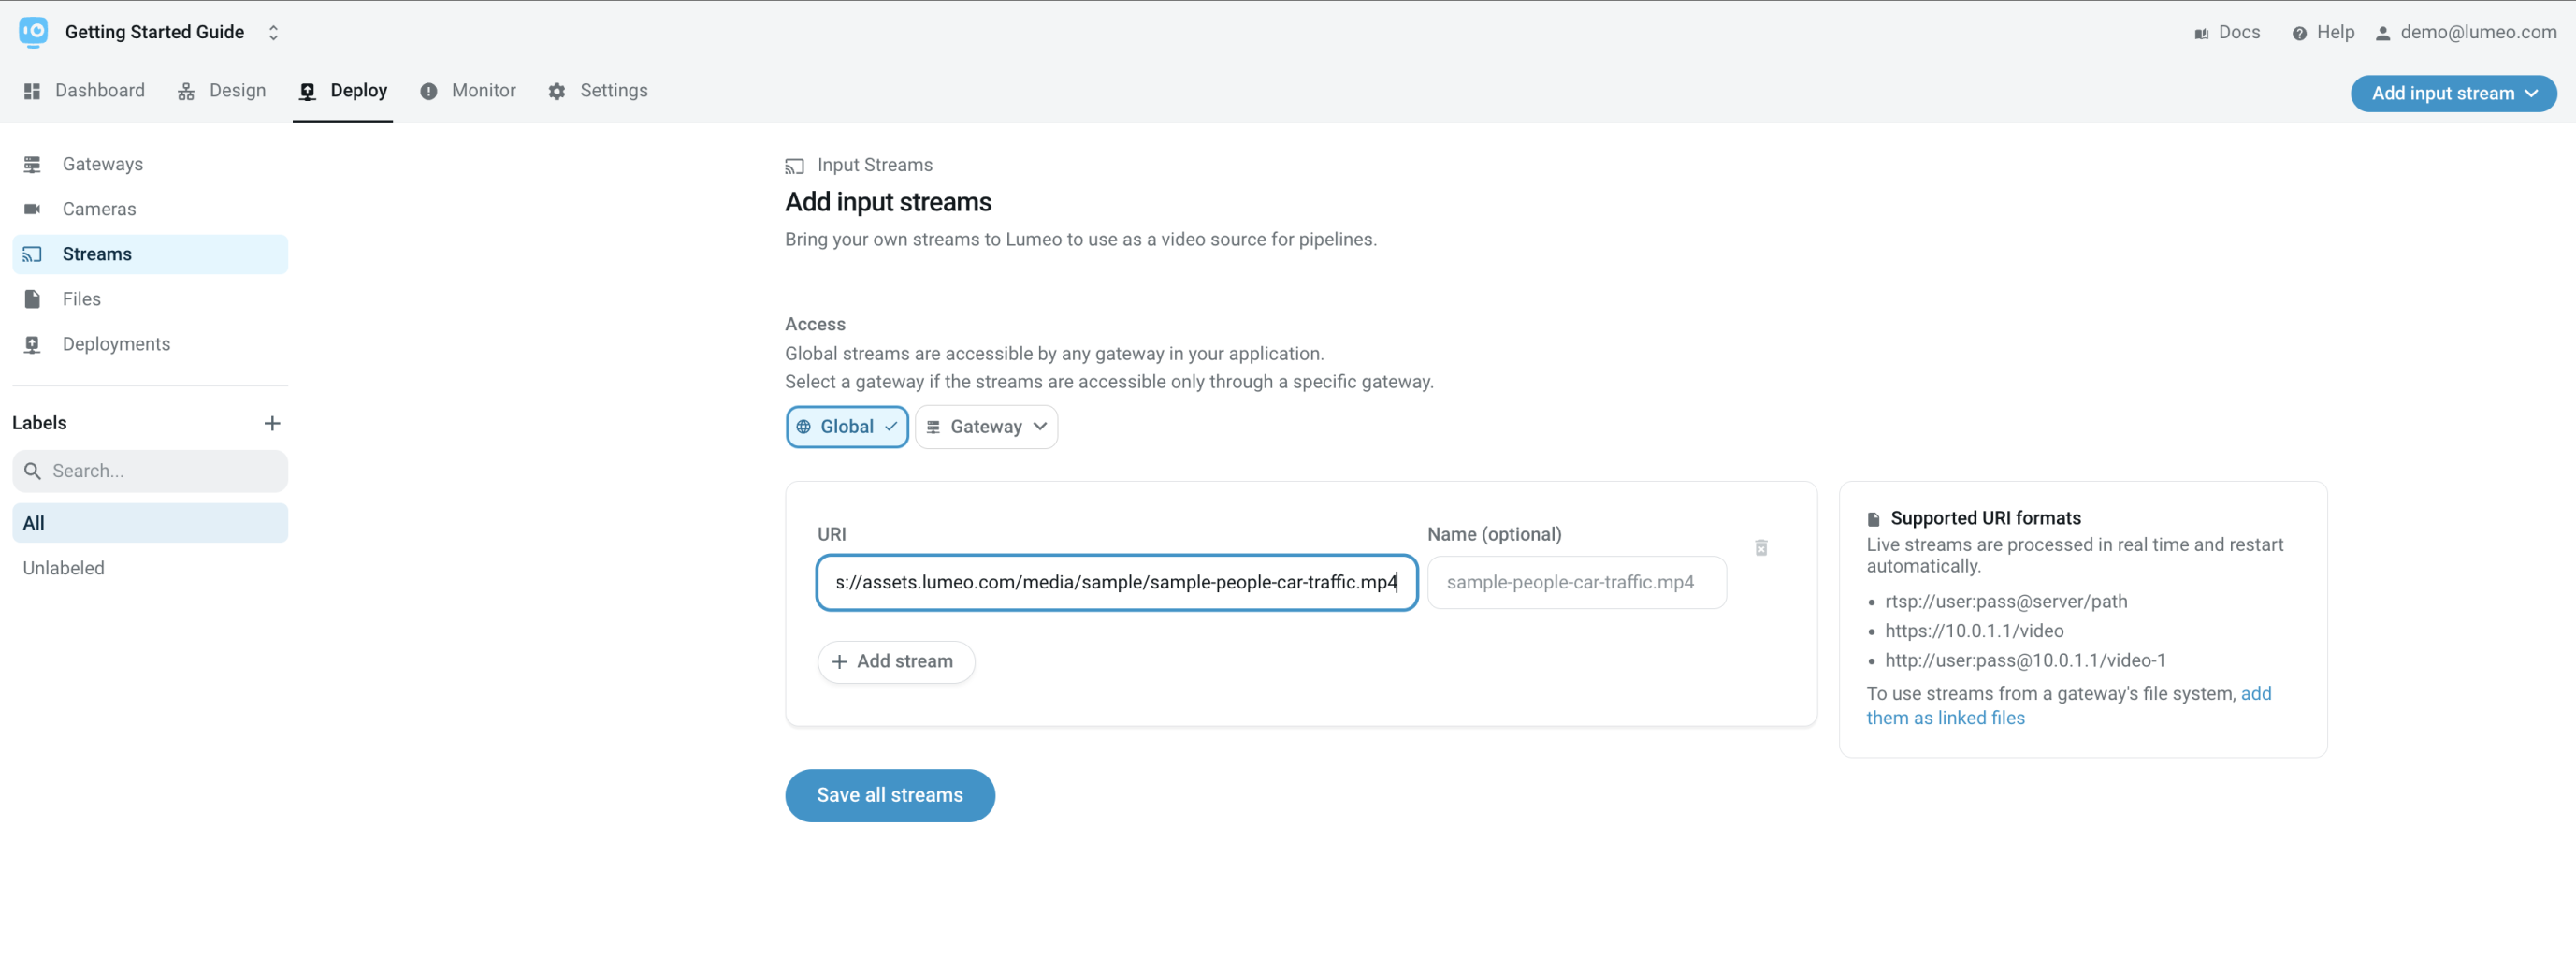
Alternatively, you can create a public stream to use as an input. Here are some sample streams you can use :
https://assets.lumeo.com/media/parking_lot/mall-parking-1.mp4
https://assets.lumeo.com/media/sample/sample-people-car-traffic.mp4
To do that, head over to Streams page, and create a new Stream with that URL.
Create a new Stream
Using RTSP Streams
AccessYou can configure a RTSP stream, a file or a HLS stream using its URL. The key thing to note when using the Lumeo Cloud Gateway is that this stream needs to be accessible over the public internet.
In practice, if you are using on-prem Gateways, then you can use locally accessible stream URLs and they will work great.
URL FormatIf you need help finding the RTSP URL for your camera, here's a handy guide / list : https://www.ispyconnect.com/cameras
CredentialsEnsure that Stream credentials are correct if it is password protected. Streams with incorrect credentials will fail to generate a preview (as seen below) and generate events under Monitor -> Events page.
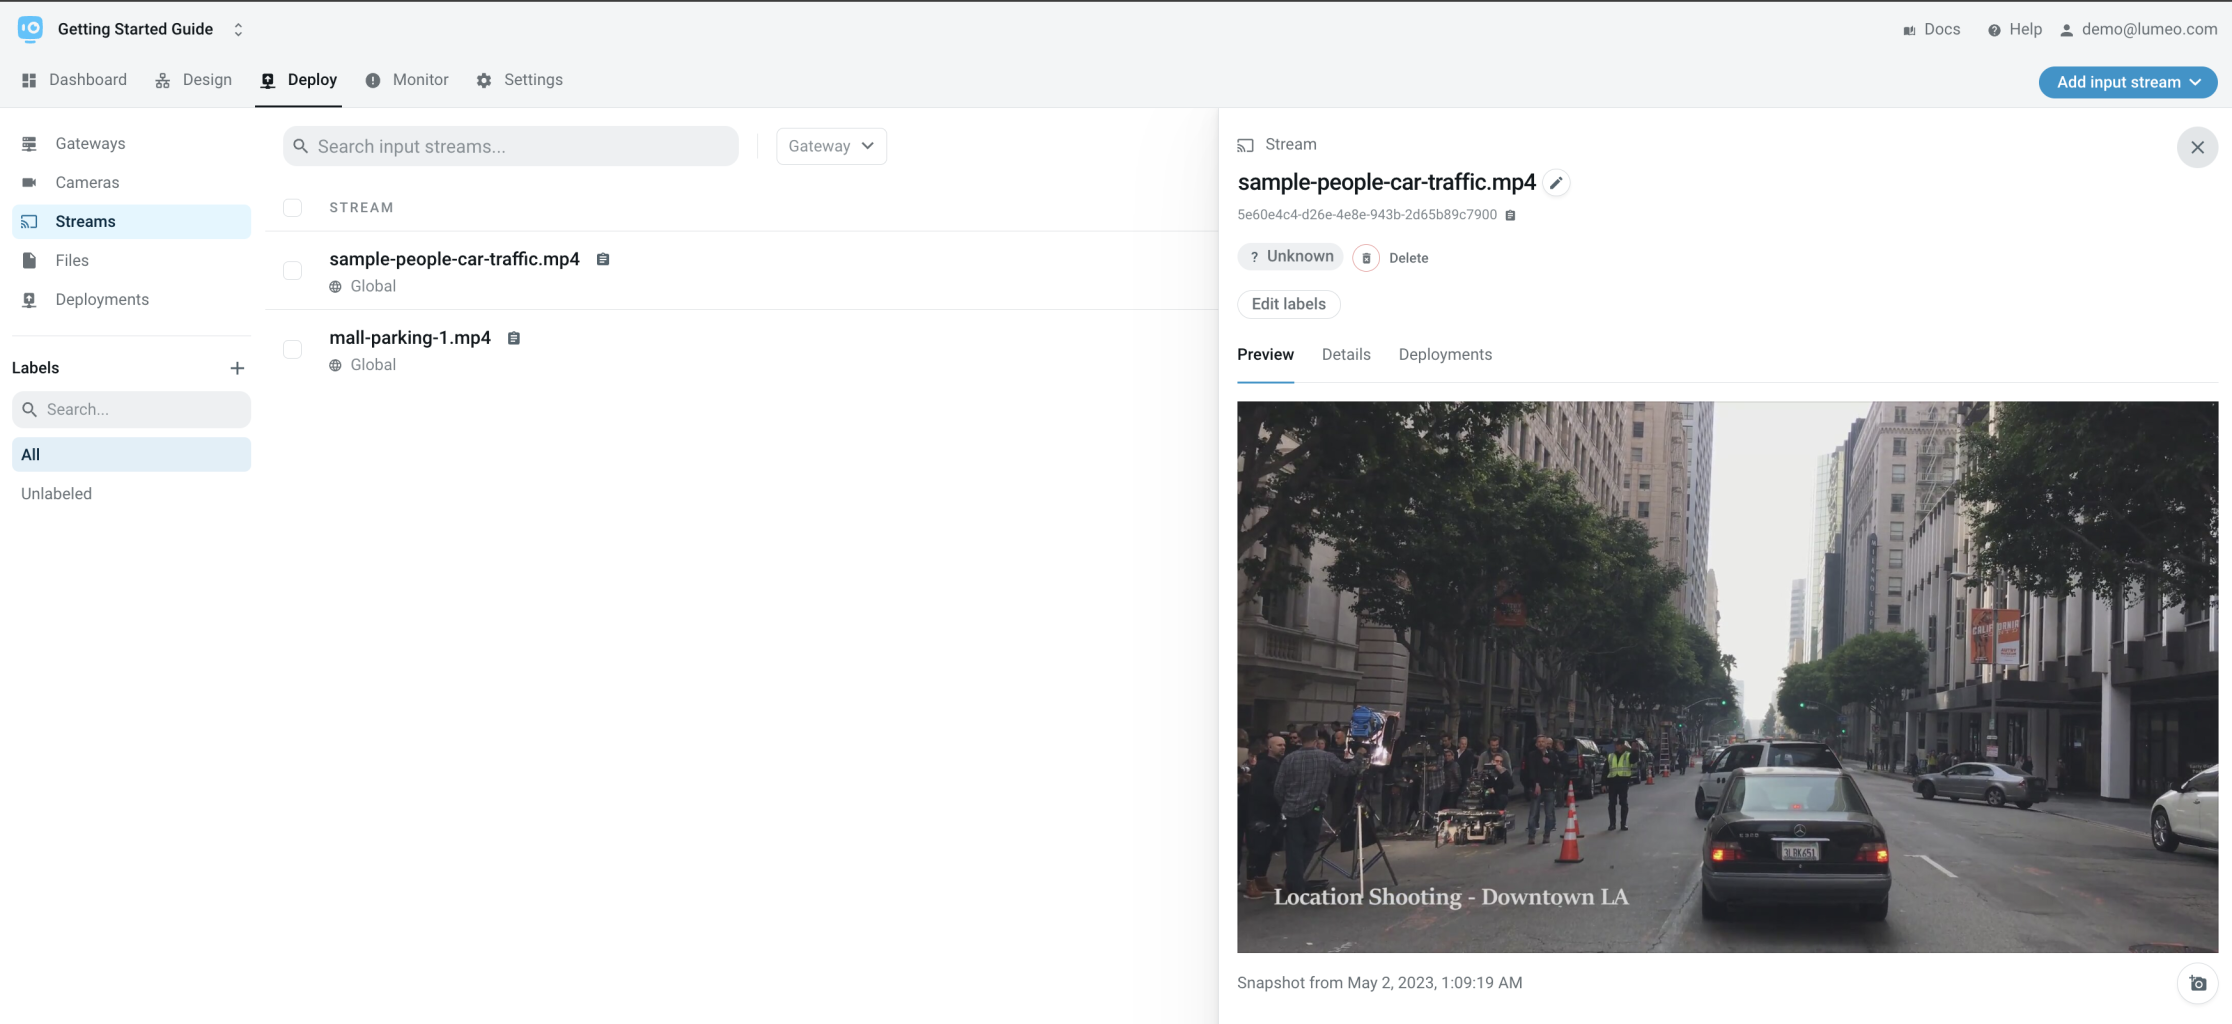
Stream snapshot
Deploy your Pipeline to the Gateway
Now that you have a Gateway and a video source setup, it's time to deploy your first pipeline to the gateway and run it. Head over to Pipelines -> Pipeline name -> Edit Pipeline and click the Deploy -> New Deployment button to create a new deployment.
You can also deploy a PIpeline from the Stream detail page
On the deployment dialog, select the Gateway, the camera or stream you created in the previous steps as the Video source, set the line position and hit Deploy.
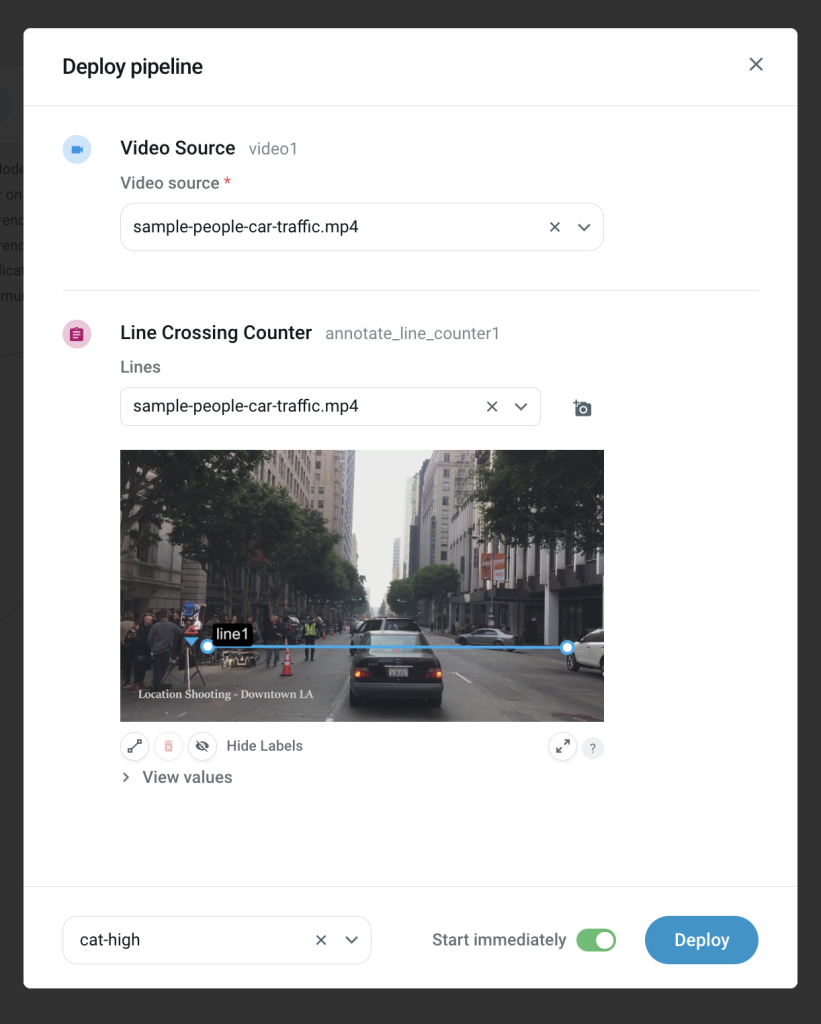
Deploying a Pipeline
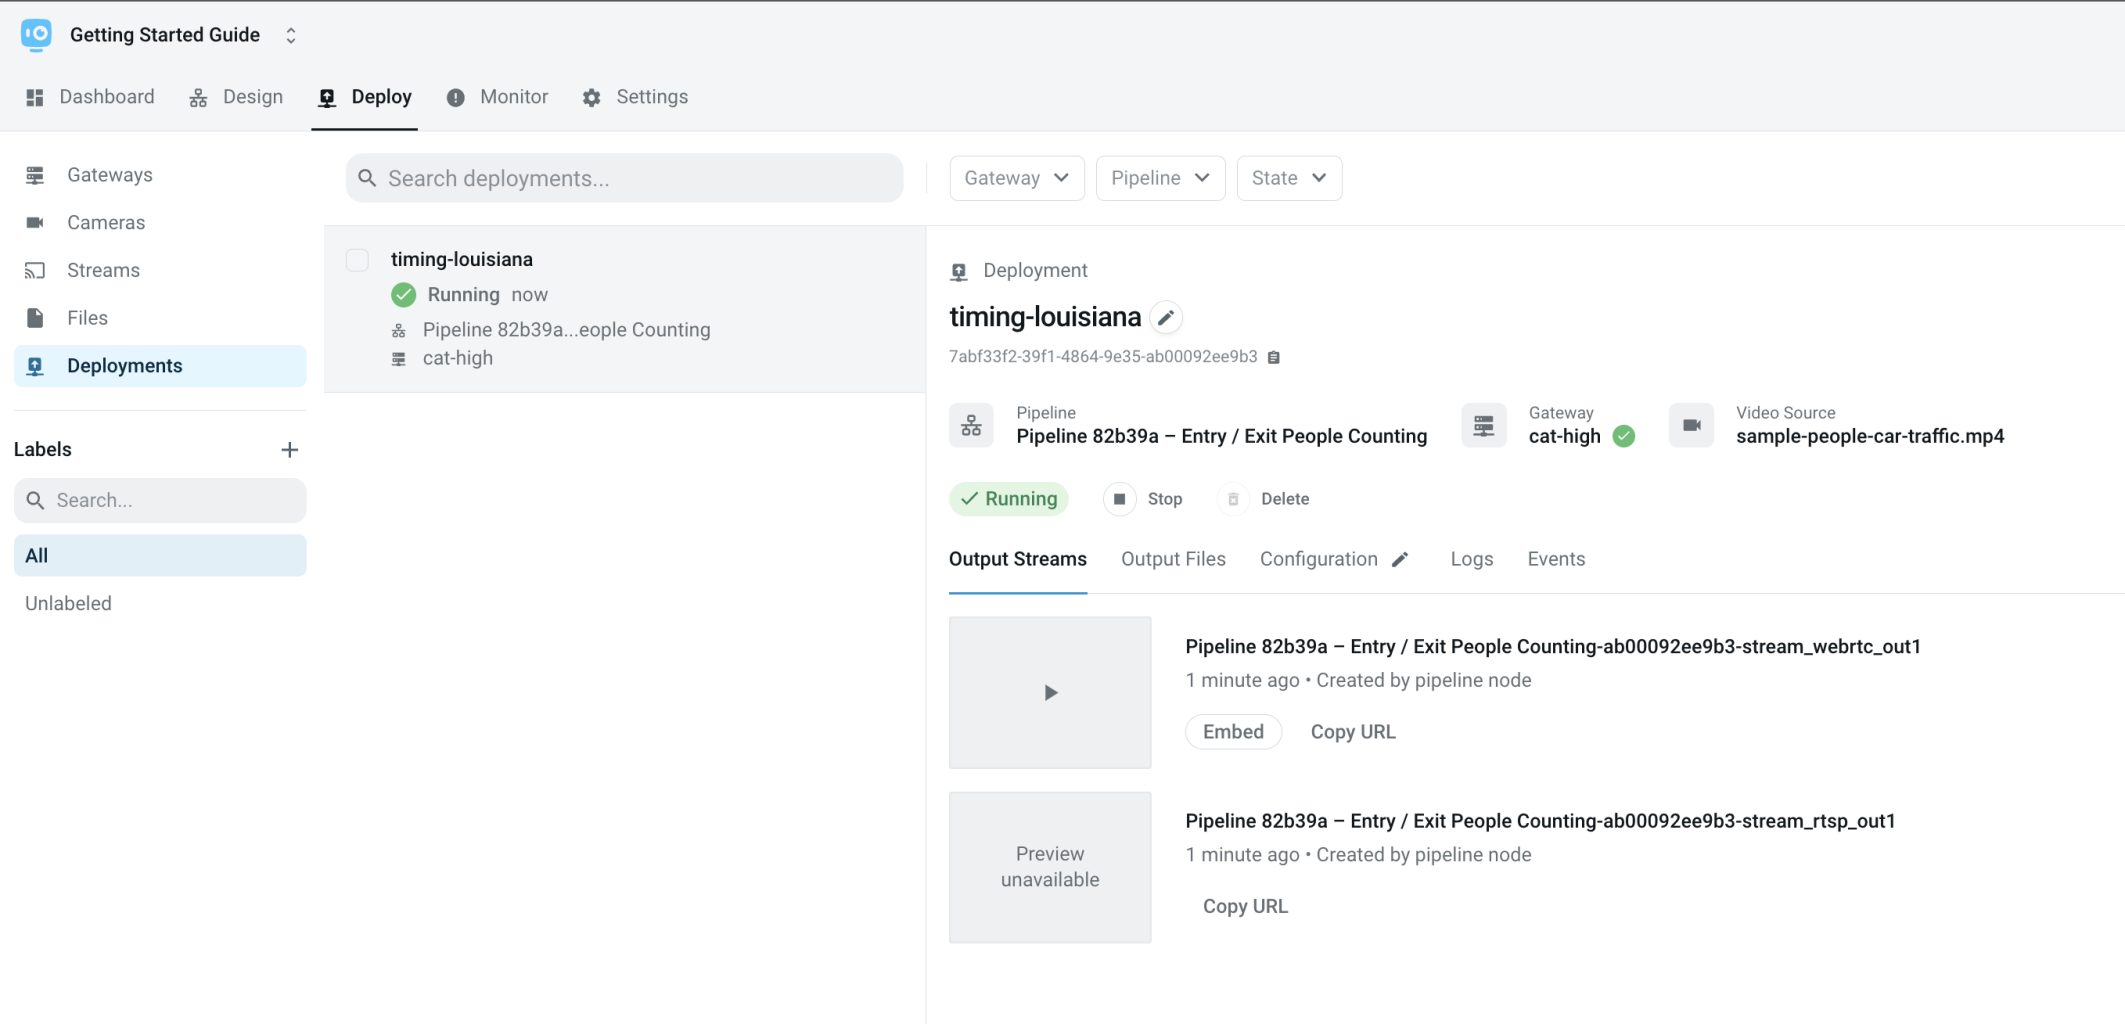
This now takes you to the Deployment detail page which:
- Lets you start and stop the Deployment
- Lists the output stream that was created by the pipeline
- Shows you the Configuration of the pipeline
- Shows events and logs generate by the deployment
First time you deploy a pipeline, Lumeo will download the model and the pipeline to the Gateway and optimize it. This takes a few minutes. Once this step is complete, the Deployment will change state to Running.
Deployment details
View the output Streams in the Console
Click on the play button to view the output WebRTC Stream in the Console. You can also copy it's URL and get the Embed code.
- The WebRTC stream URL can be used to view this stream publicly from any browser
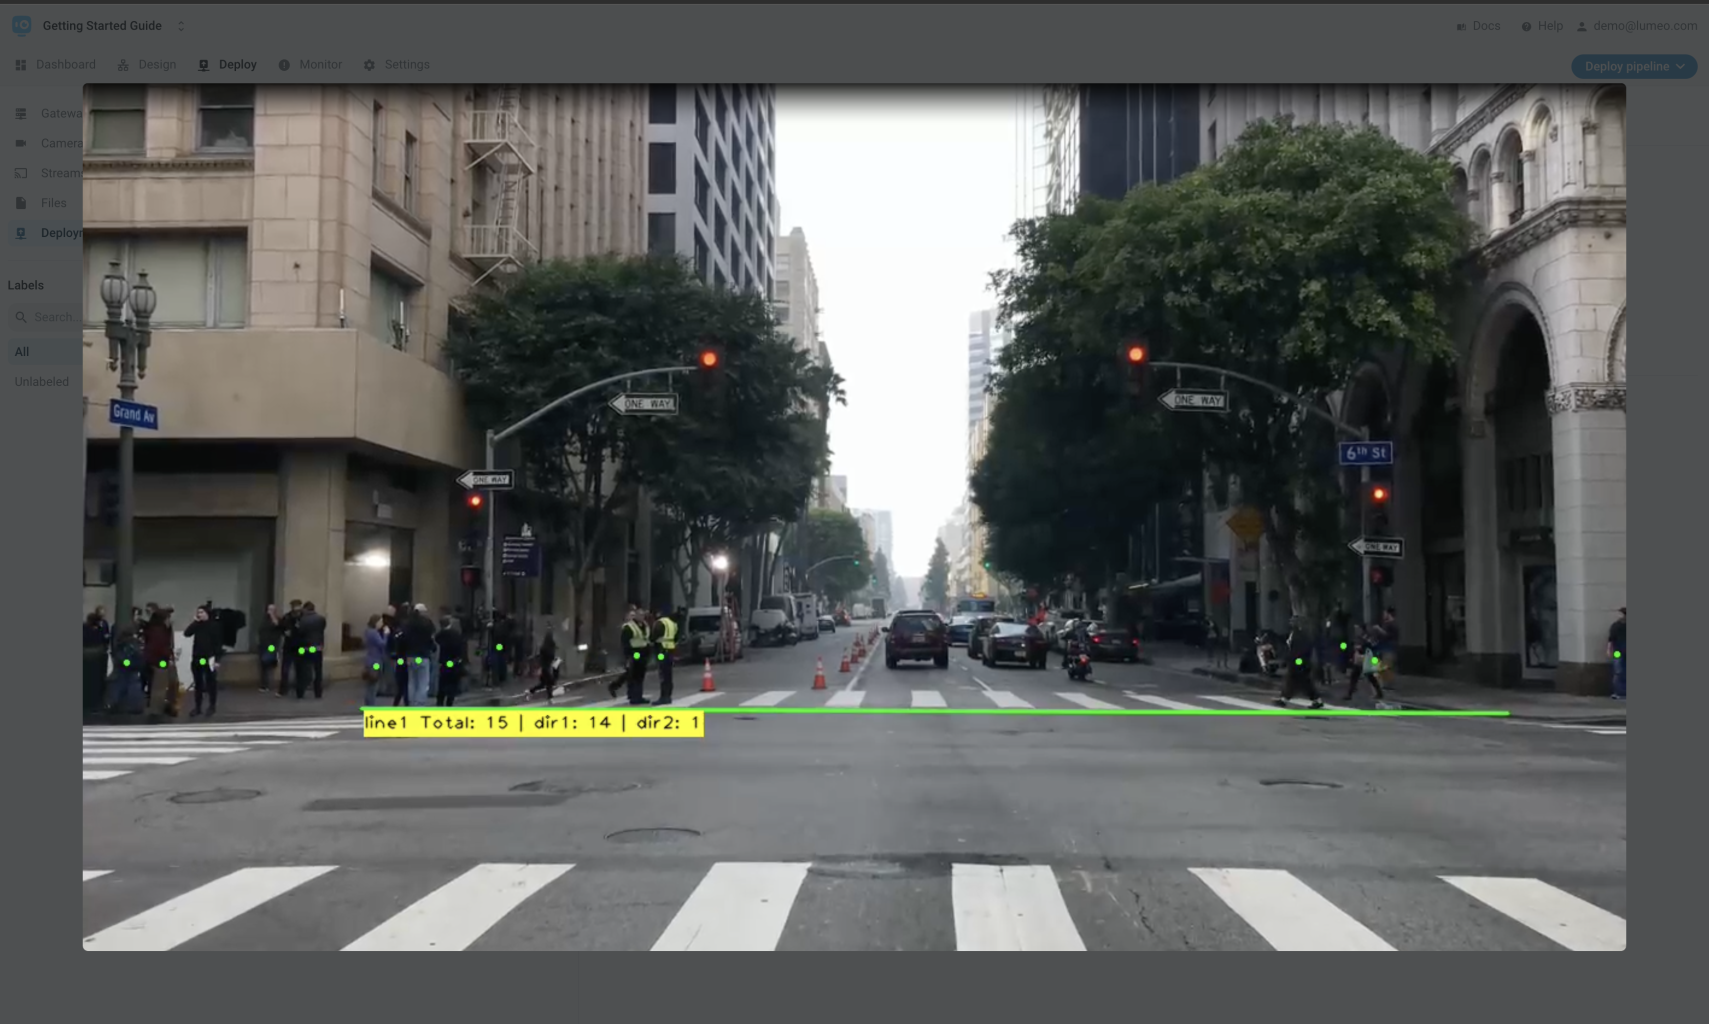
View WebRTC output streams in Console
Update the Pipeline and Redeploy
Now that you have successfully created and deployed a pipeline, let's walk through updating it.
Head back to the pipeline, and add a Save Clip Nodeto it. This will let us capture clips in addition to live streaming the pipeline. Connect it to the Encode node. Your pipeline should now look like below:
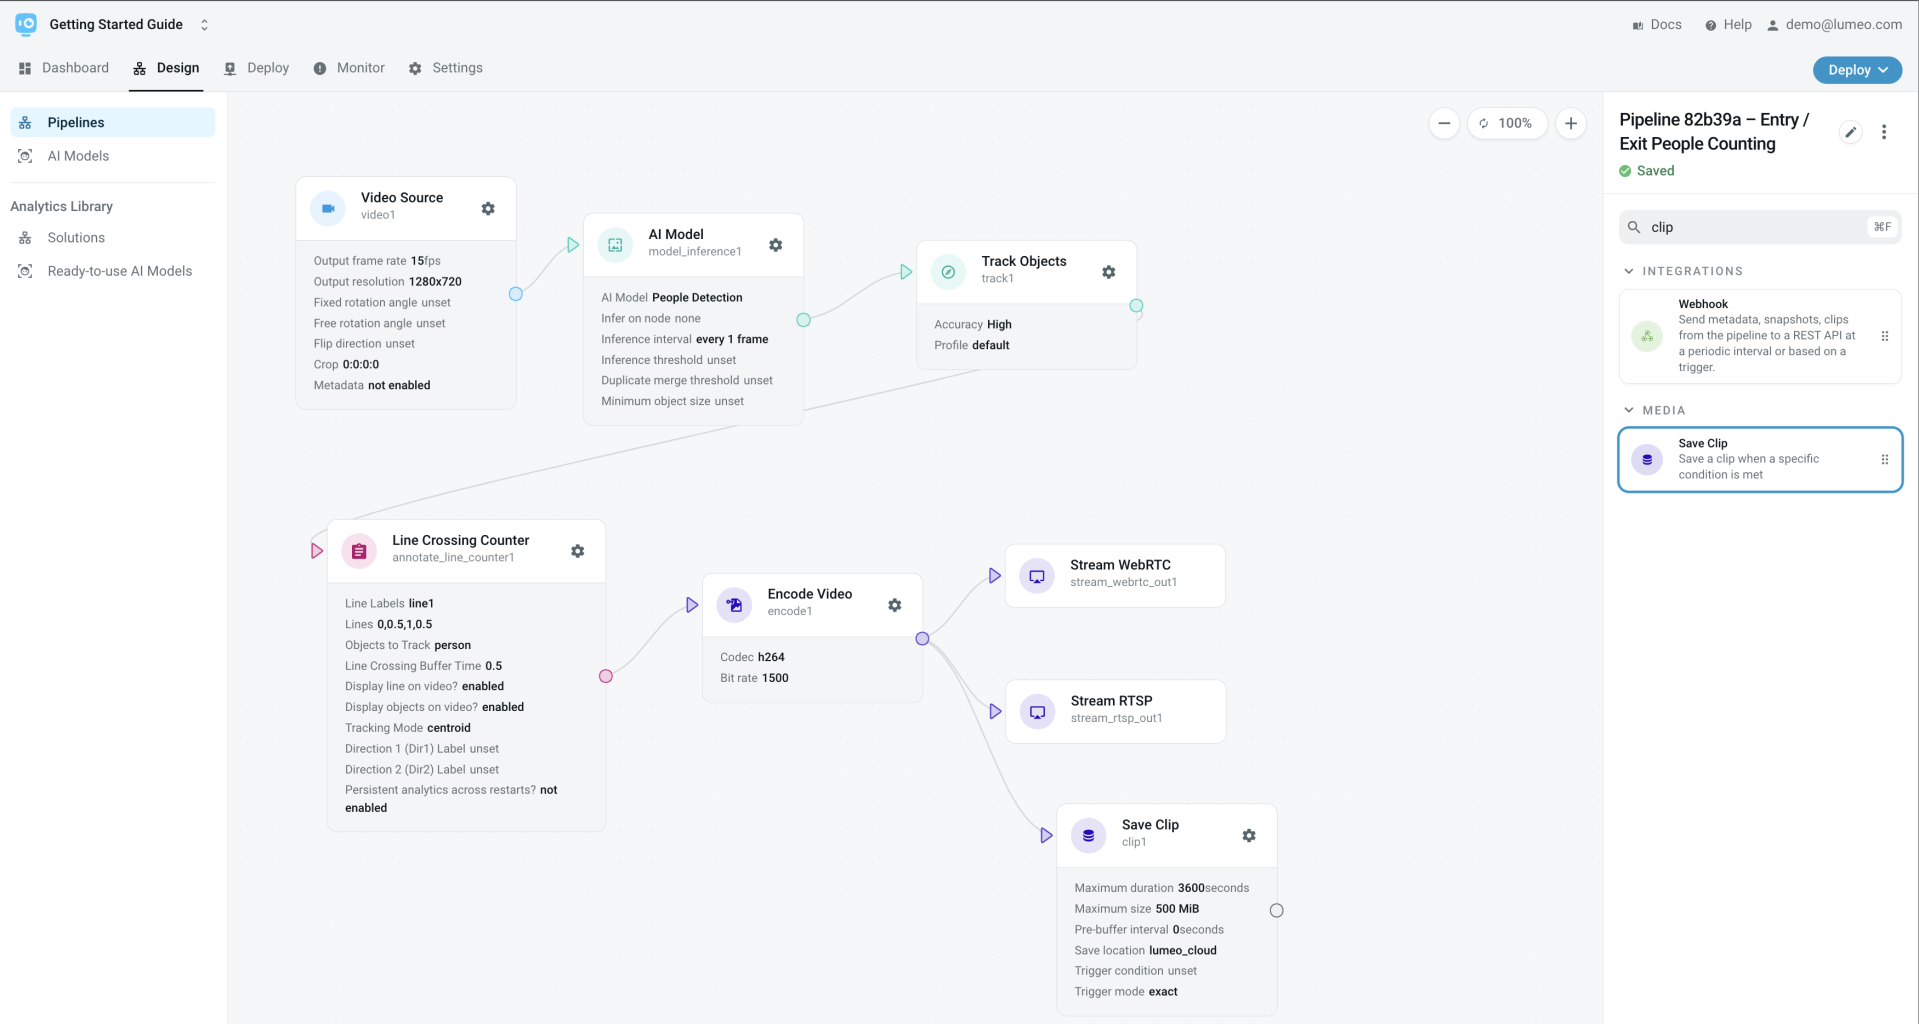
Update pipeline to add a Save Clip node
Next click on the arrow next to the Deploy button and select Update Deployments.
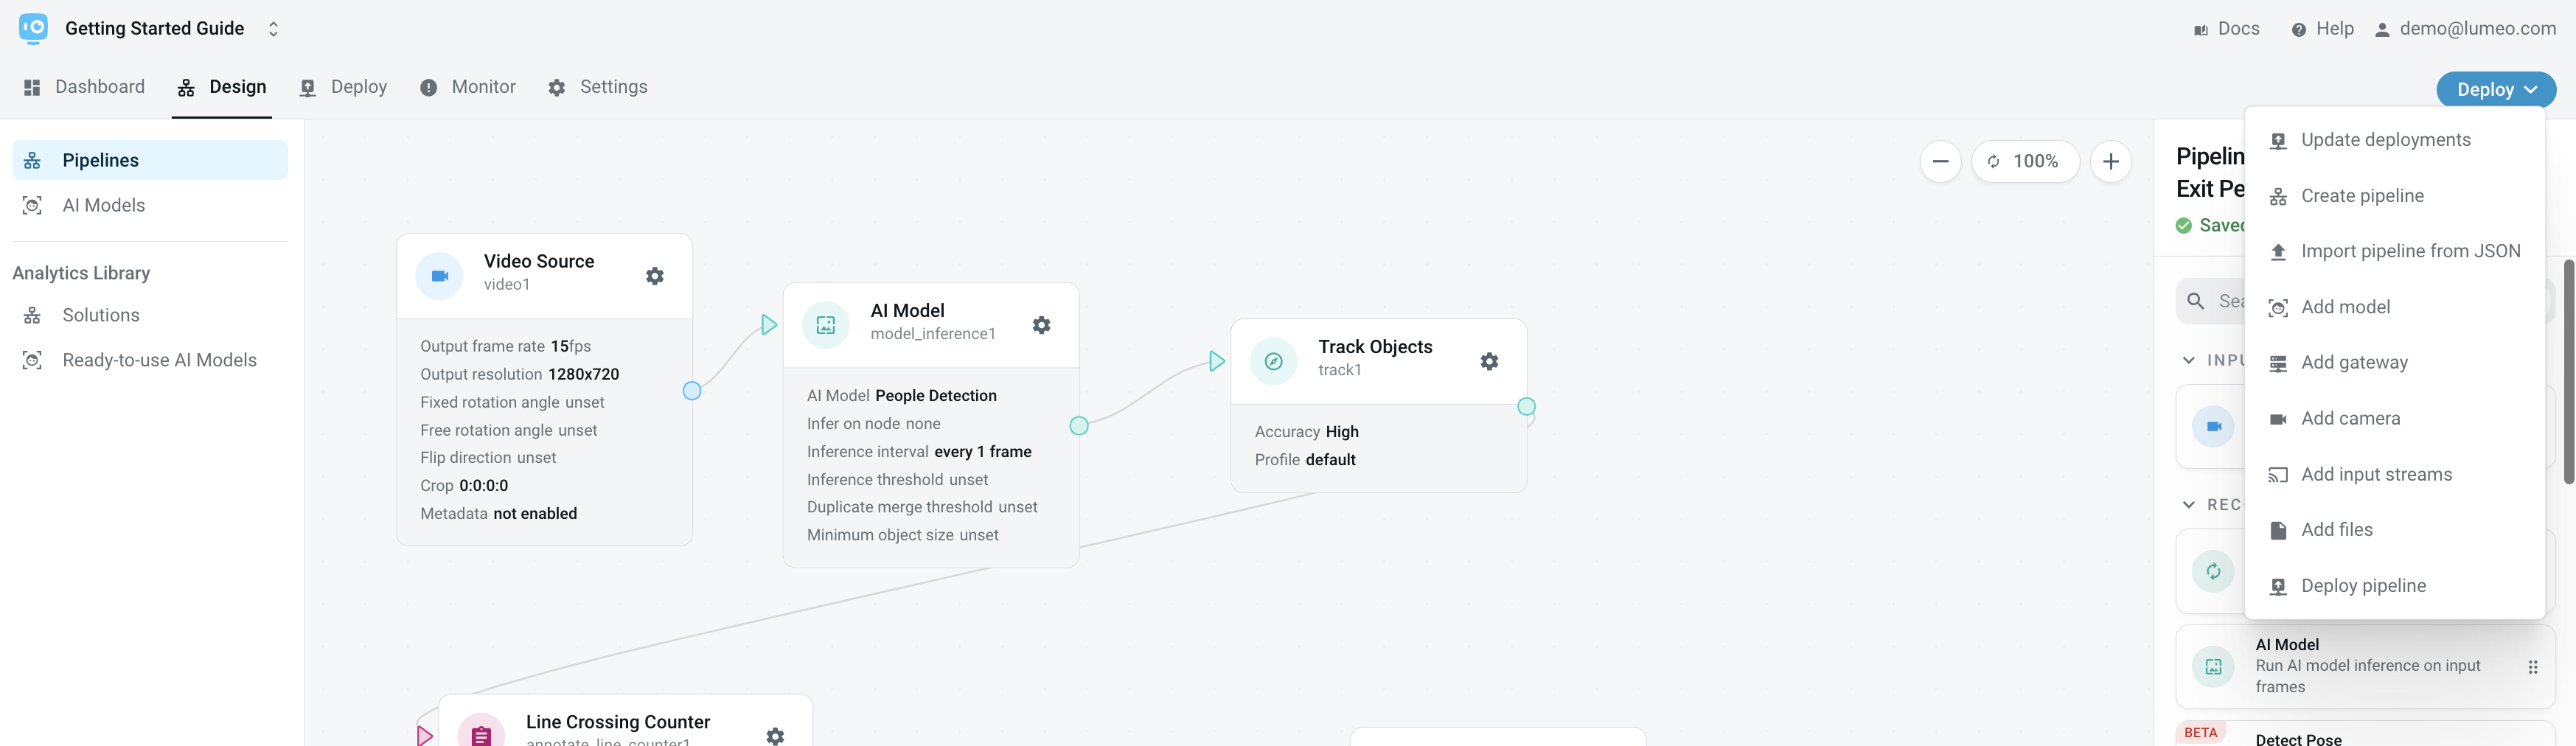
Update Deployments Menu
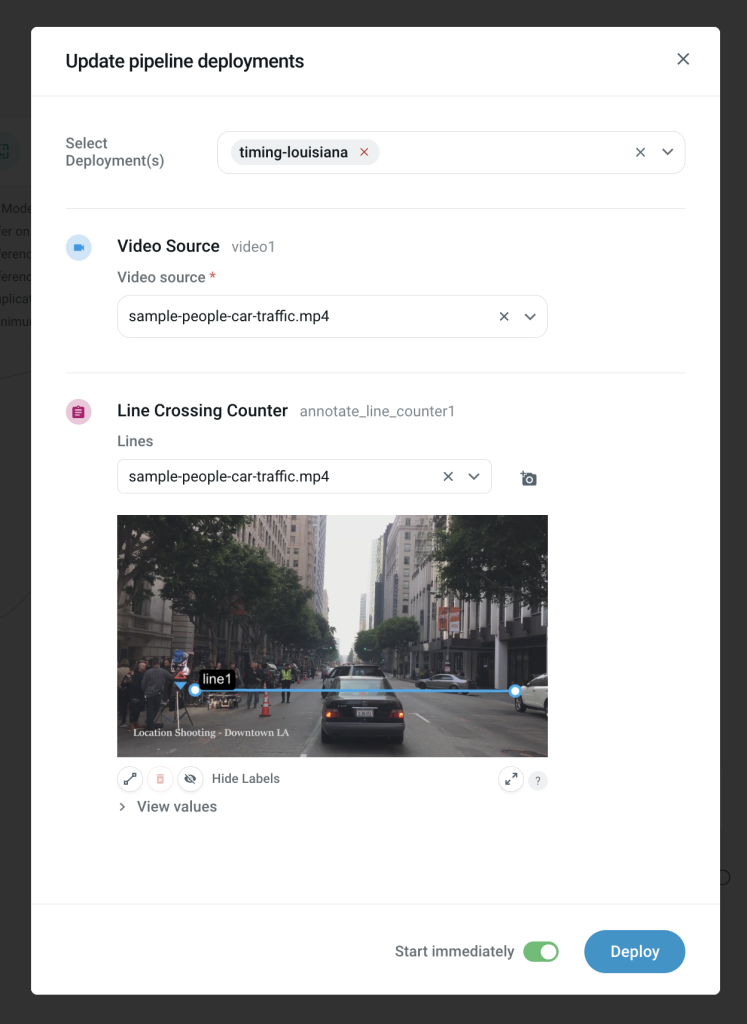
In the Update Deployment dialog, select the previously created deployment, and hit Deploy. This will update it with the change we made by adding a Save Clip node.
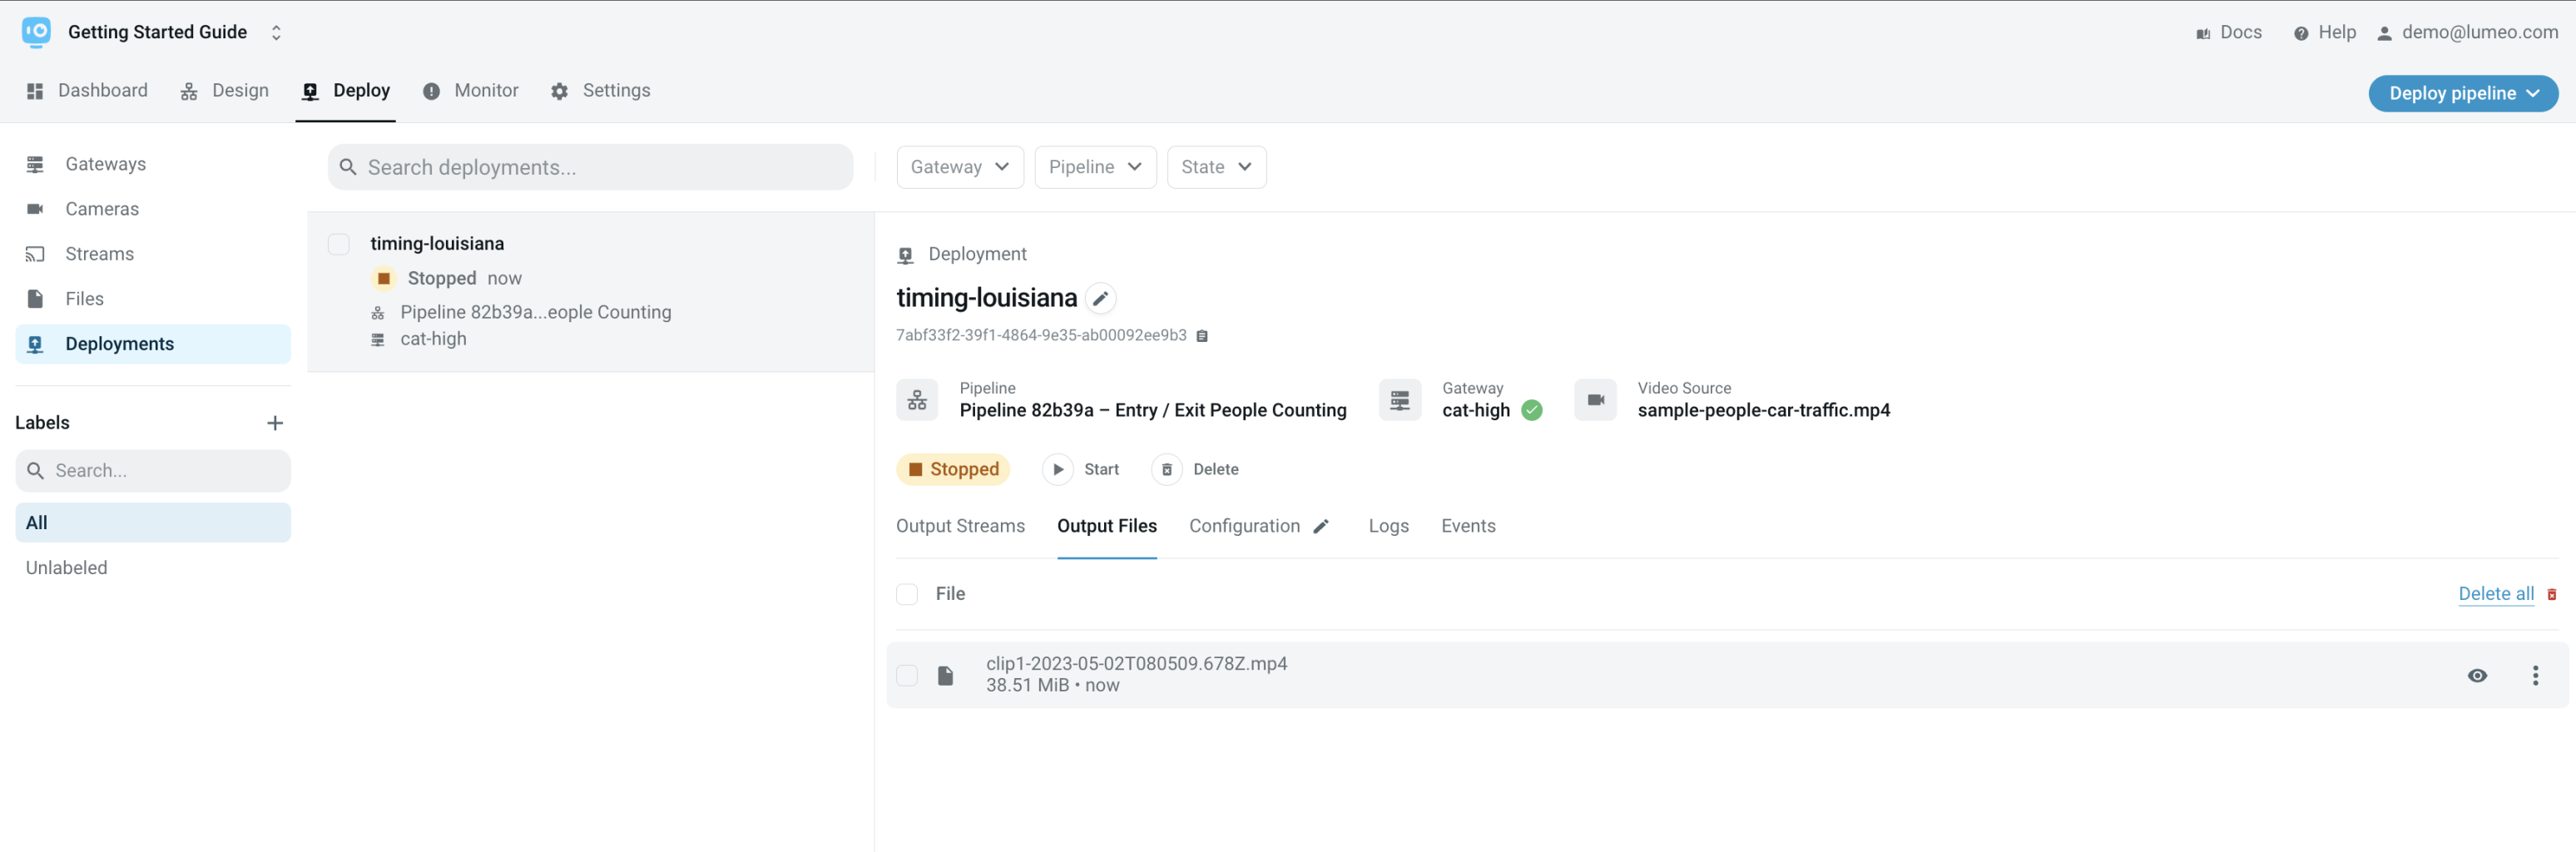
View the output Clips
Once the updated deployment finishes running, you can find the output clip under the Output Files tab.
Updated 6 months ago