
Notifications
Setup and configure Lumeo notifications
Set Up Notifications in Lumeo
Stay on top of important alerts with Lumeo's flexible notification system. Setting up notifications by user group helps ensure the right people get relevant updates—like analytics events, configuration changes, or system health issues.
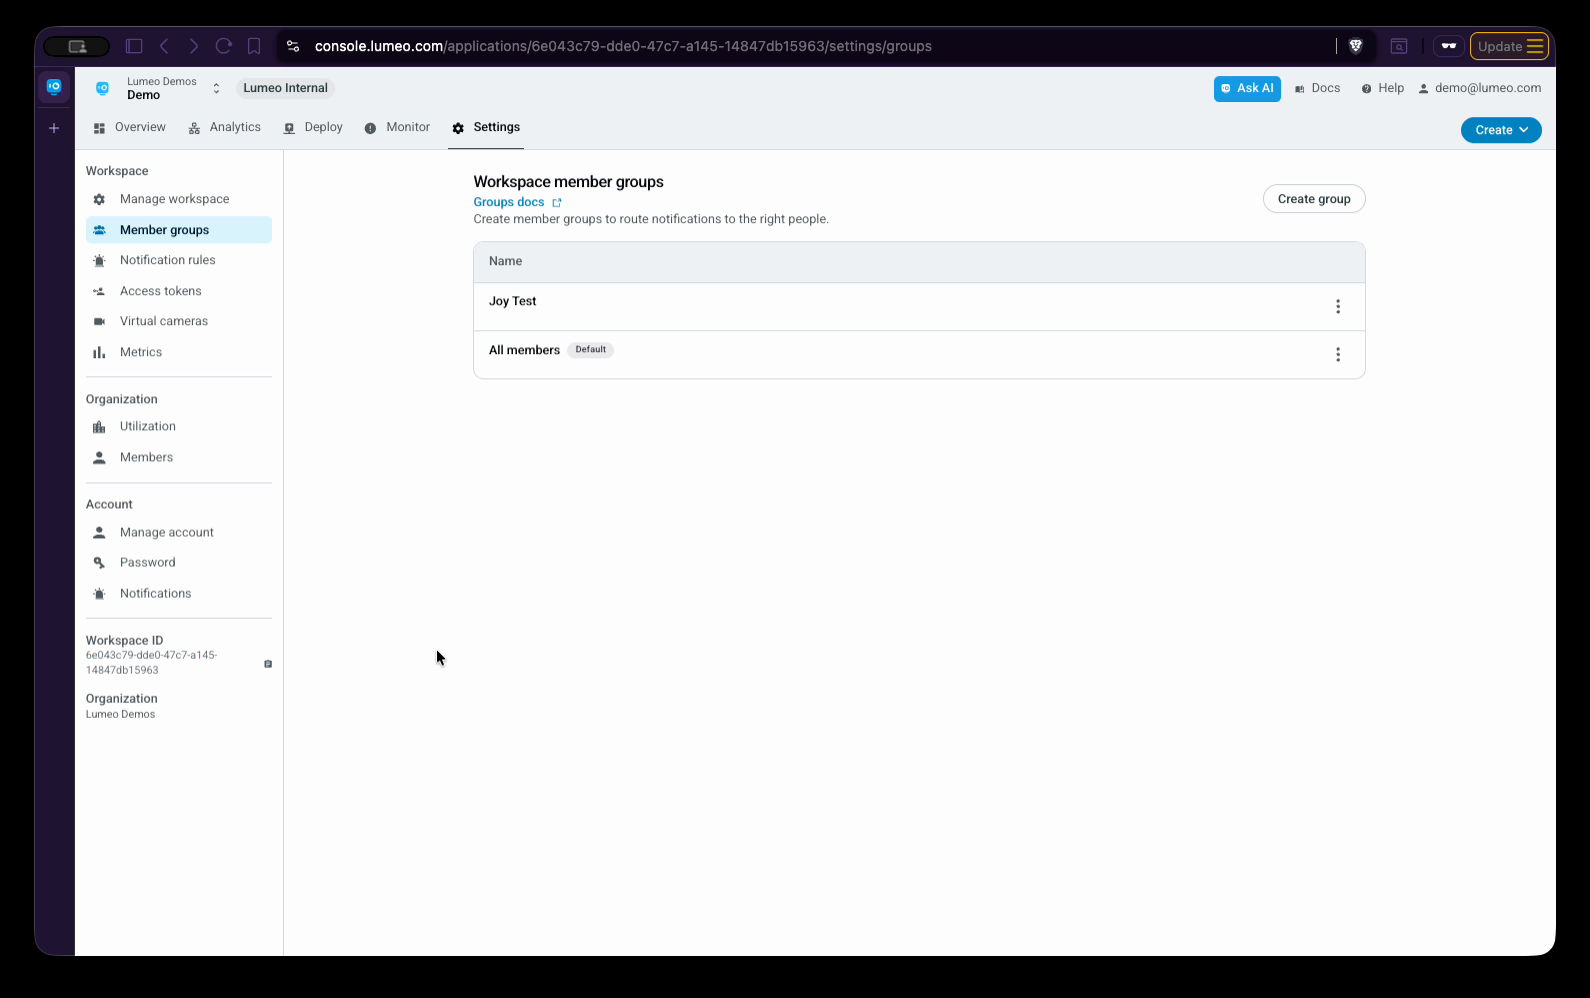
Step 1: Go to Settings and select Member Groups, then Create Group.
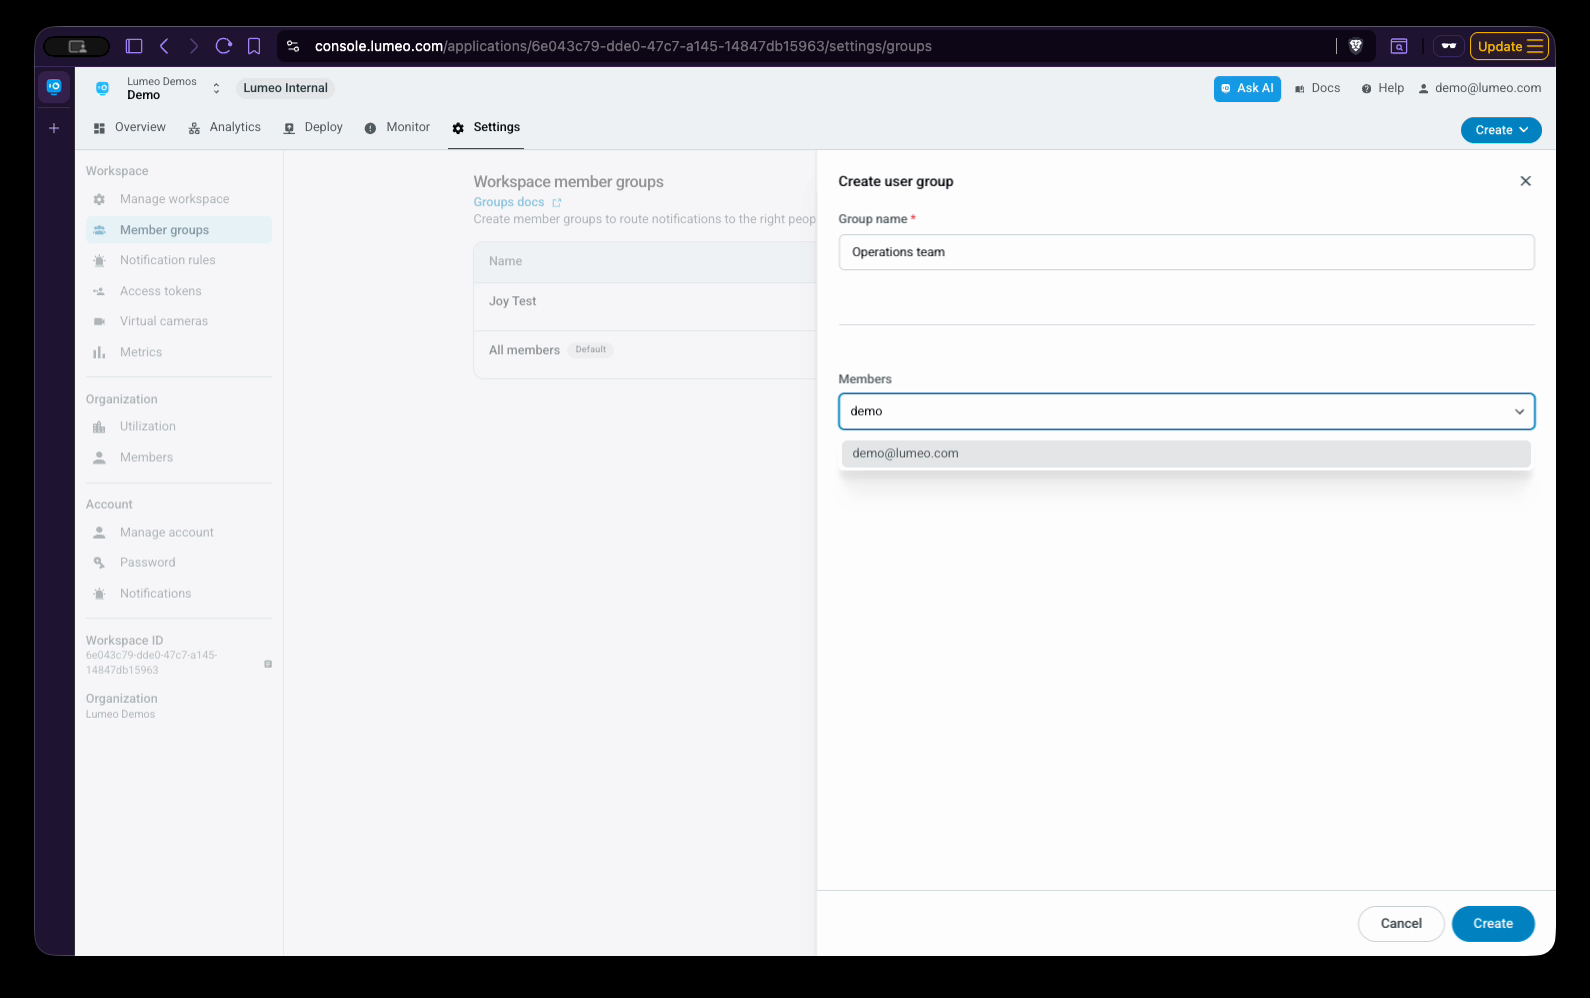
For example, call it Operations Team.
Step 2: Add members from your organization or workspace to the group.
Member groups let you organize users so you can target specific notifications to the right teams. Create as many groups as you need—each with different member profiles.
Step 3: Switch to Notification Rules.
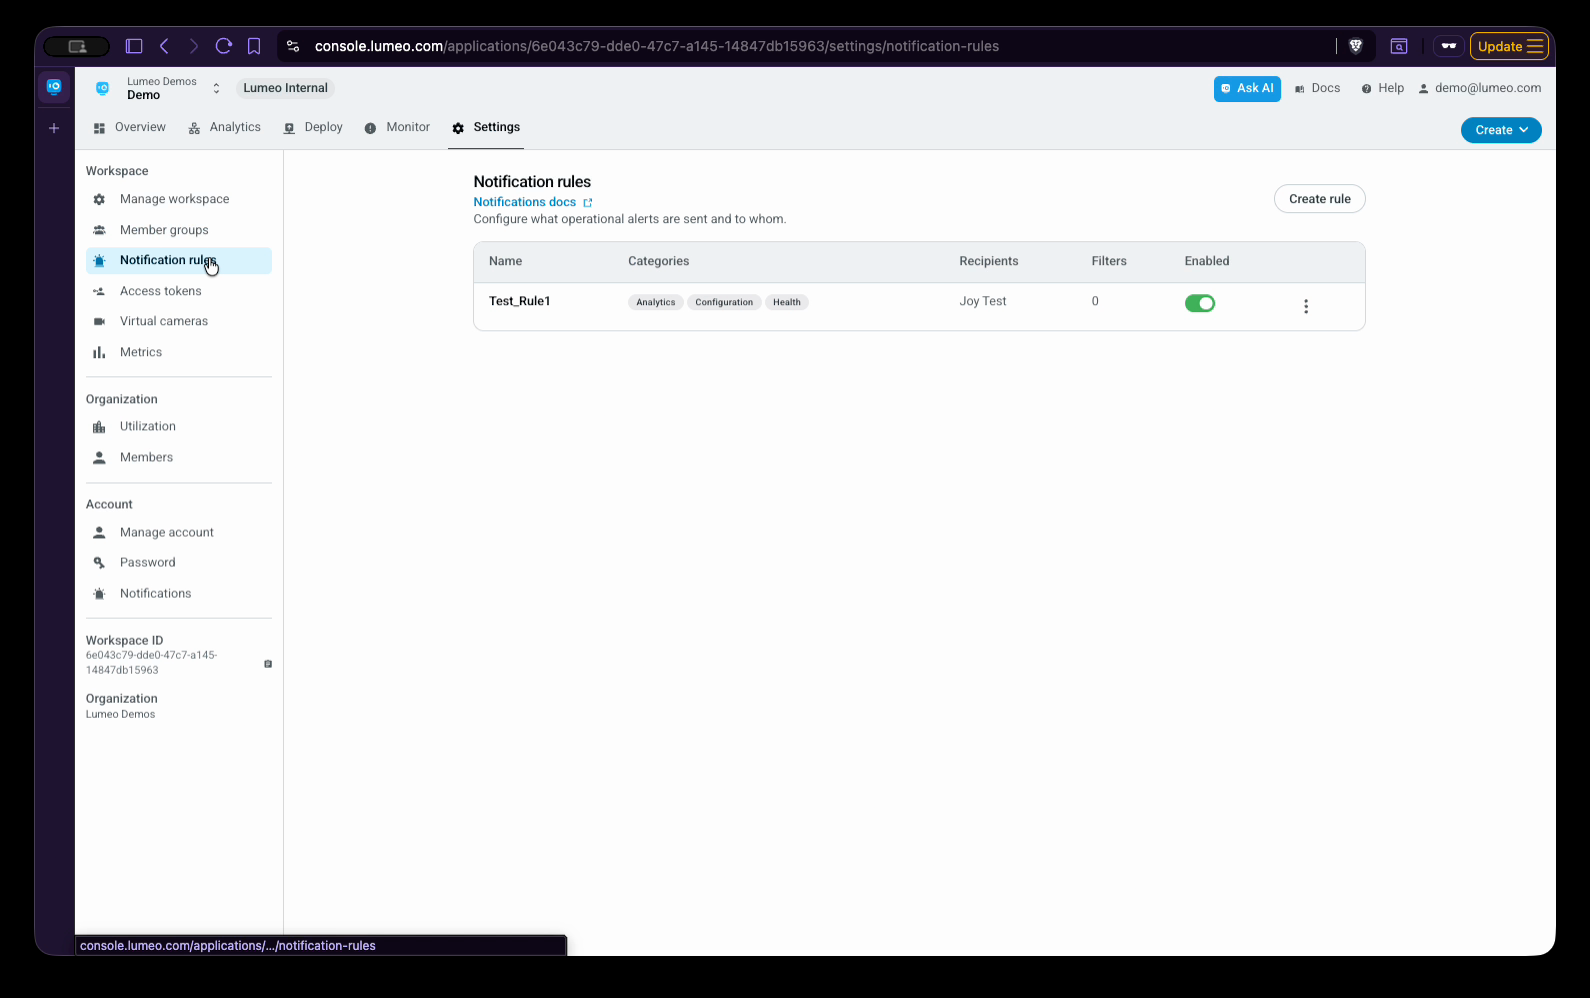
Step 4: Click to add a new notification rule.
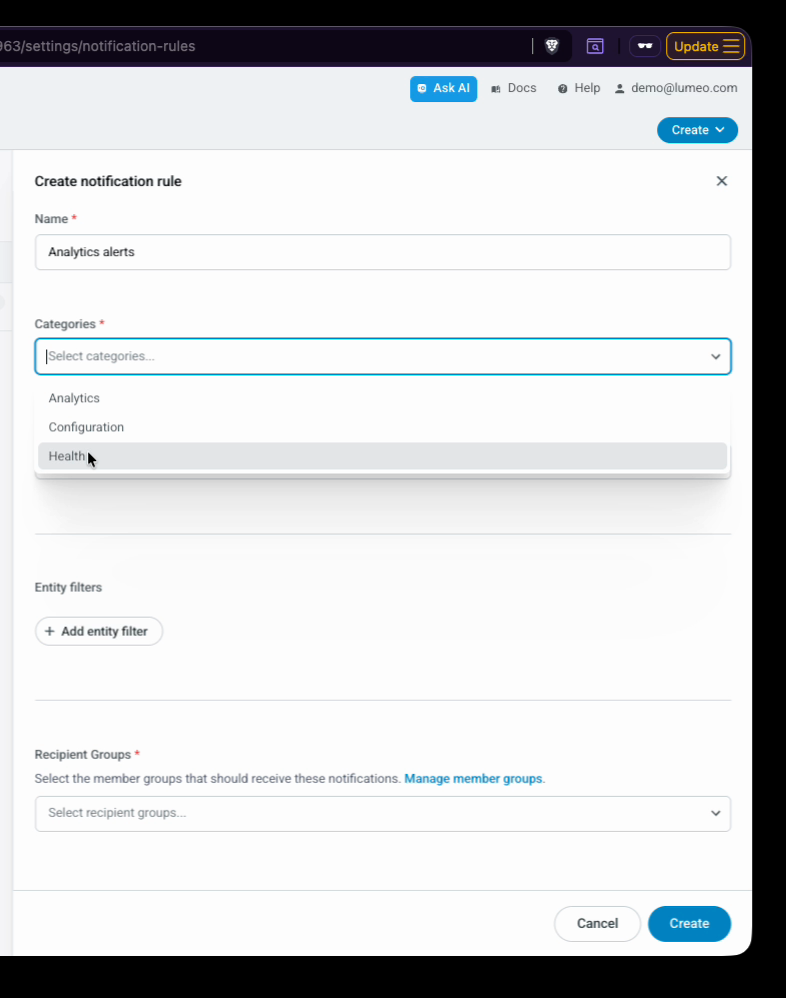
Step 5: Pick a Category: Analytics, Configuration, or Health.
Choose a notification category based on what alerts you want to send: analytics (event alerts), configuration (workflow updates), or health (system issues).
Analytics include alerts like loitering or ordering detected by your workflows.
Configuration covers changes like new workflows being deployed.
Health covers issues such as cameras or gateways going offline, or high CPU/GPU use.
Step 6: Select notification types for your chosen category.
Leave the list empty to send all notifications in that category, or narrow it down by type.

Step 7: Setup filters for notifications
For analytics alerts, enter the keywords you want to include —like “intrusion” or “person”— to only get relevant alerts, separating each with a comma.
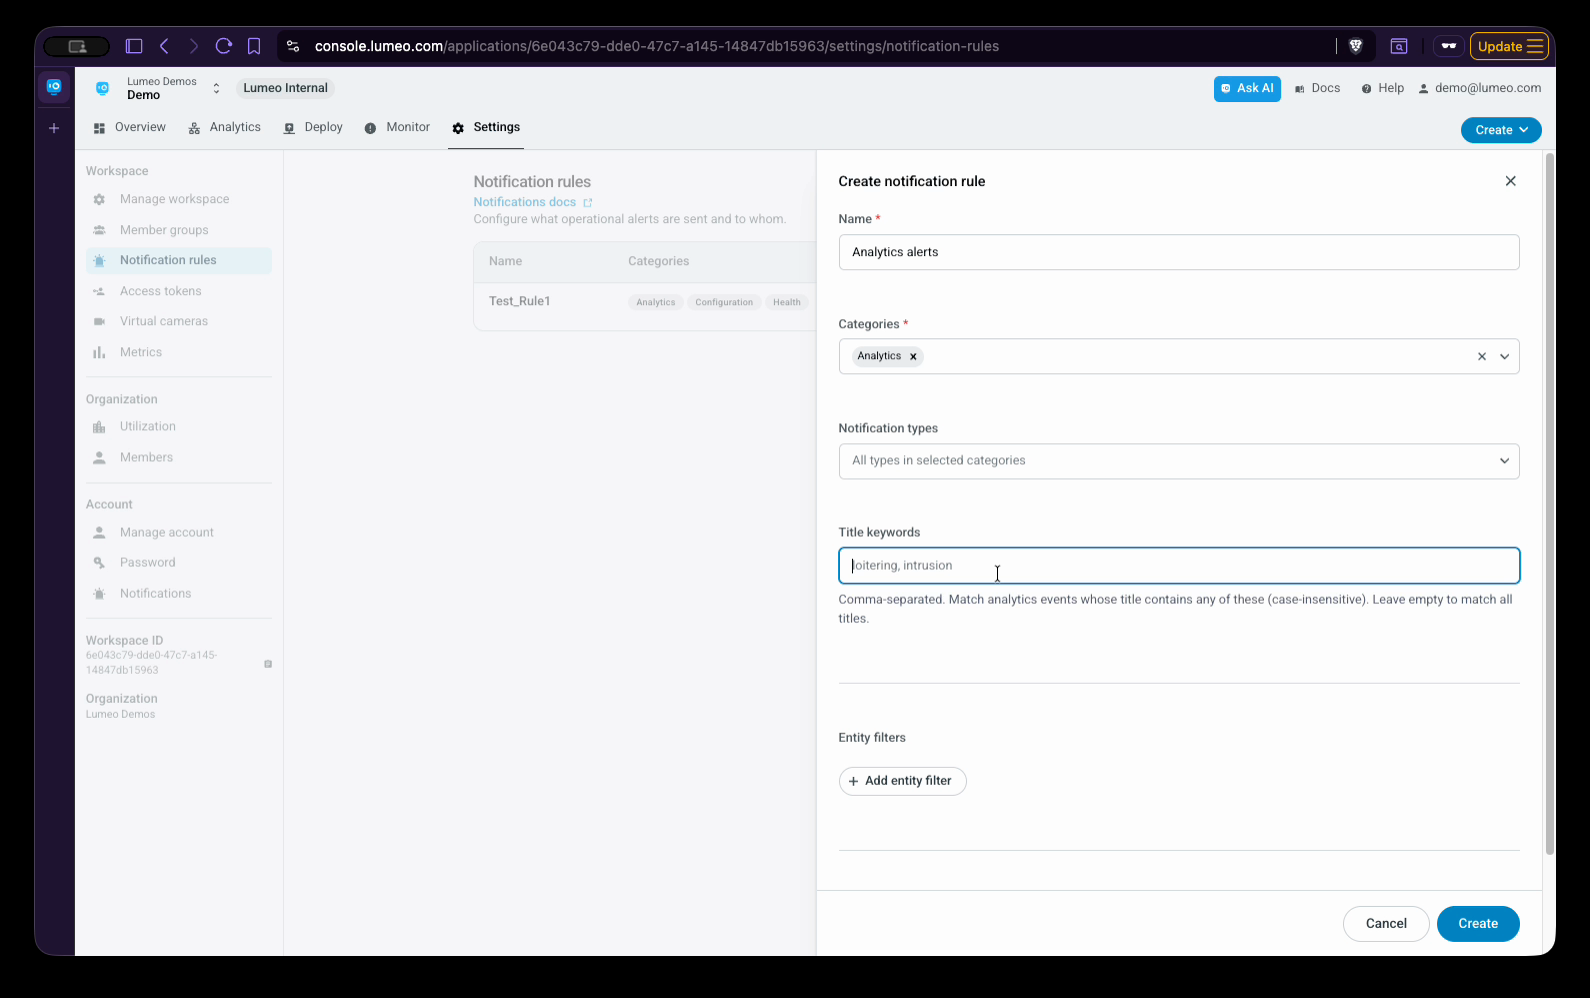
You can also filter further by gateway, camera, or tag. Skipping these filters sends all notifications across your account.
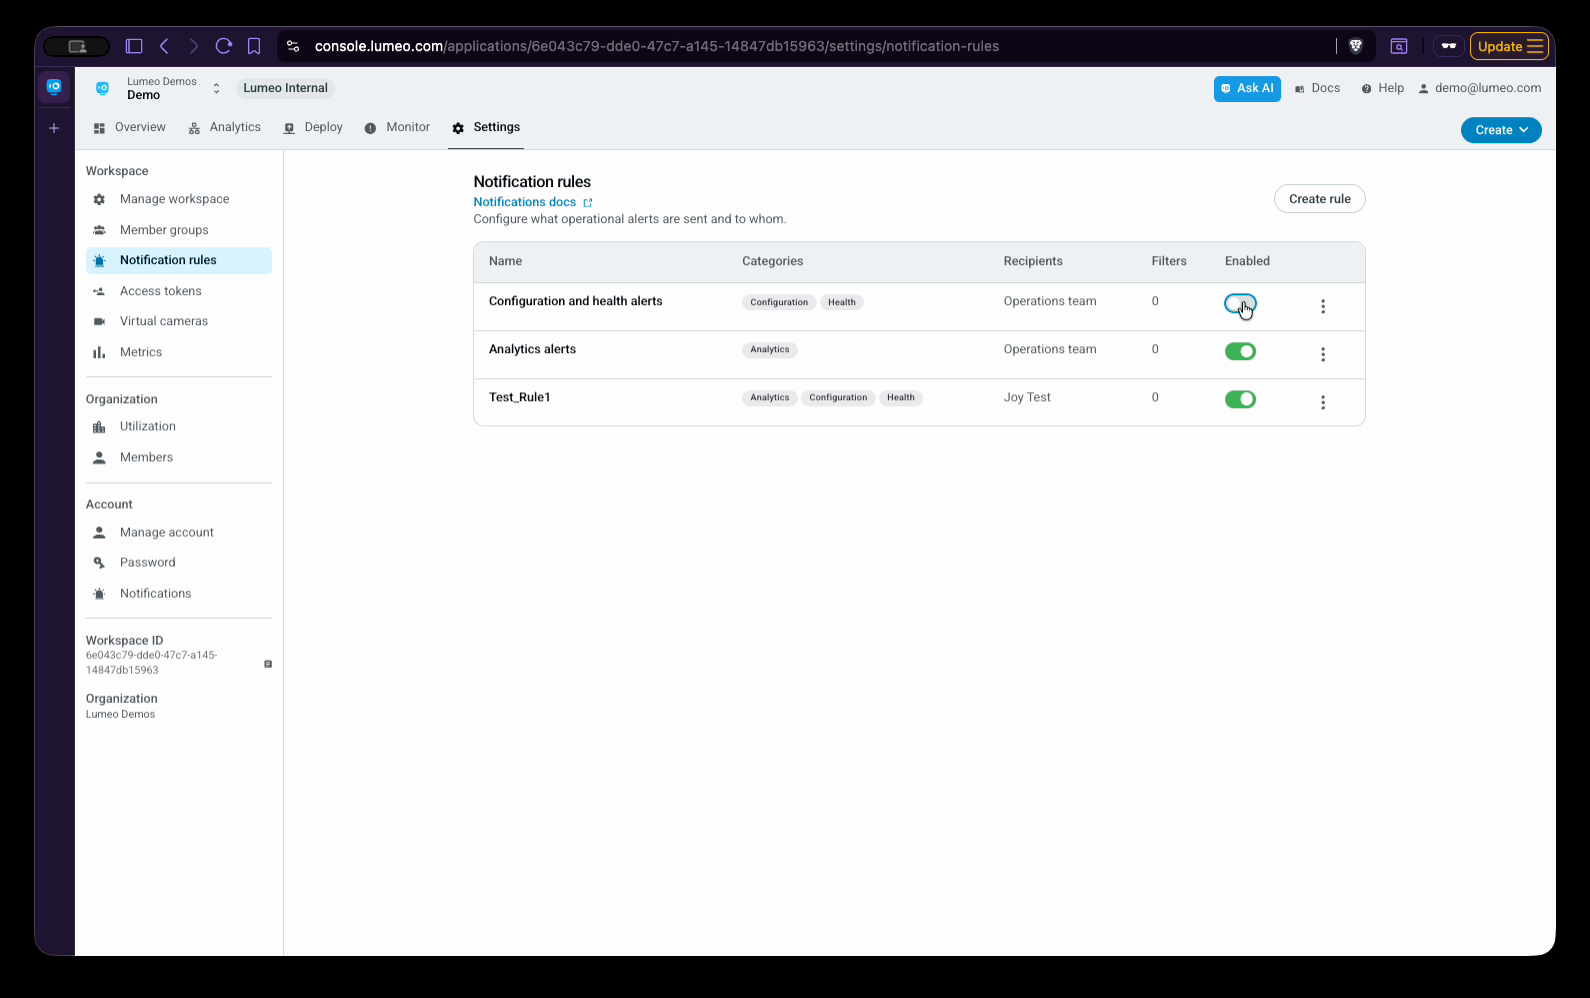
Step 8: Assign a Recipient Group by selecting the member group you created earlier.
Repeat these steps to create more rules for other alert types, like configuration and health. Choose the notification types that matter most, such as cameras added, cameras offline or removed, and gateways offline or removed. If needed, review the full list and add more notification types. Apply location- or device-specific filters as needed.
Step 9: Toggle rules on or off at any time using the Enabled button.
Once your groups and rules are in place, notifications begin flowing to your recipients. To finalize, go to the Notification section under your account and verify that your notification channels—Email and Push Notifications—are turned on. Turn on notifications for each workspace you belong to and confirm the email shown is correct.
Additional Tips & Workspace Management
-
Member groups and notification rules are workspace-specific. If your organization uses multiple workspaces, repeat these steps in each one.
-
The All Members group lets you quickly target everyone in a workspace.
-
When inviting a new user, select the Notifications role if the person only needs to receive alerts (not access the Lumio console). These users receive notification snapshots or clips but can’t log into the console—ideal for static alert devices, Slack or Teams, or remote guards.
-
To manage which analytics notifications trigger, use Manage Notifications inside your workflow setup.
Getting your notification setup right means your team always stays informed and ready to act. Happy monitoring!
Updated 20 days ago