
Watchlists
Use Watchlists to find, alert on and track last known location of individuals (face matching), vehicles (LPR) or other objects.
Background
Watchlists in Lumeo streamline your video analytics by flagging faces, license plates or custom object metadata such as barcodes for automated monitoring and rapid response. Here’s how to accurately set up and deploy Watchlists.
How Watchlists work
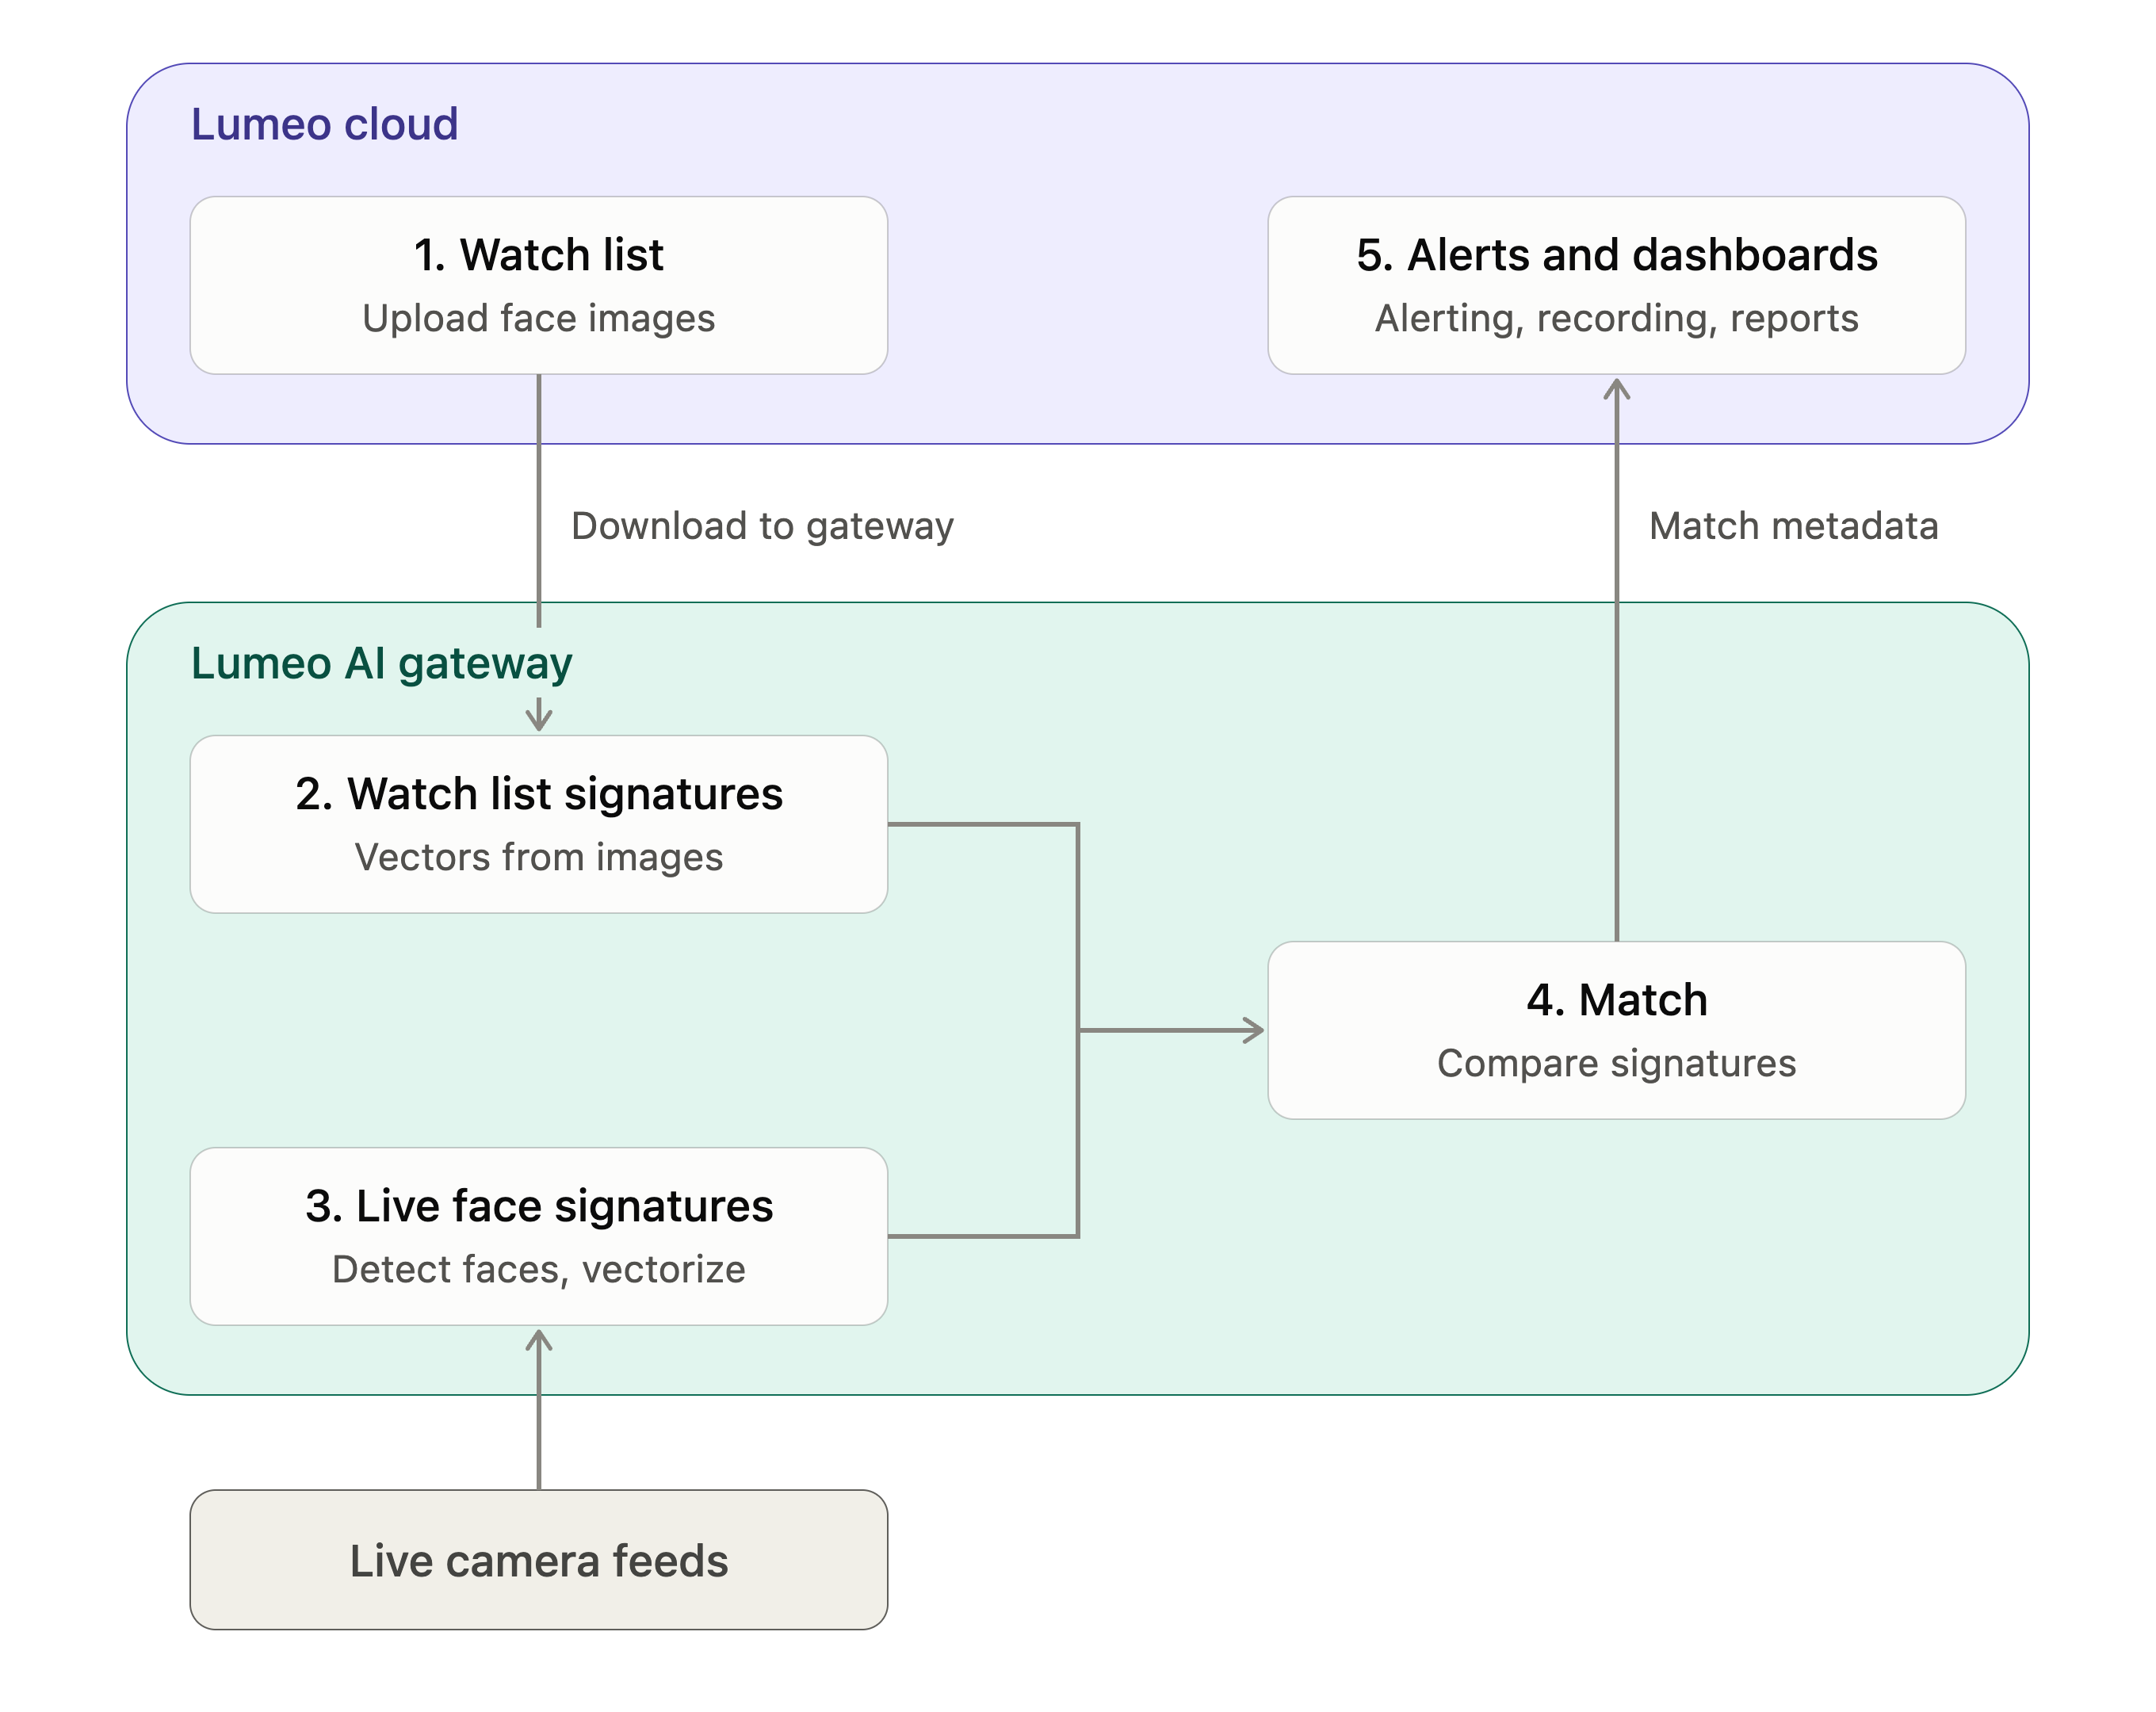
Lumeo Watchlists store metadata and images for each watchlist item in Lumeo's cloud.
When a watchlist matching workflow is deployed on an AI gateway, the AI gateway downloads those watchlist item images & metadata and performs matching against objects seen in the live video feed.
The matching algorithm is entity-type dependent. For instance, for faces Lumeo generates numerical vector signatures from face images. It then looks for faces in live video feeds, and computes numerical vector signatures for them as well. Finally, the Lumeo AI gateway uses a signature matching algorithm to match them.
When a match is found, Lumeo can trigger events, notifications, and recordings, which save the match metadata and push it where it needs to go.
Face Watchlists
Introduction
Face Watchlists help you automatically track people based on facial features. This guide walks you through building and deploying face matching watch lists, adding entries, setting labels, and customizing notification rules for streamlined monitoring.
Setup Face Watchlist
Step 1: Create a new Watchlist
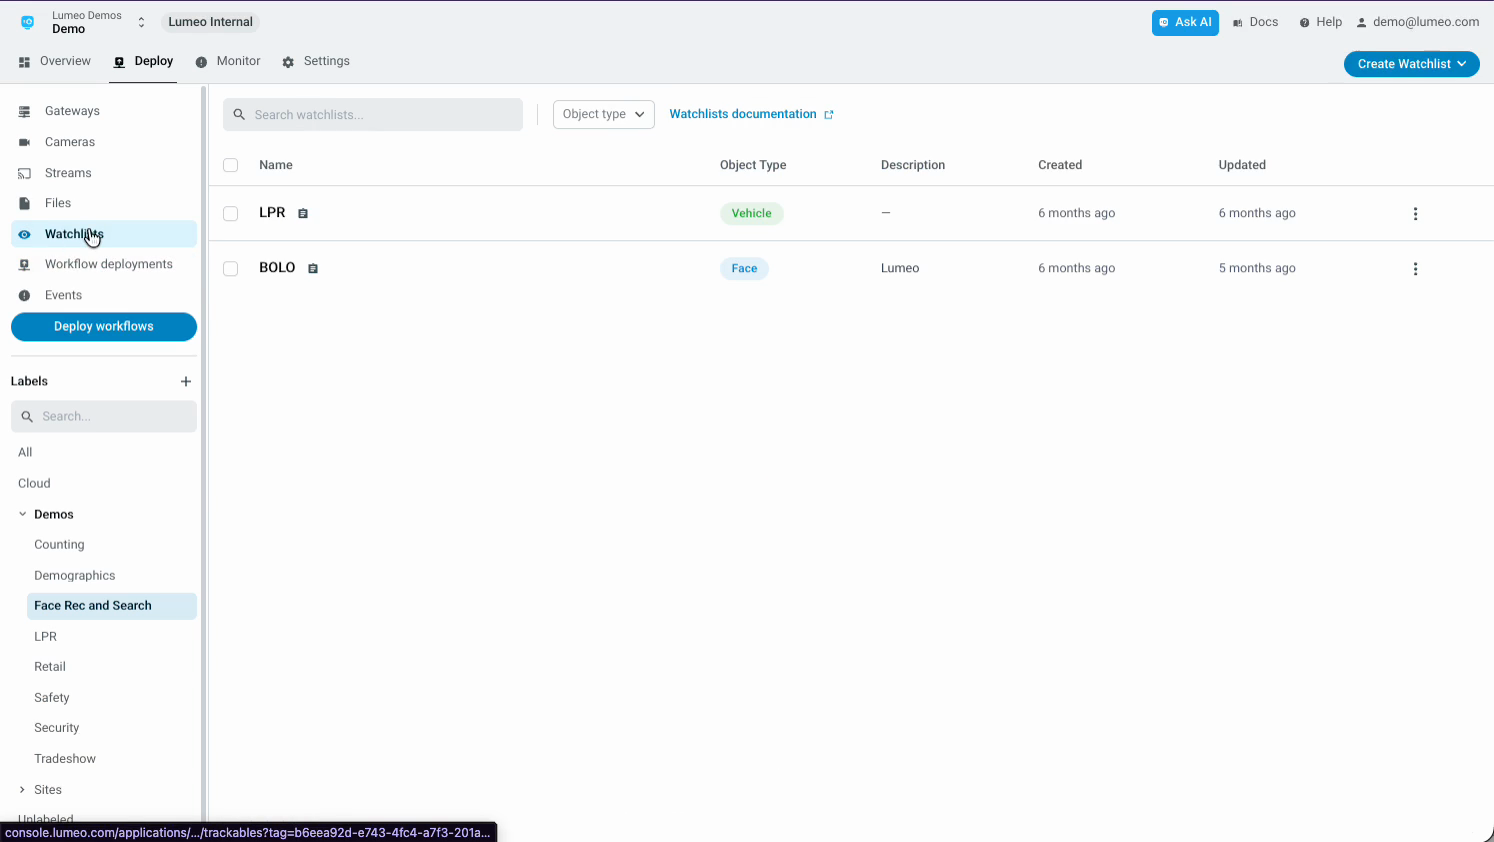
Start from your Lumeo dashboard. Select the Watchlists section.
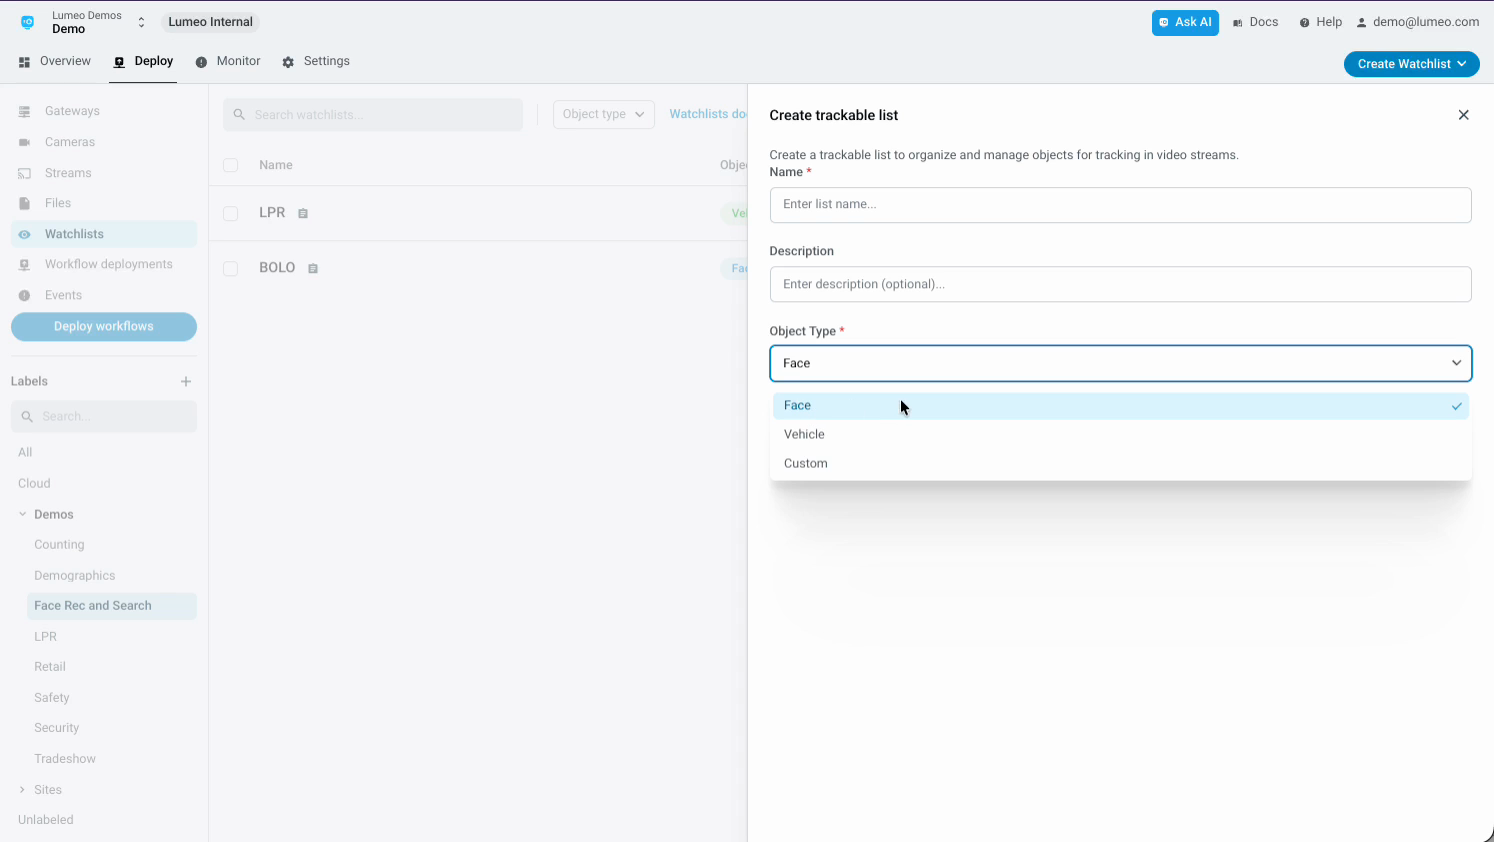
Click Create New Watchlist. Choose Face as the watchlist type for face matching. Give your new watchlist a clear name.
Step 2: Upload Items to the Watchlist
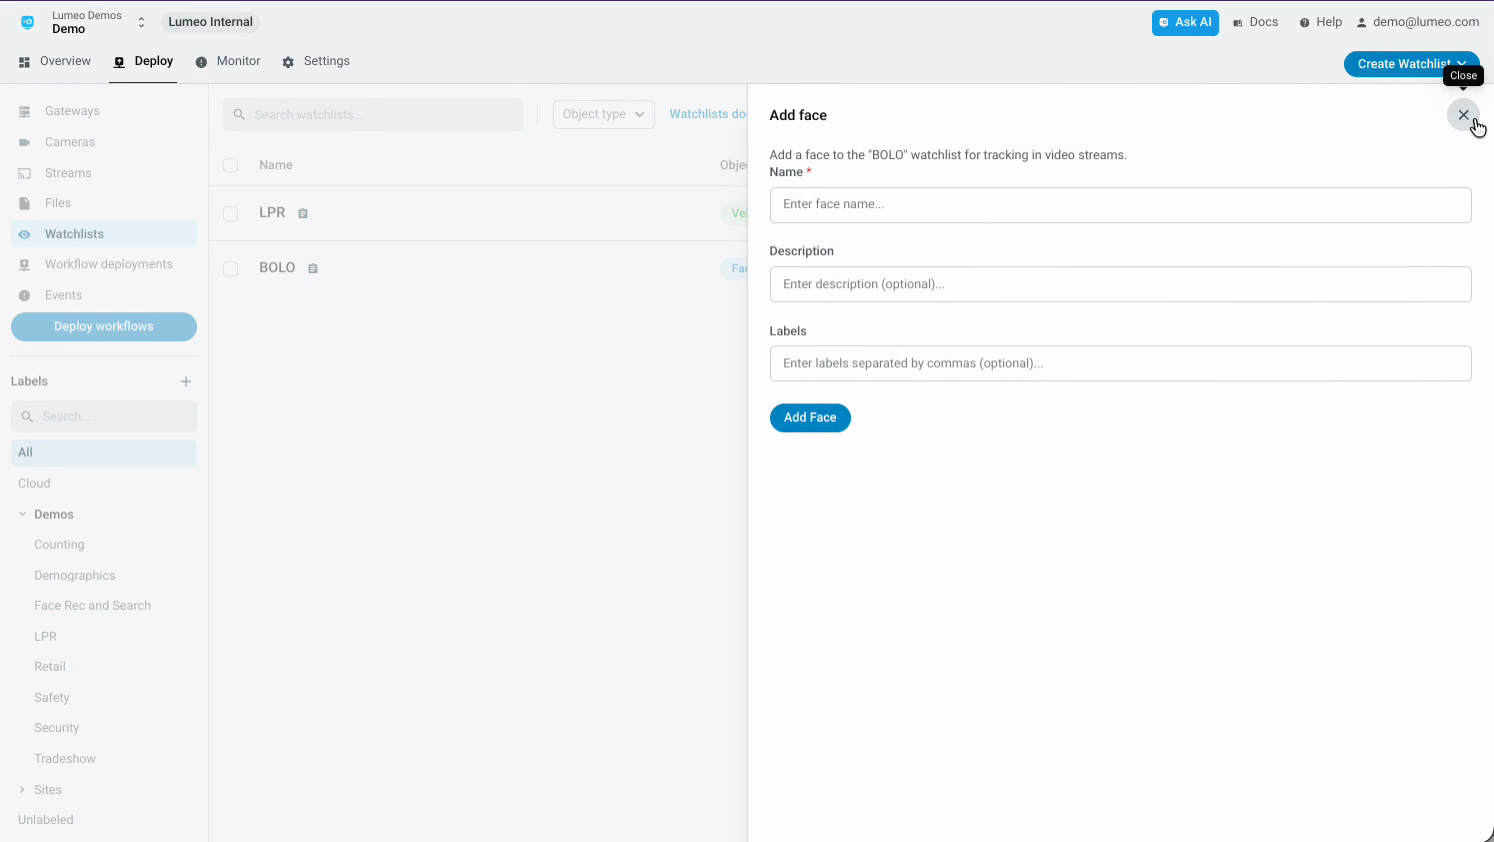
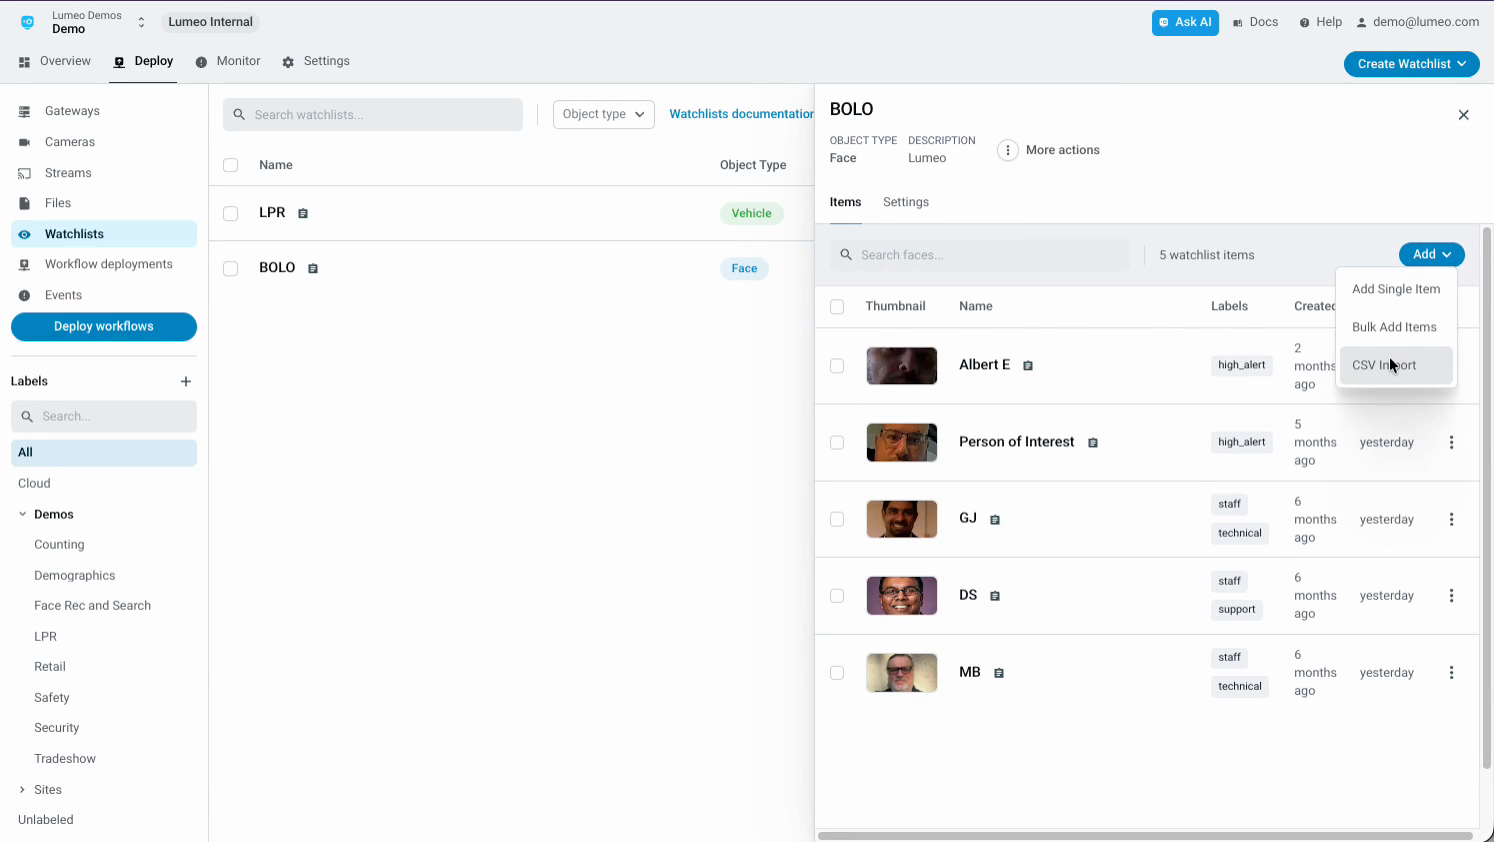
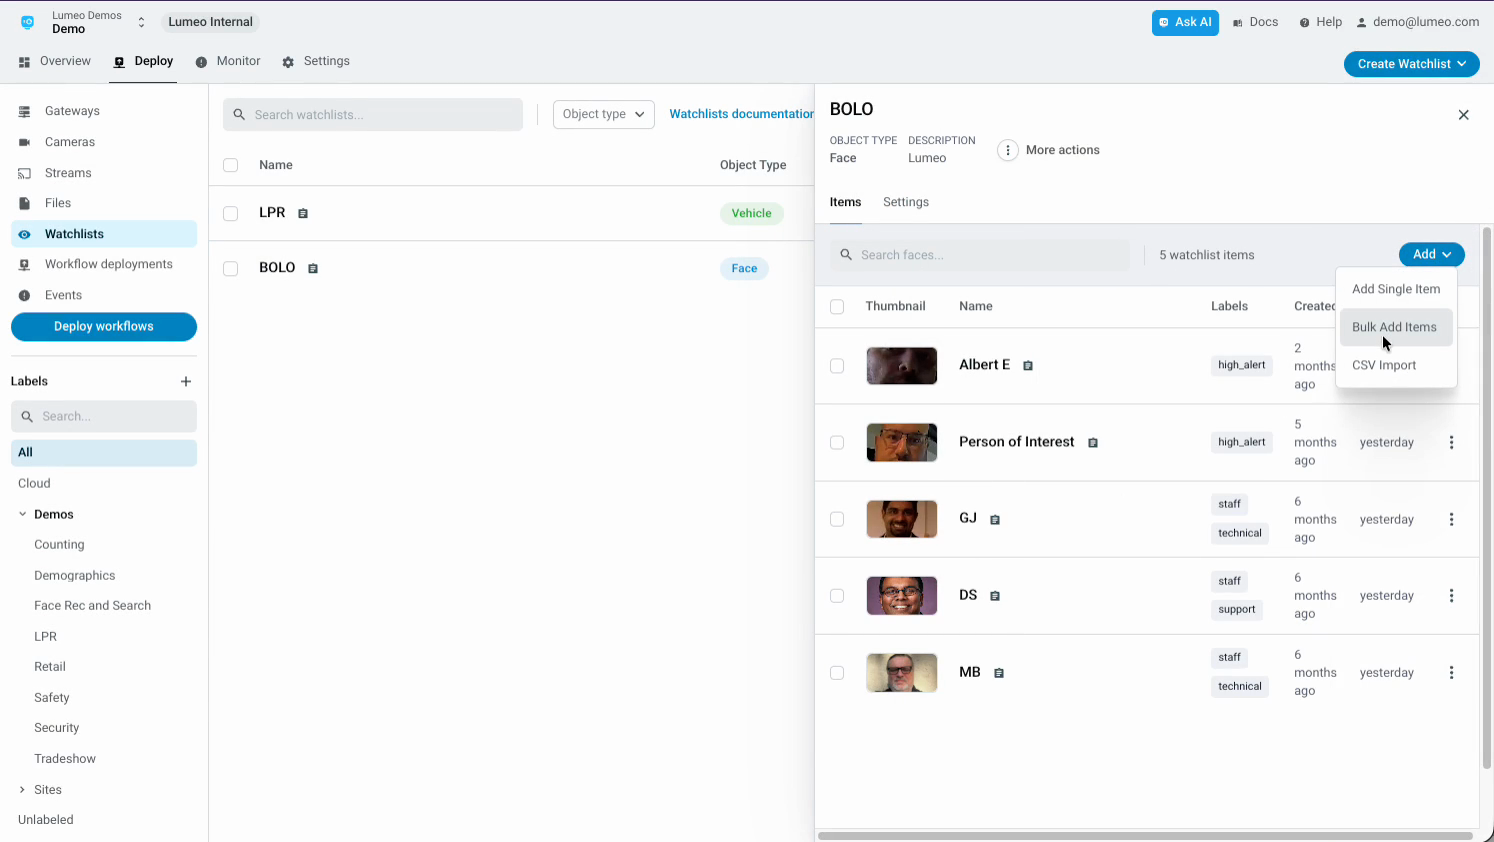
Add face images to the list. To add faces,
-
upload individual photos,
-
bulk add images, or
-
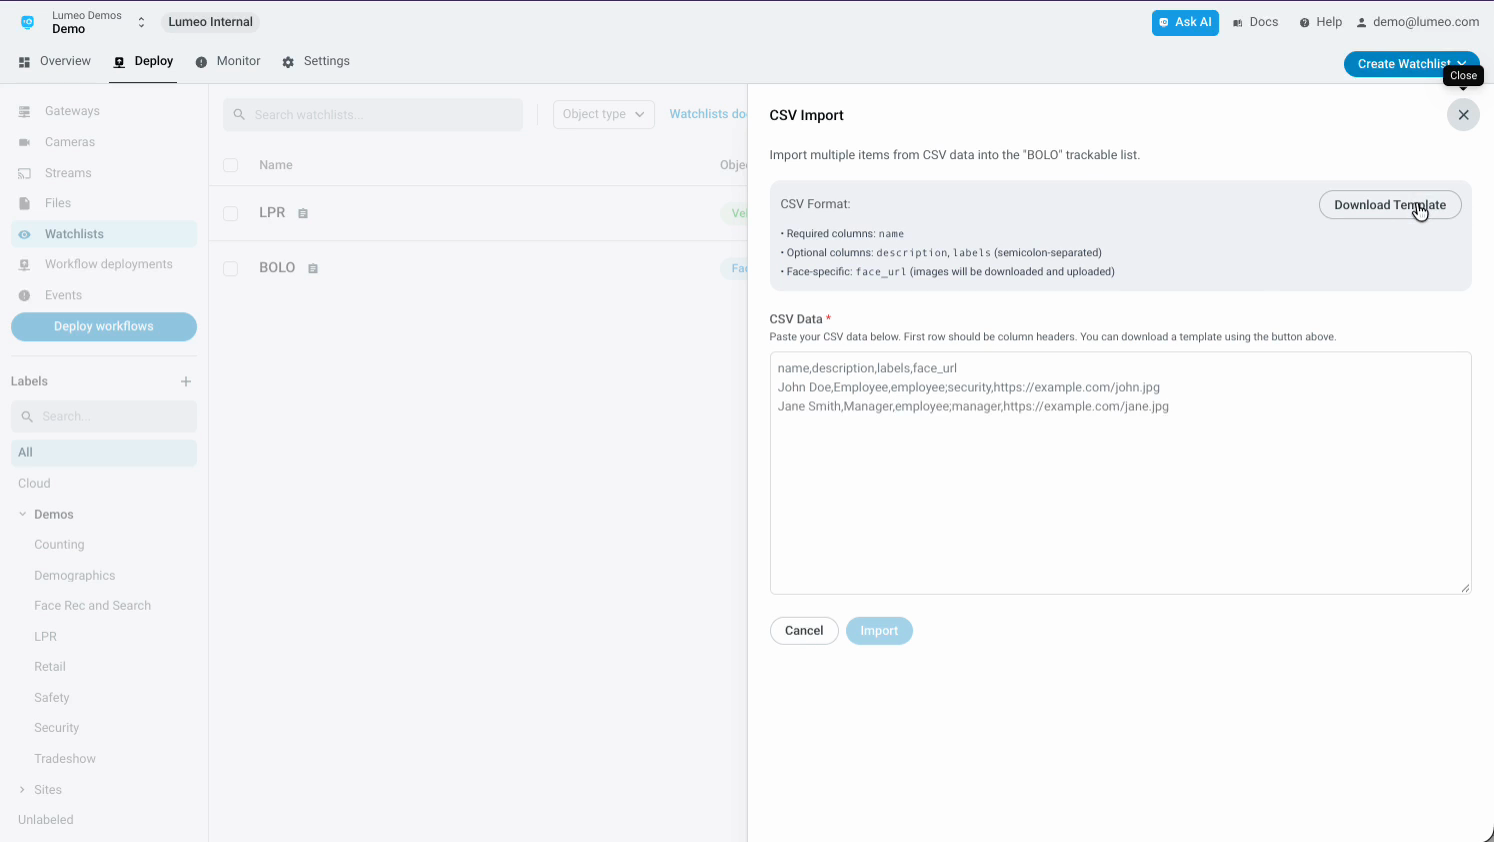
import through a CSV file: Download the template CSV, fill it in, and upload for bulk entries.
Tips:
-
Check each face crop—ensure clear, high-quality images for best results. Poor quality or side angle faces will yield poor match results.
-
Only one face should appear per image. You can add multiple reference images per face entry.
-
Add extra labels to help with filtering or later rule applications.
Step 3: Add detected faces from Recordings
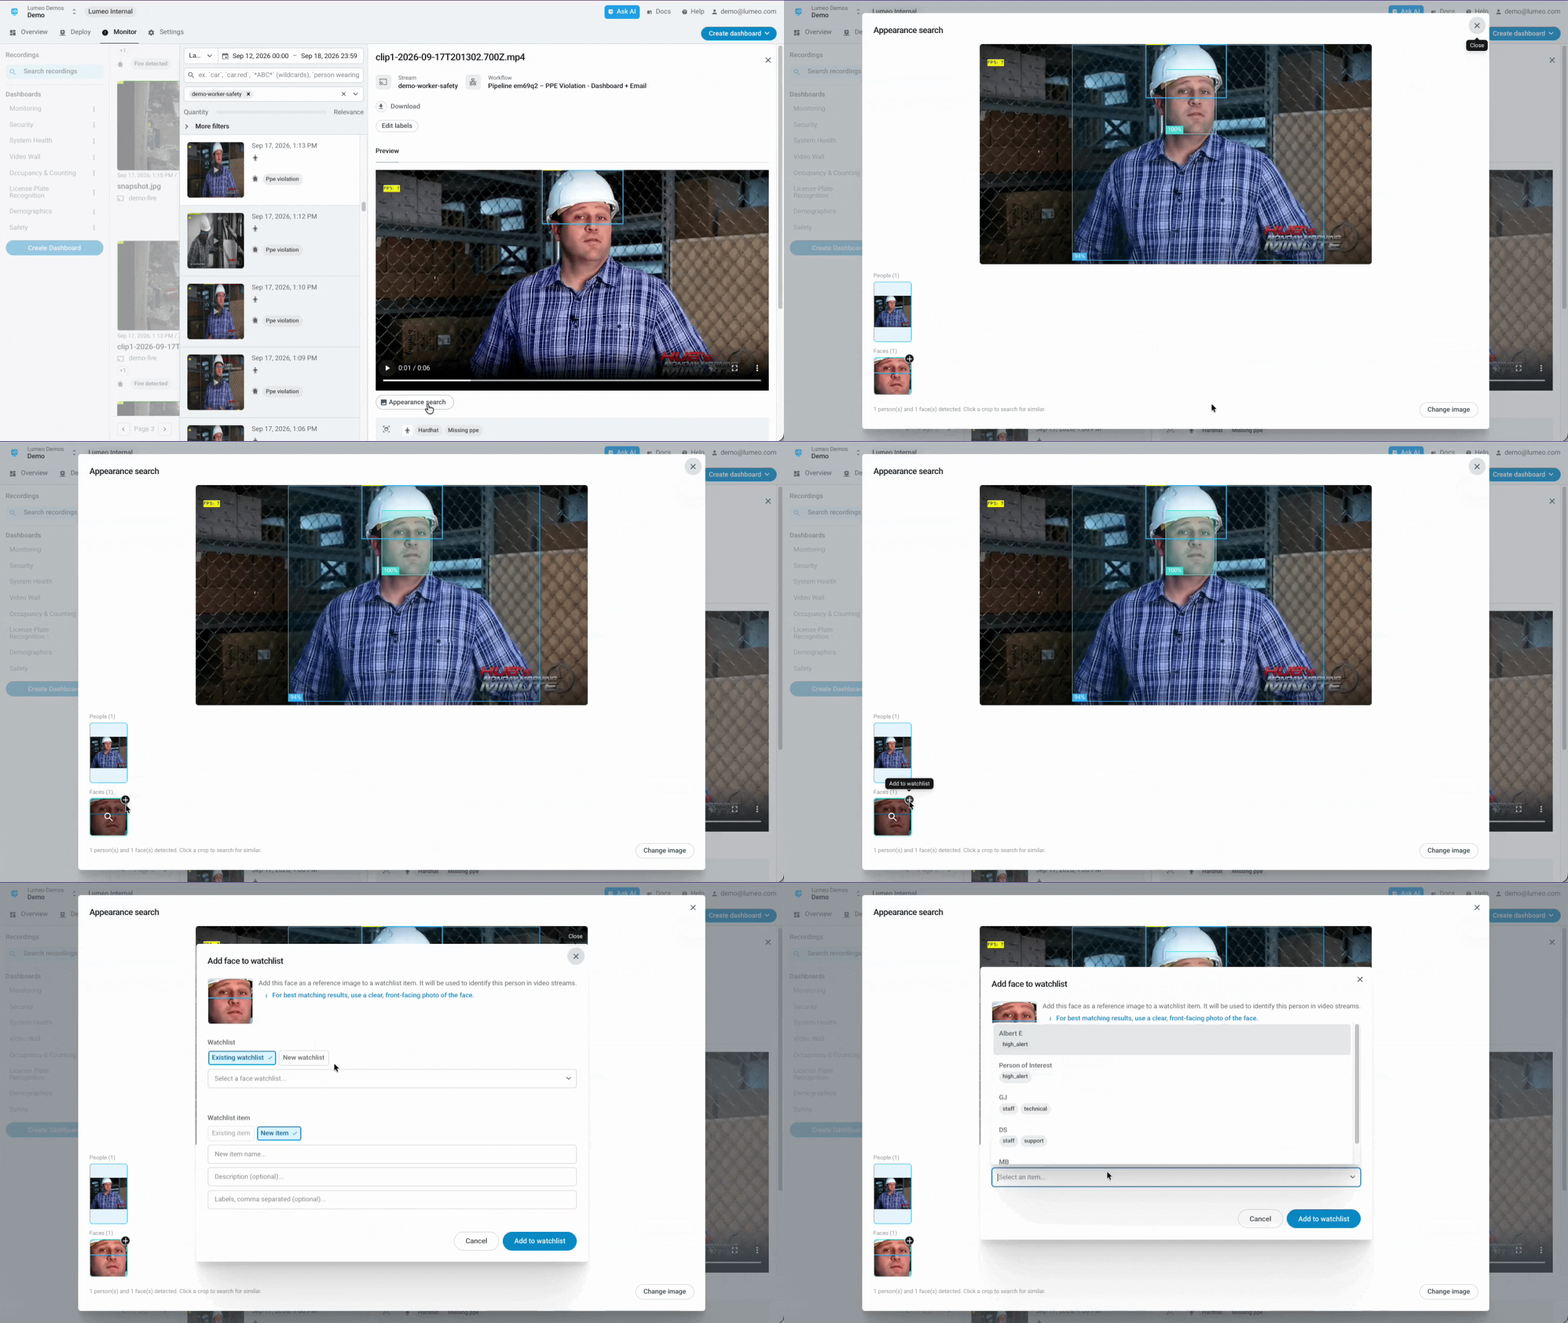
Go to the Monitor → Search recordings to find clips with people and faces. When something pops up that you want on the list, click the the image or clip, and then Appearance Search to show detected faces.
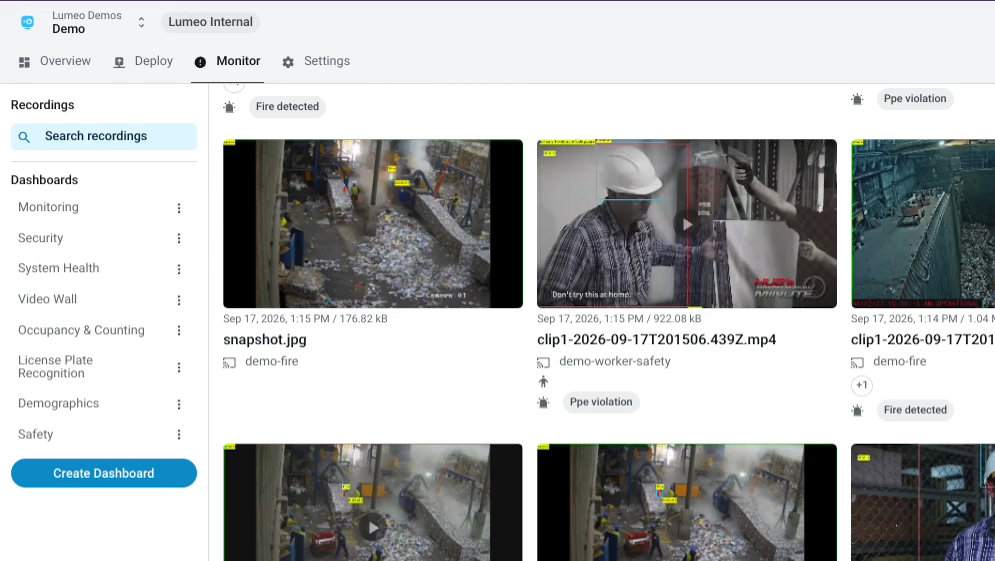
On the detected face in the row below, and click the "+" button on the face to Add to Watchlist. Add it either as a new entry or attach more images to an existing one.
Deploy a Face matching Workflow
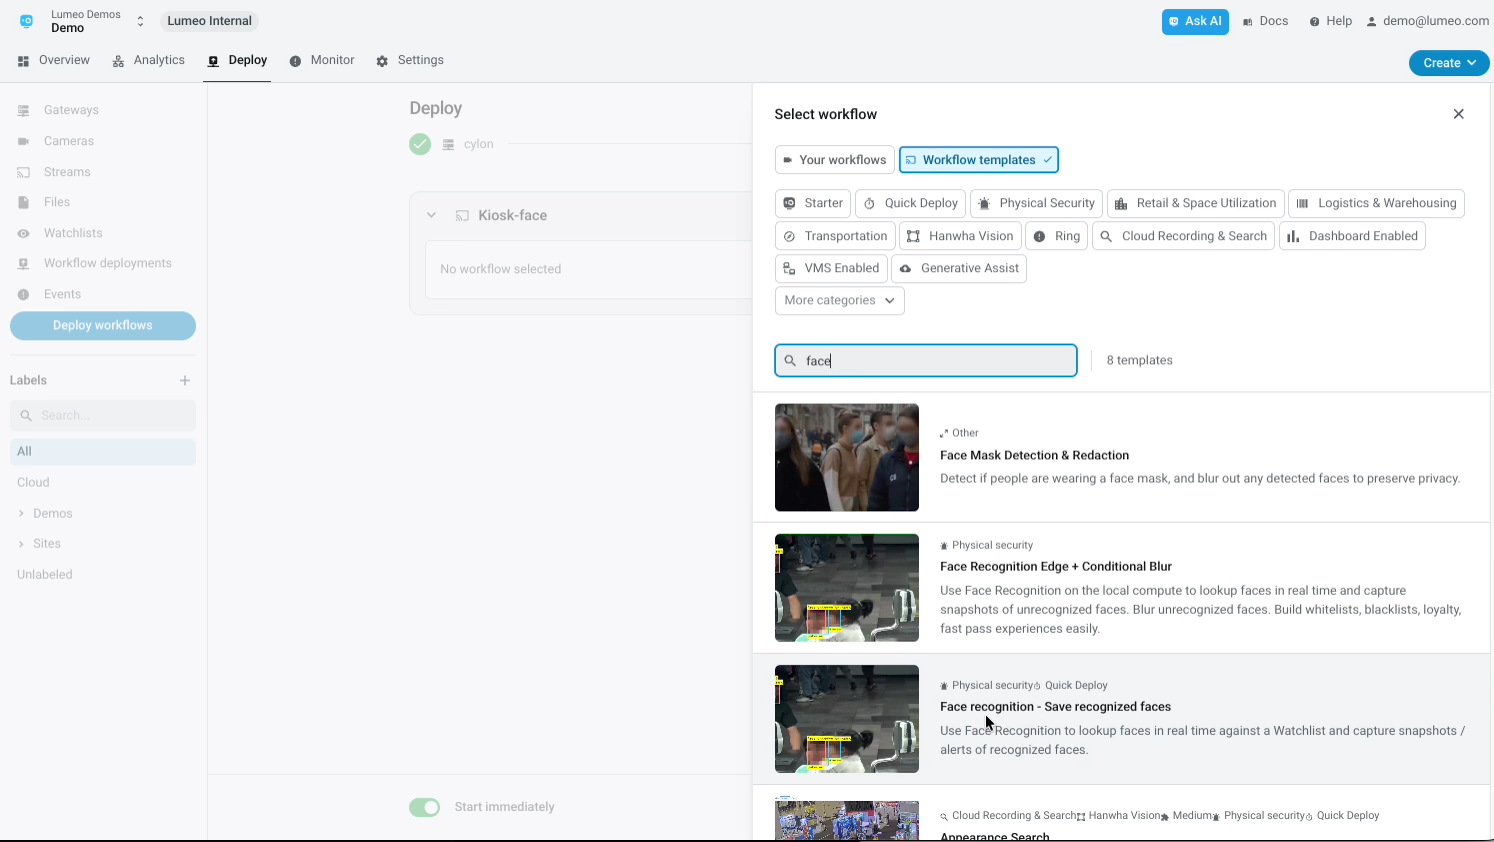
Go to Deploy -> Deploy Workflows. Choose a video gateway and select your camera source. From the template gallery, pick the workflow type that fits your scenario — select Face recognition - Save recognized faces.
Step 4: Configure Workflow Details
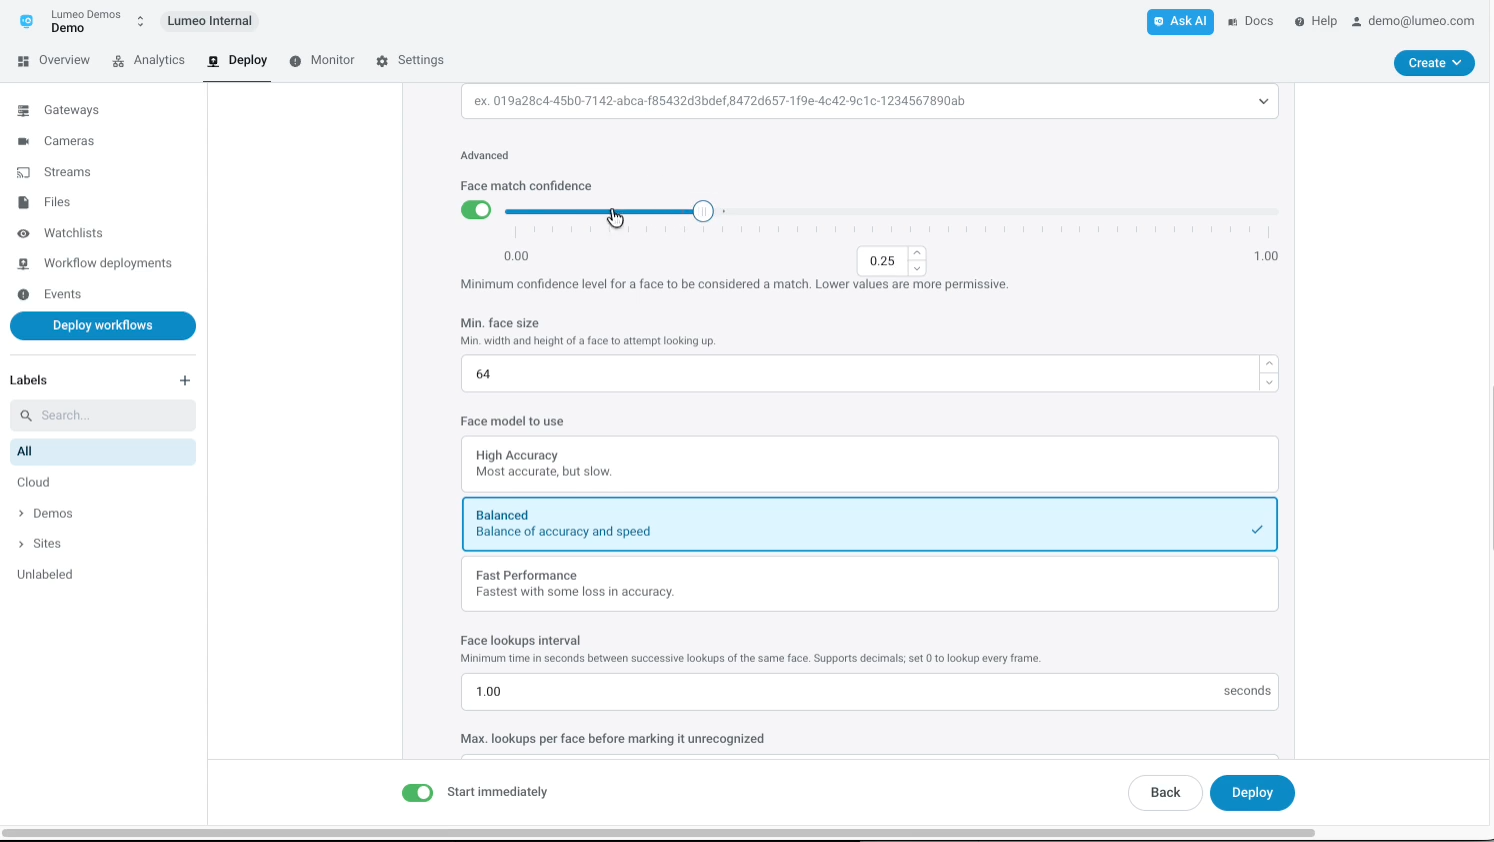
Set the Recognition Area to choose where detection happens. Select your prepared watch list as the Known Face/Plate Source. Restrict the workflow to specific entries or run it on all entries if needed.
Adjust settings:
-
Model Type: Pick Balanced for speed or High-Accuracy for precision.
-
Match Confidence: Start with the defaults, and if you see too many false positives, adjust it upwards of 0.4 for better matching.
-
Set the frequency for checking new entries, and define lookup limits per face or plate.
-
For facial matching, enable Frontal Face Only for best accuracy.
Step 5: Set Event Triggers and Visual Feedback
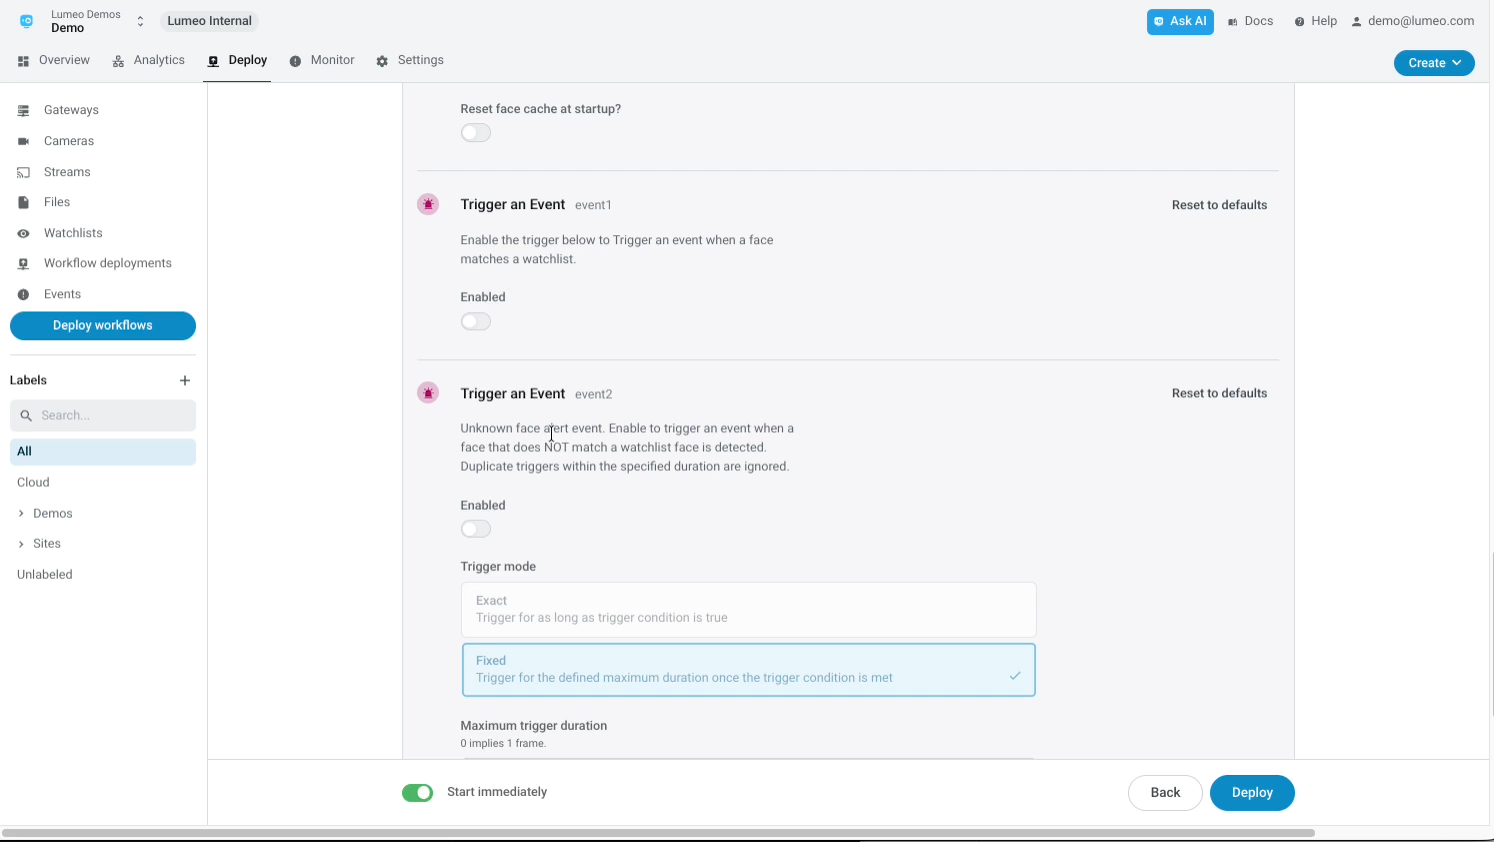
Decide whether to fire events on matches (or unknowns), display overlays with info, or show match confidence scores.
Step 6: Enable notifications
Switch on notifications so you’re alerted instantly when a match occurs. After enabling notifications on the workflow, you will also need to configure who receives them. See Notifications section of this guide for instructions on how to do so.
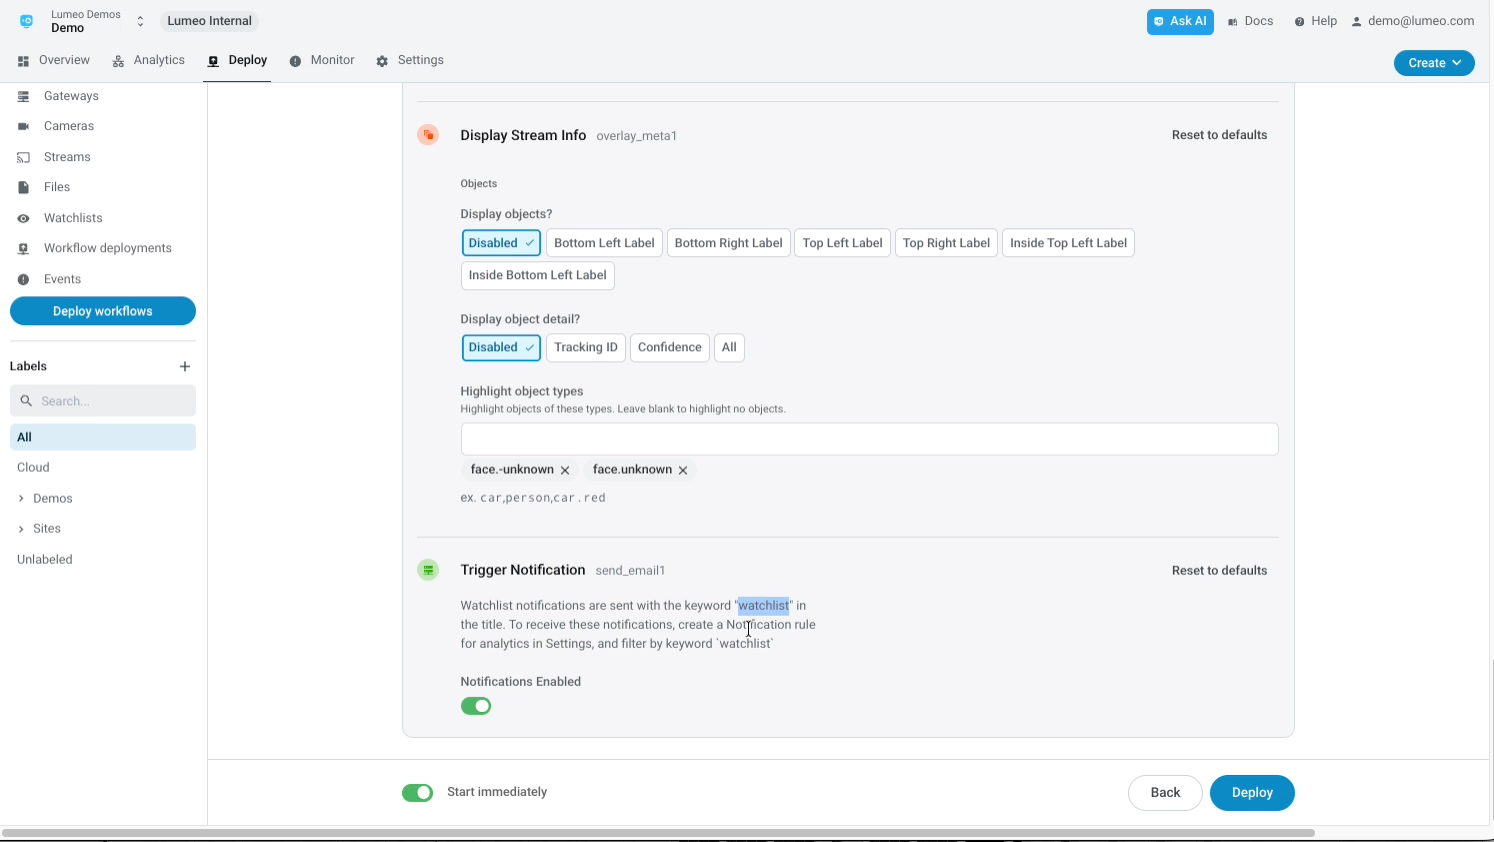
Step 7: Finalize and Deploy
Click Deploy. Monitor outcomes live or search through recordings. You’ll spot match snapshots, labels, and history right from your dashboard or special widgets.
Vehicle Watchlist (LPR)
Guide coming soon.
Custom Watchlist (Metadata)
Guide coming soon.
Set Up Notification Rules
Notifications from watchlist workflows are sent as "Analytics" events with "watchlist" in their title. You can use this to configure Notification rules to route the alerts to the appropriate people on your team.
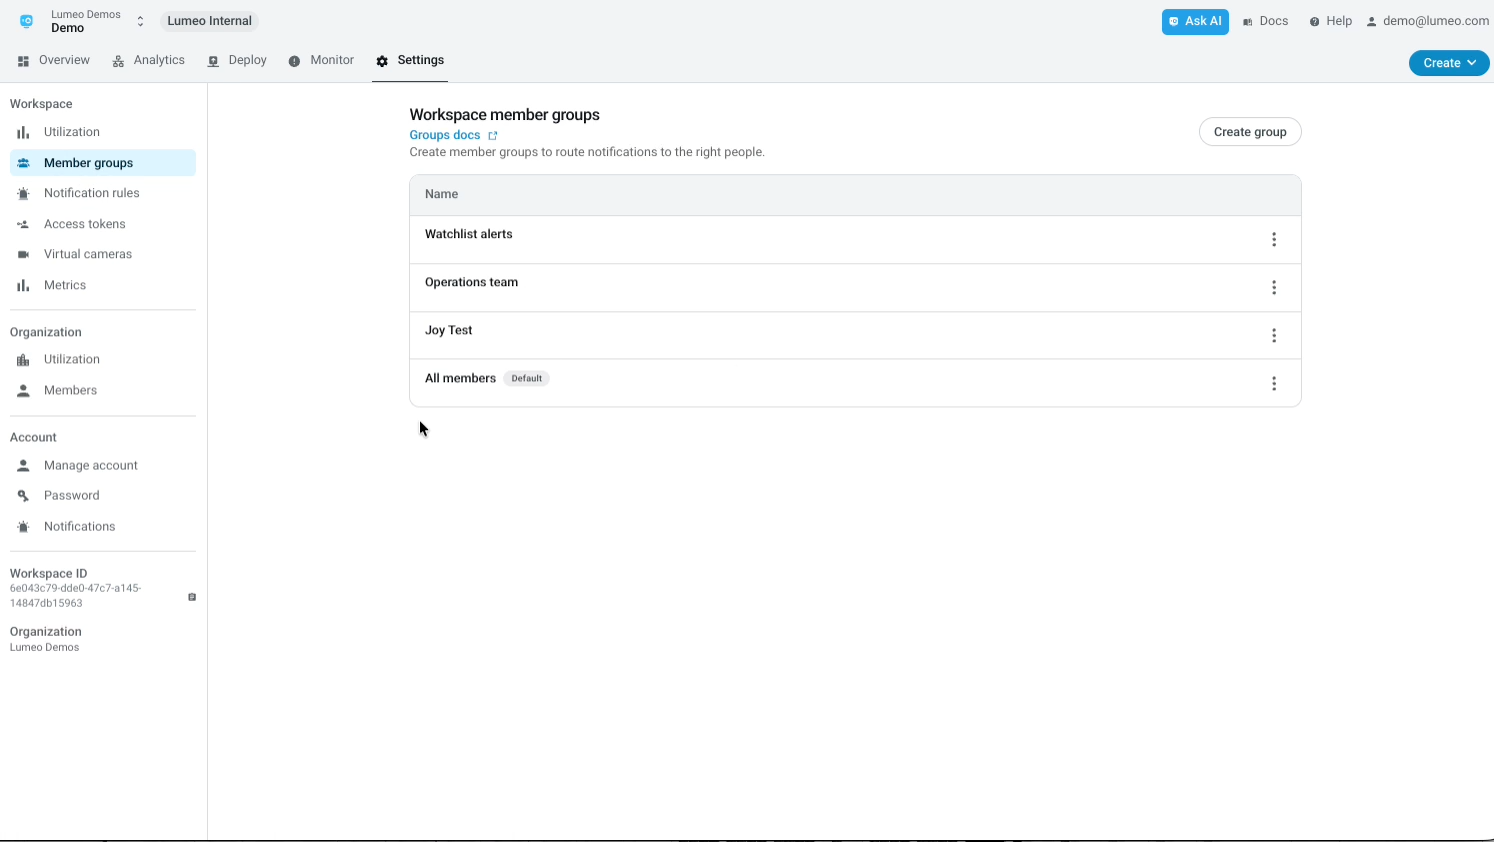
Create a Recipient group
Go to Settings → Member groups. Create a new group to receive these alerts.
Create a Notification Rule
Go to Settings → Notification Rules. Set up a rule with Analytics as the category and Analytics Event as the type. Use the keyword "watchlist" in the title for routing these notifications.
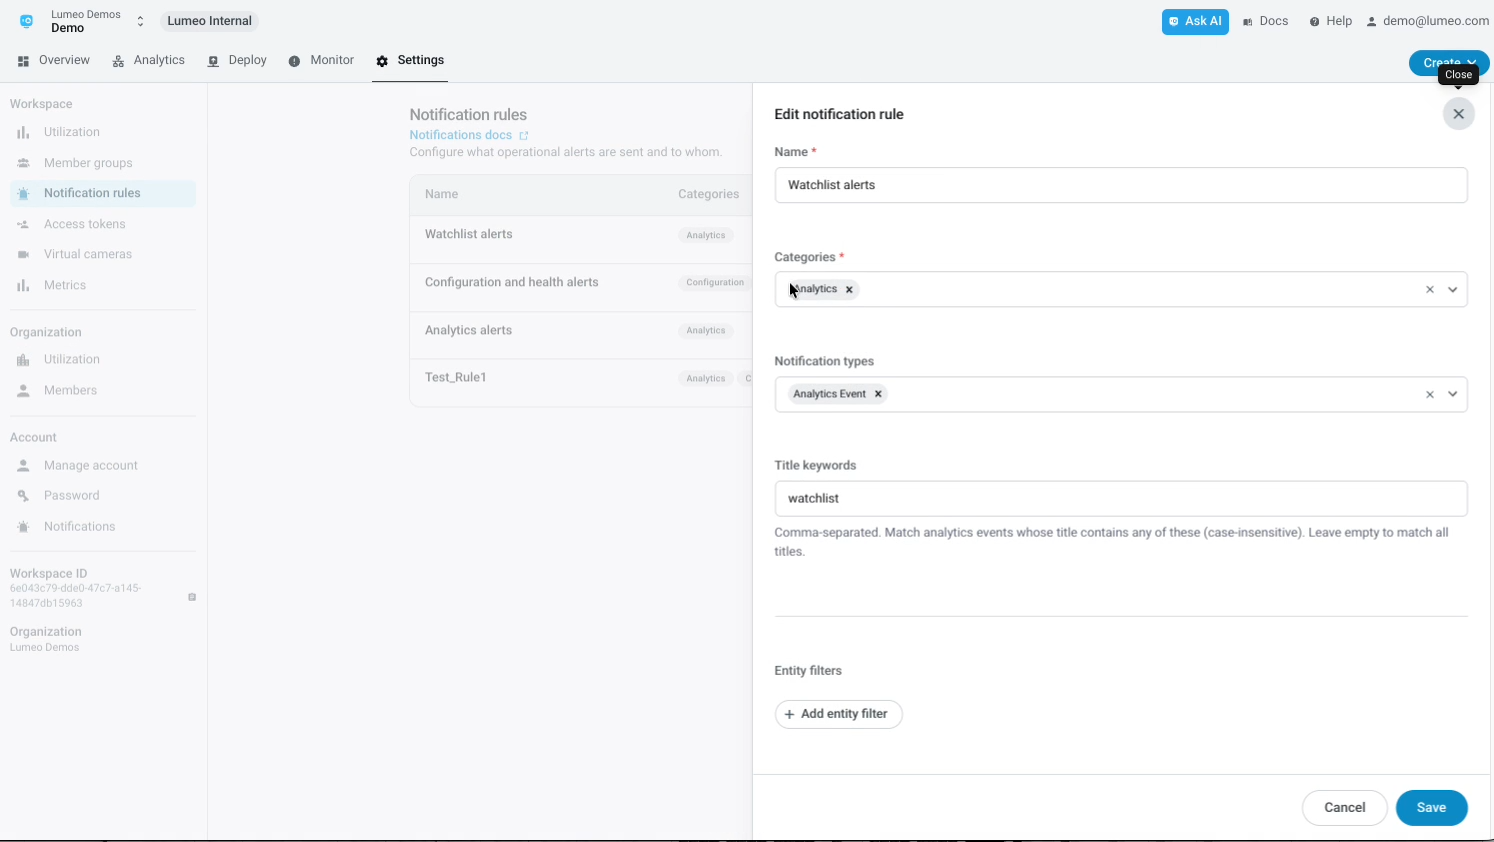
Apply camera or stream filters as needed, then assign recipient groups from Member Groups. Make sure only the right people get notified of activity on selected cameras or streams.
Receive Notifications
Notifications contain watchlist item information (name, labels, description) for matches. If you need to customize the metadata included in the notification, you can do so by modifying the workflow.
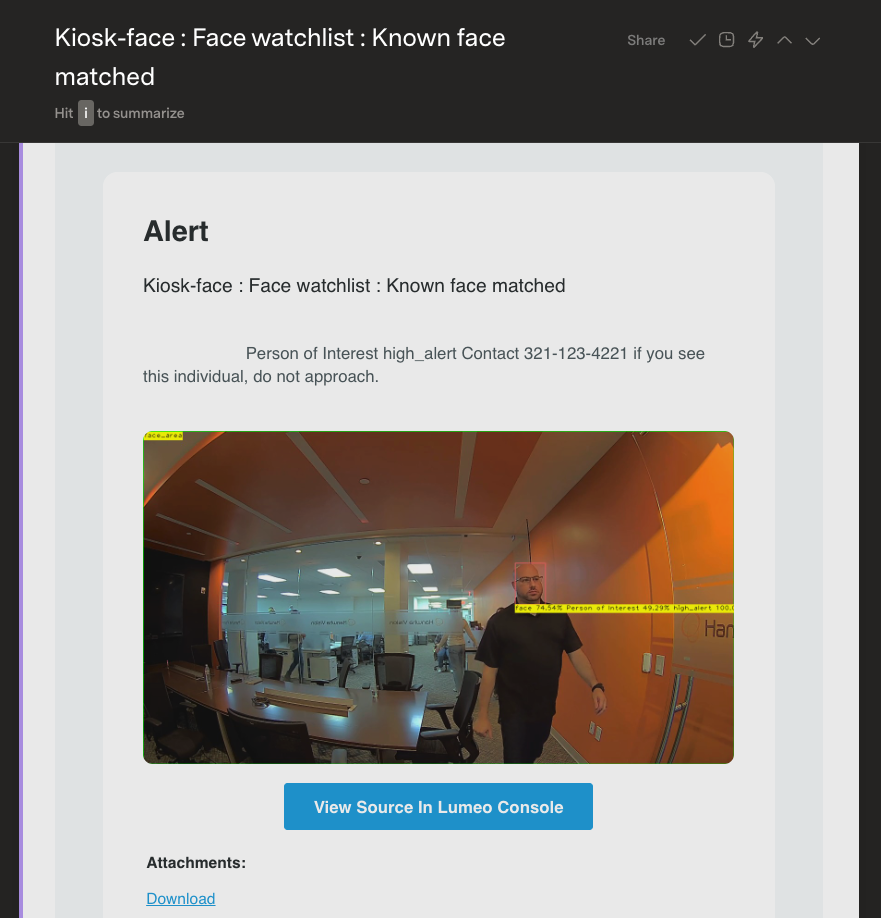
Search for Watchlist match events
Go to Monitor → Search recordings to find event recordings for watchlist matches. You can also filter by specific watchlists or specific items (license plates, faces, or custom objects) in a watchlist.
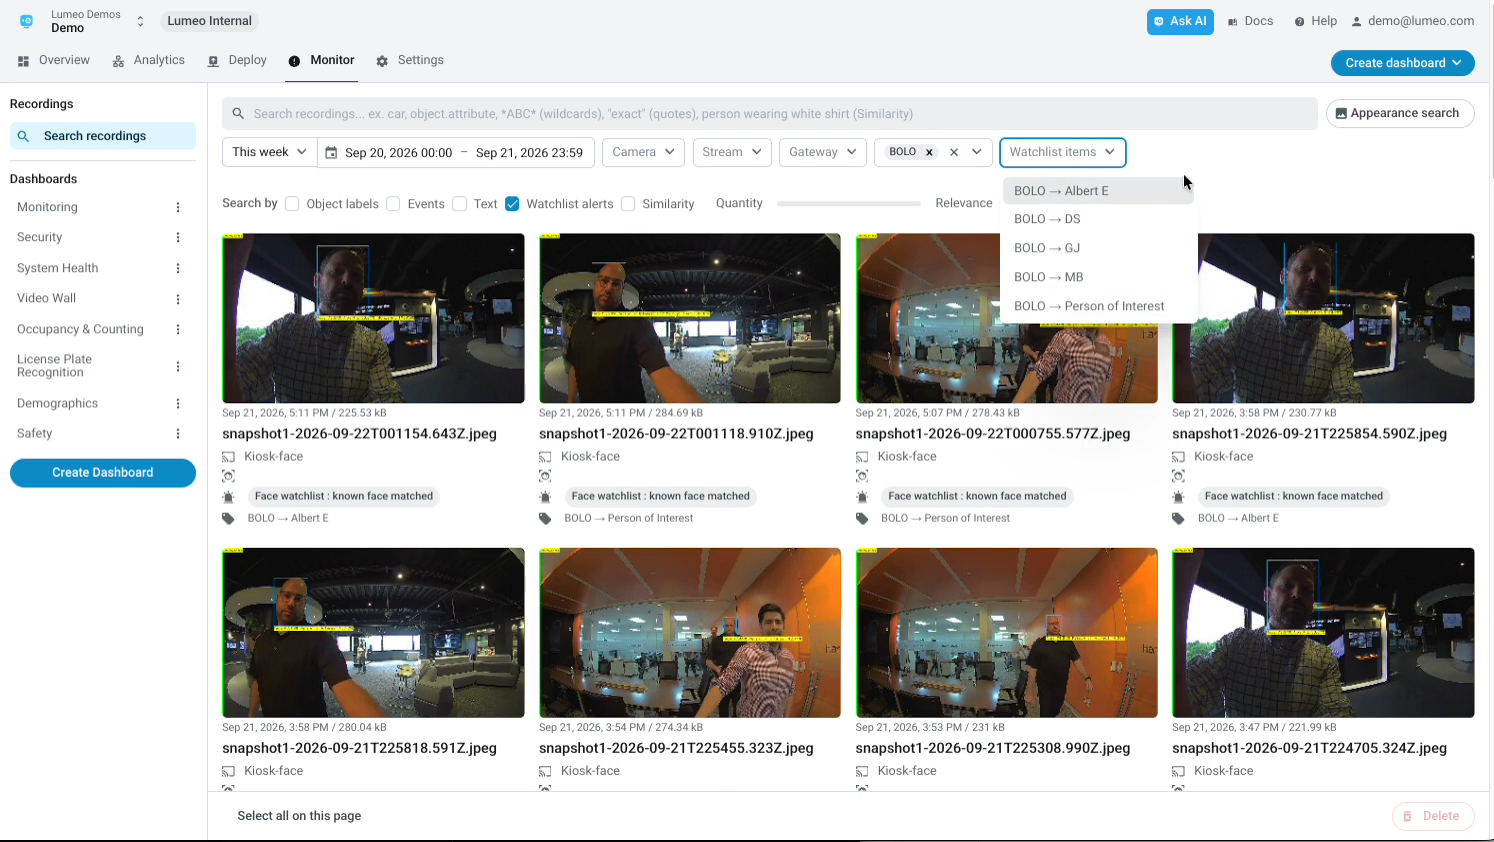
Setup Dashboards for tracking Watchlist match events
Head to Monitor → Dashboards and create a Monitoring dashboard to view Watchlist match events.
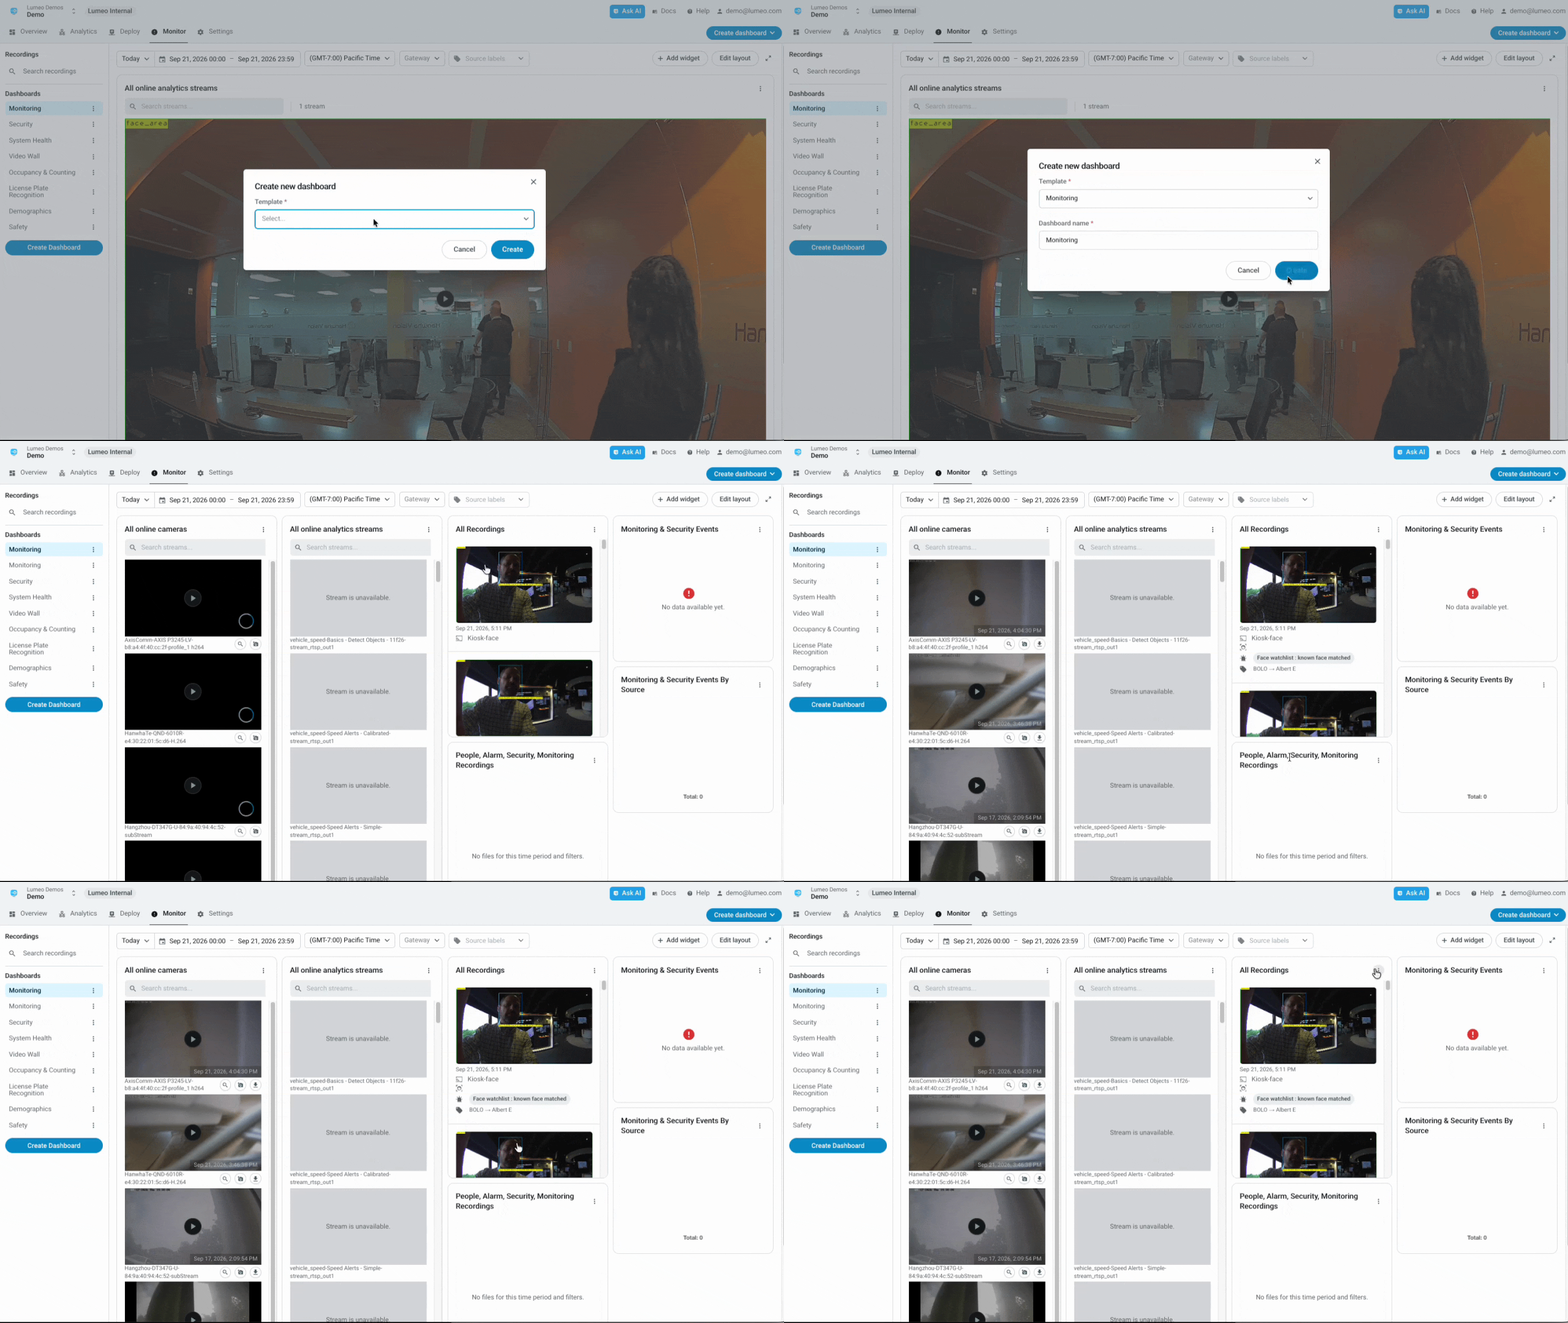
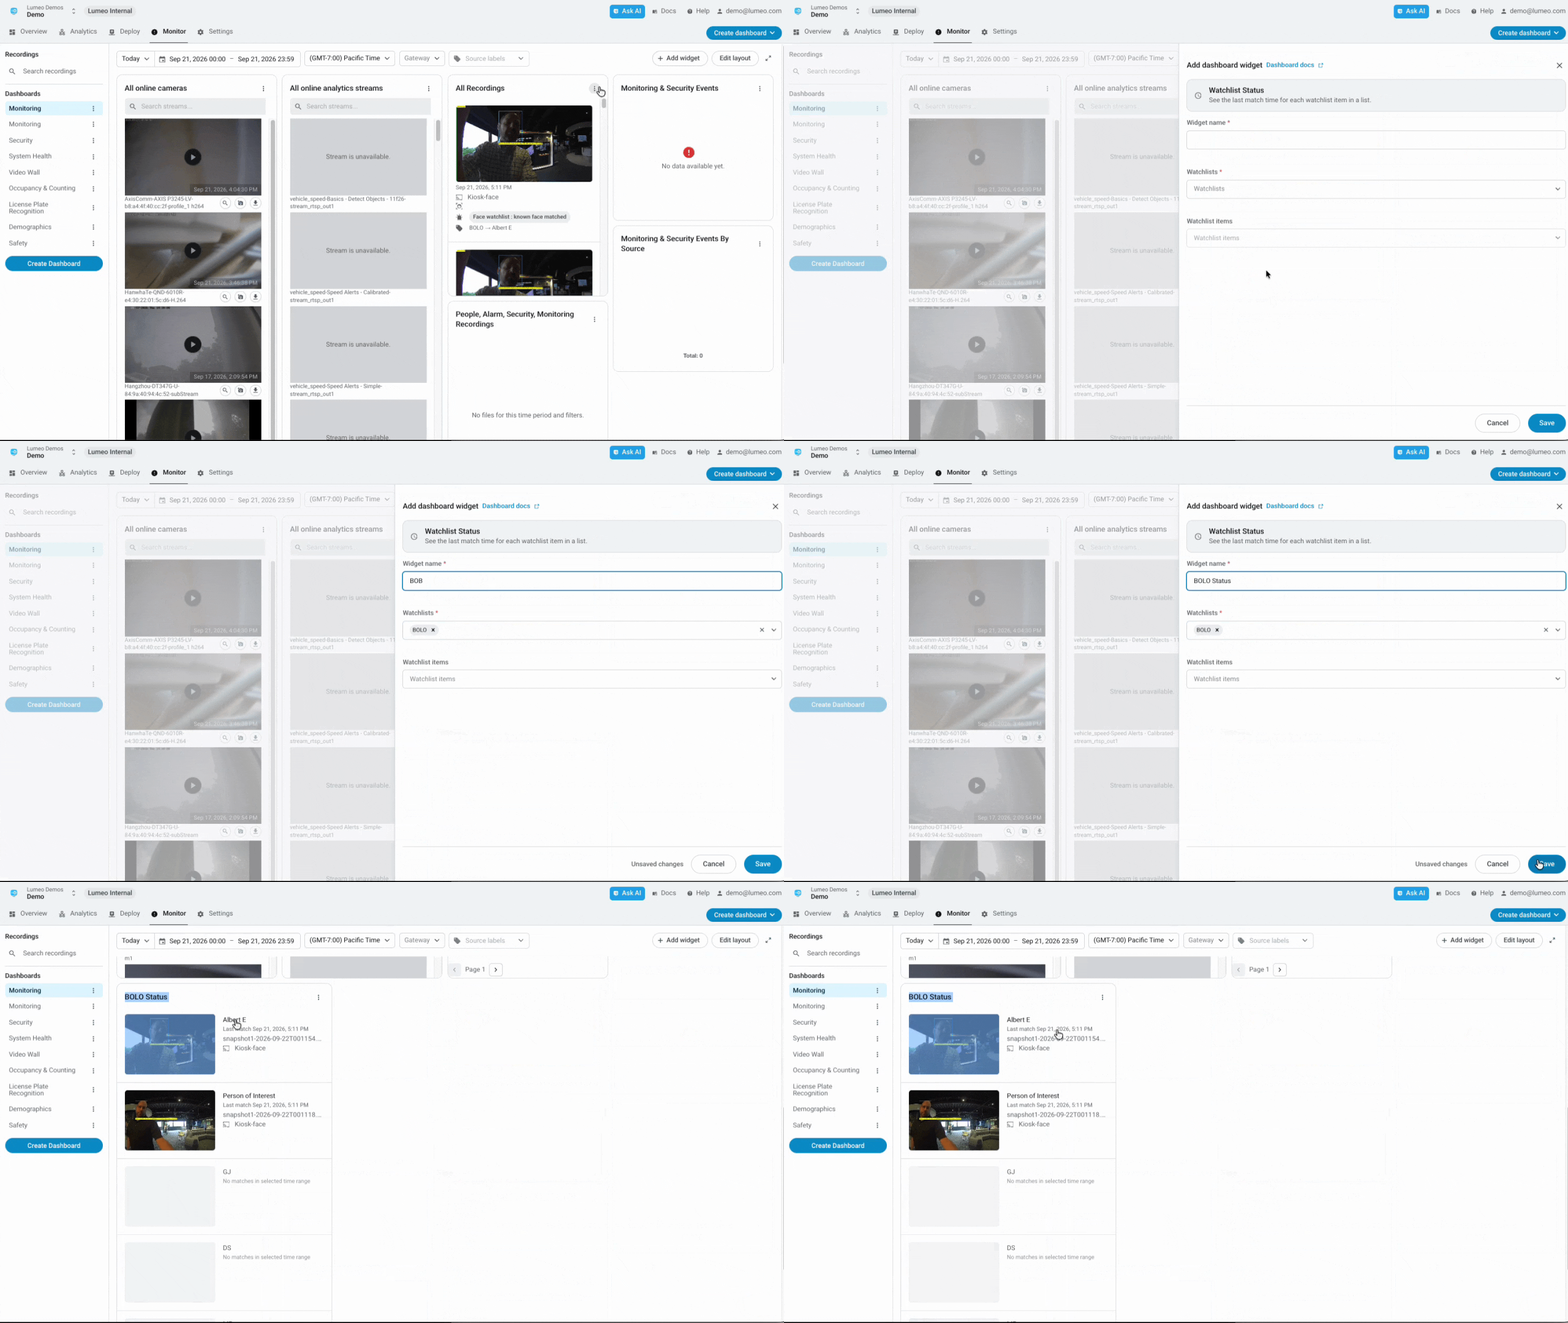
You can also add a Watchlist Status widget to any dashboard to view latest match status for specific watchlist items.
Updated 20 days ago